About once a year, I get the itch to build a PC. This time, it came out of nowhere: I was trolling through Facebook Marketplace and spotted an Apple Cinema Display from 2004 for $30. Forty-five minutes later, I returned home with a heavy monitor and big dreams about making the best Plex server possible.
I’ve been running Plex on and off for years, but with how streaming has been going, I’ve been using it more and over the last six months. Before this new computer, my Plex lived in my main gaming PC, but it’s usually stationed in my living room attached to my TV, and while it’s excellent for gaming, it’s not a perfect setup for messing around with apps and settings. Anyone who’s used a Logitech K400 with a TV-sized display knows what I’m talking about.
Beyond that, I’ve wanted to build a small form factor PC and a home media server, so it finally felt like the right time to make that happen. Beyond just Plex, I also want to back up my photos quickly and store files.
Picking the parts
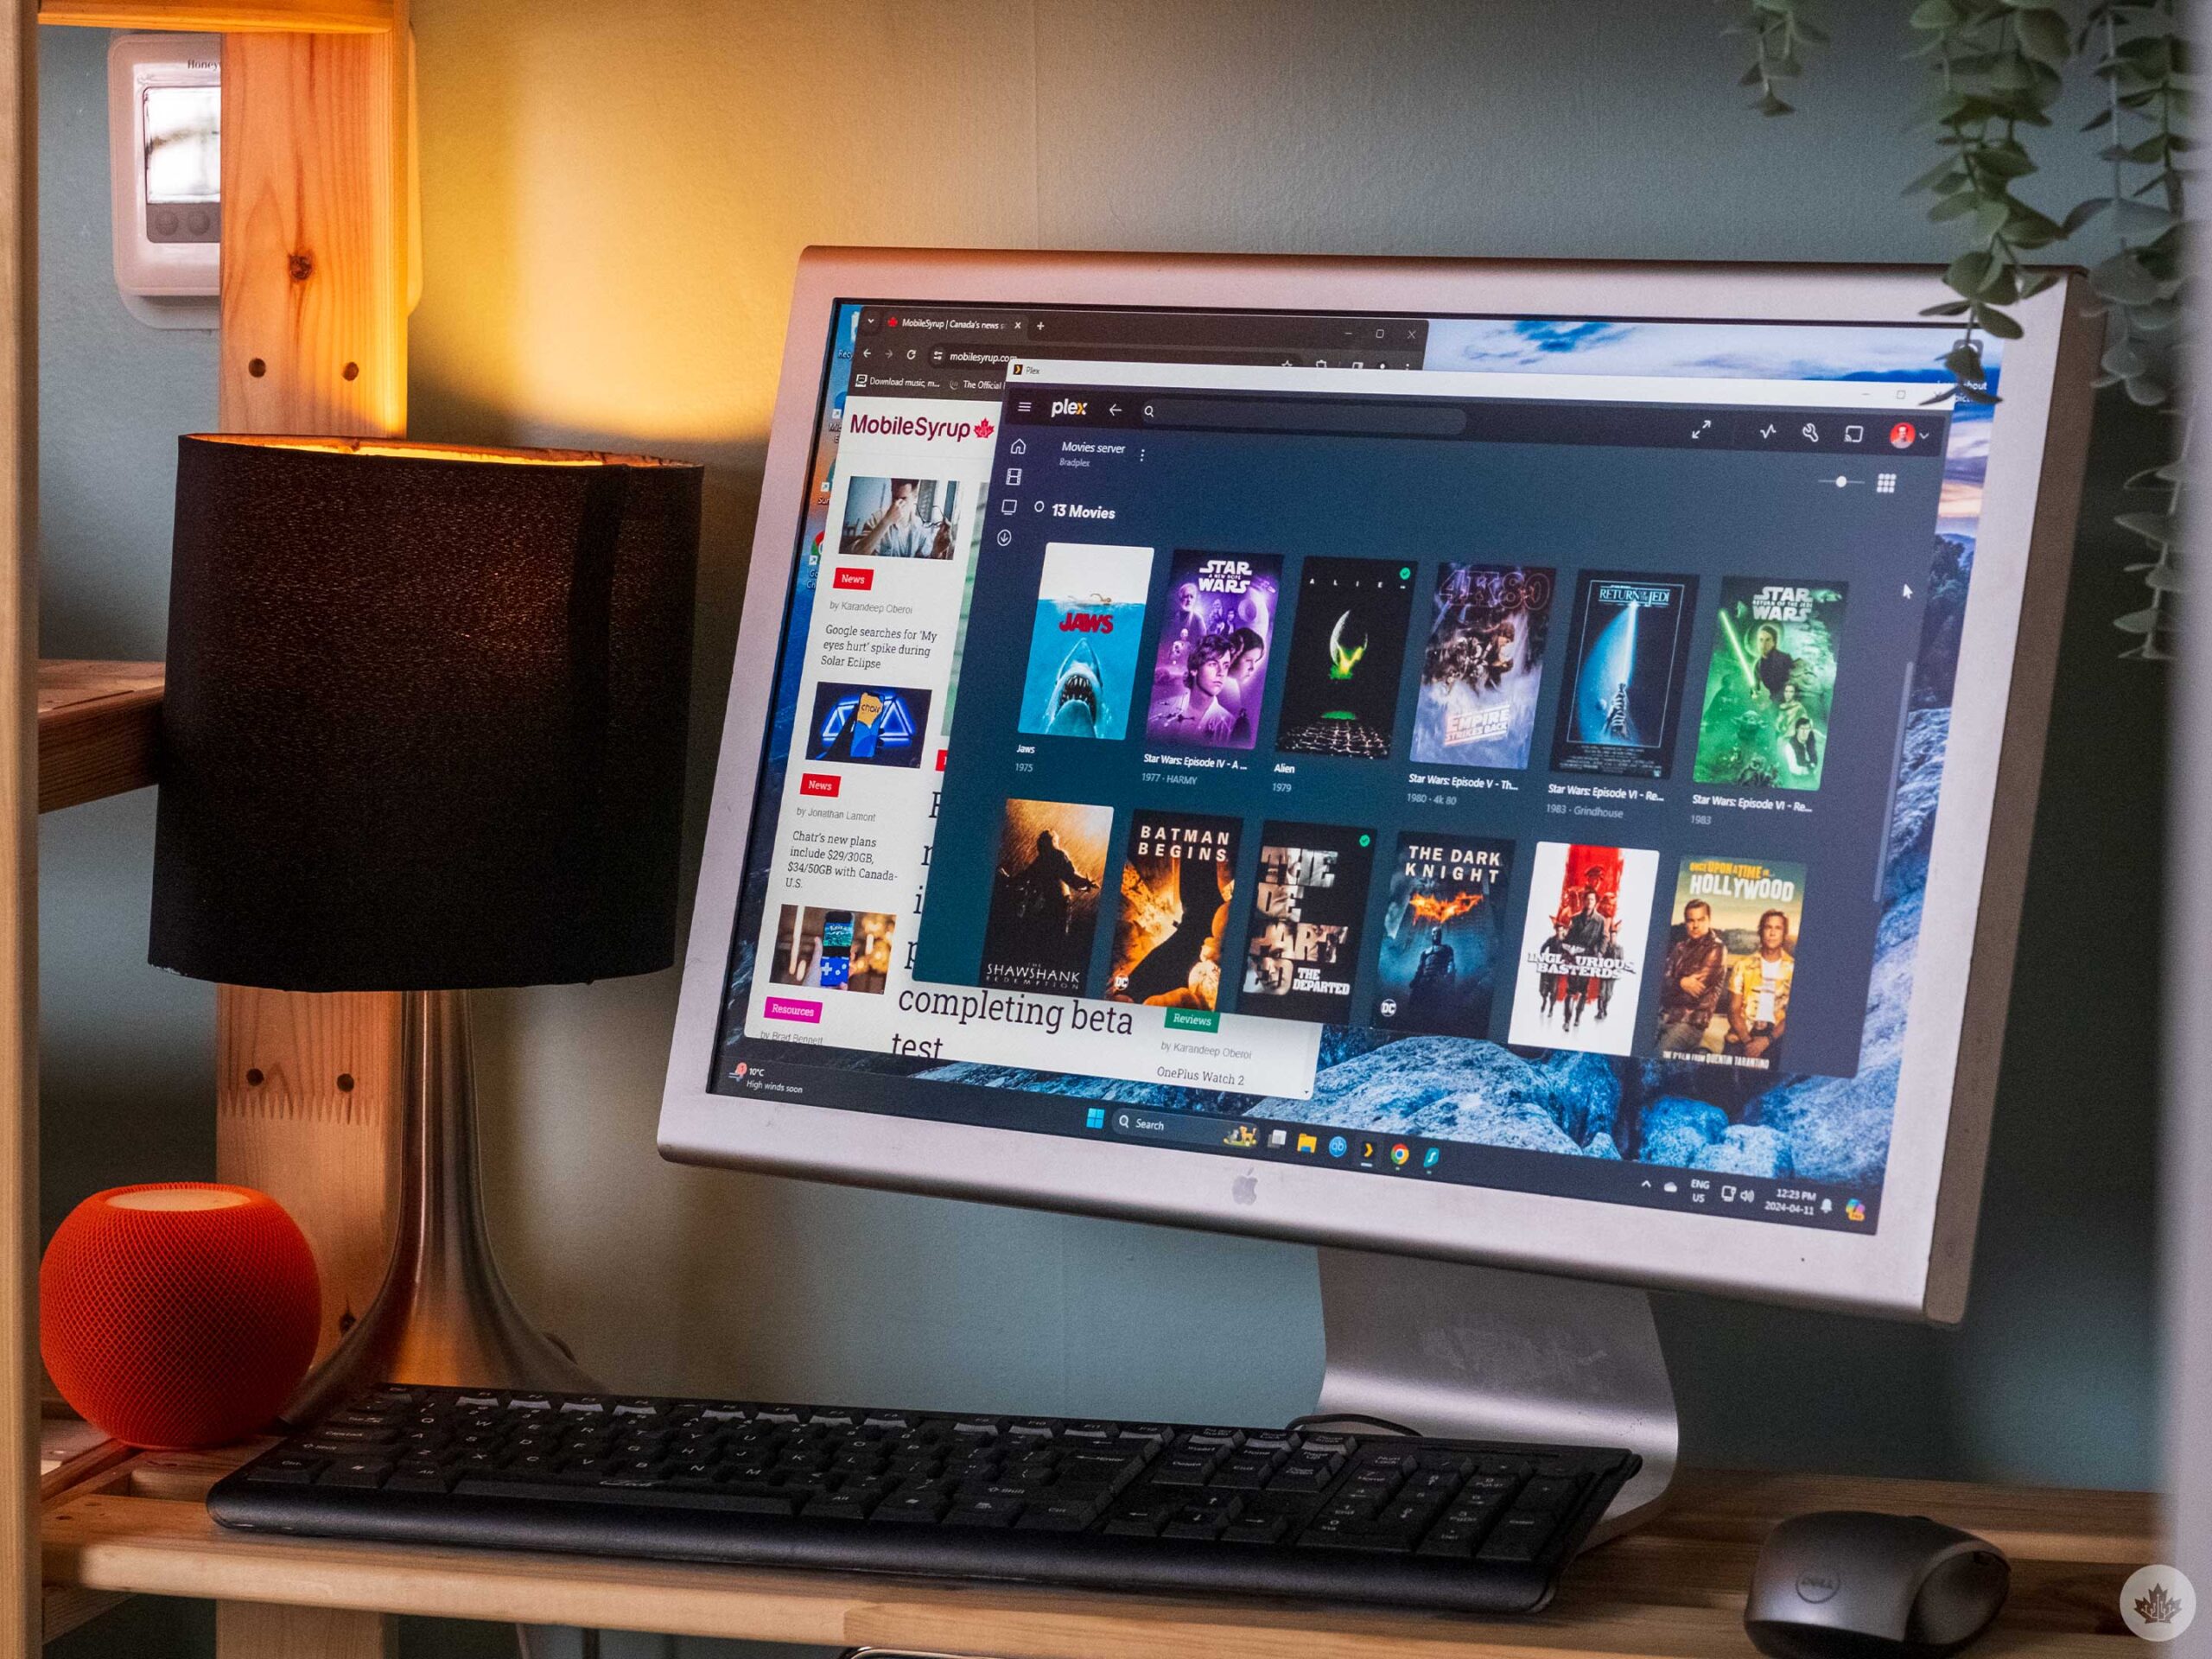
It might be old, but I’m in love with this monitor. Let’s bring back metal bezels.
When I started imagining this build, I wanted to make it power-efficient yet still able to transcode a handful of 4K streams. By the end, I reached that goal, but I’ve found myself with a strange mix of parts that I wouldn’t necessarily recommend for a bare-bones Plex server.
I made mistakes along the way and talked myself into future-proofing some components, so keep that in mind as I try to justify this list:
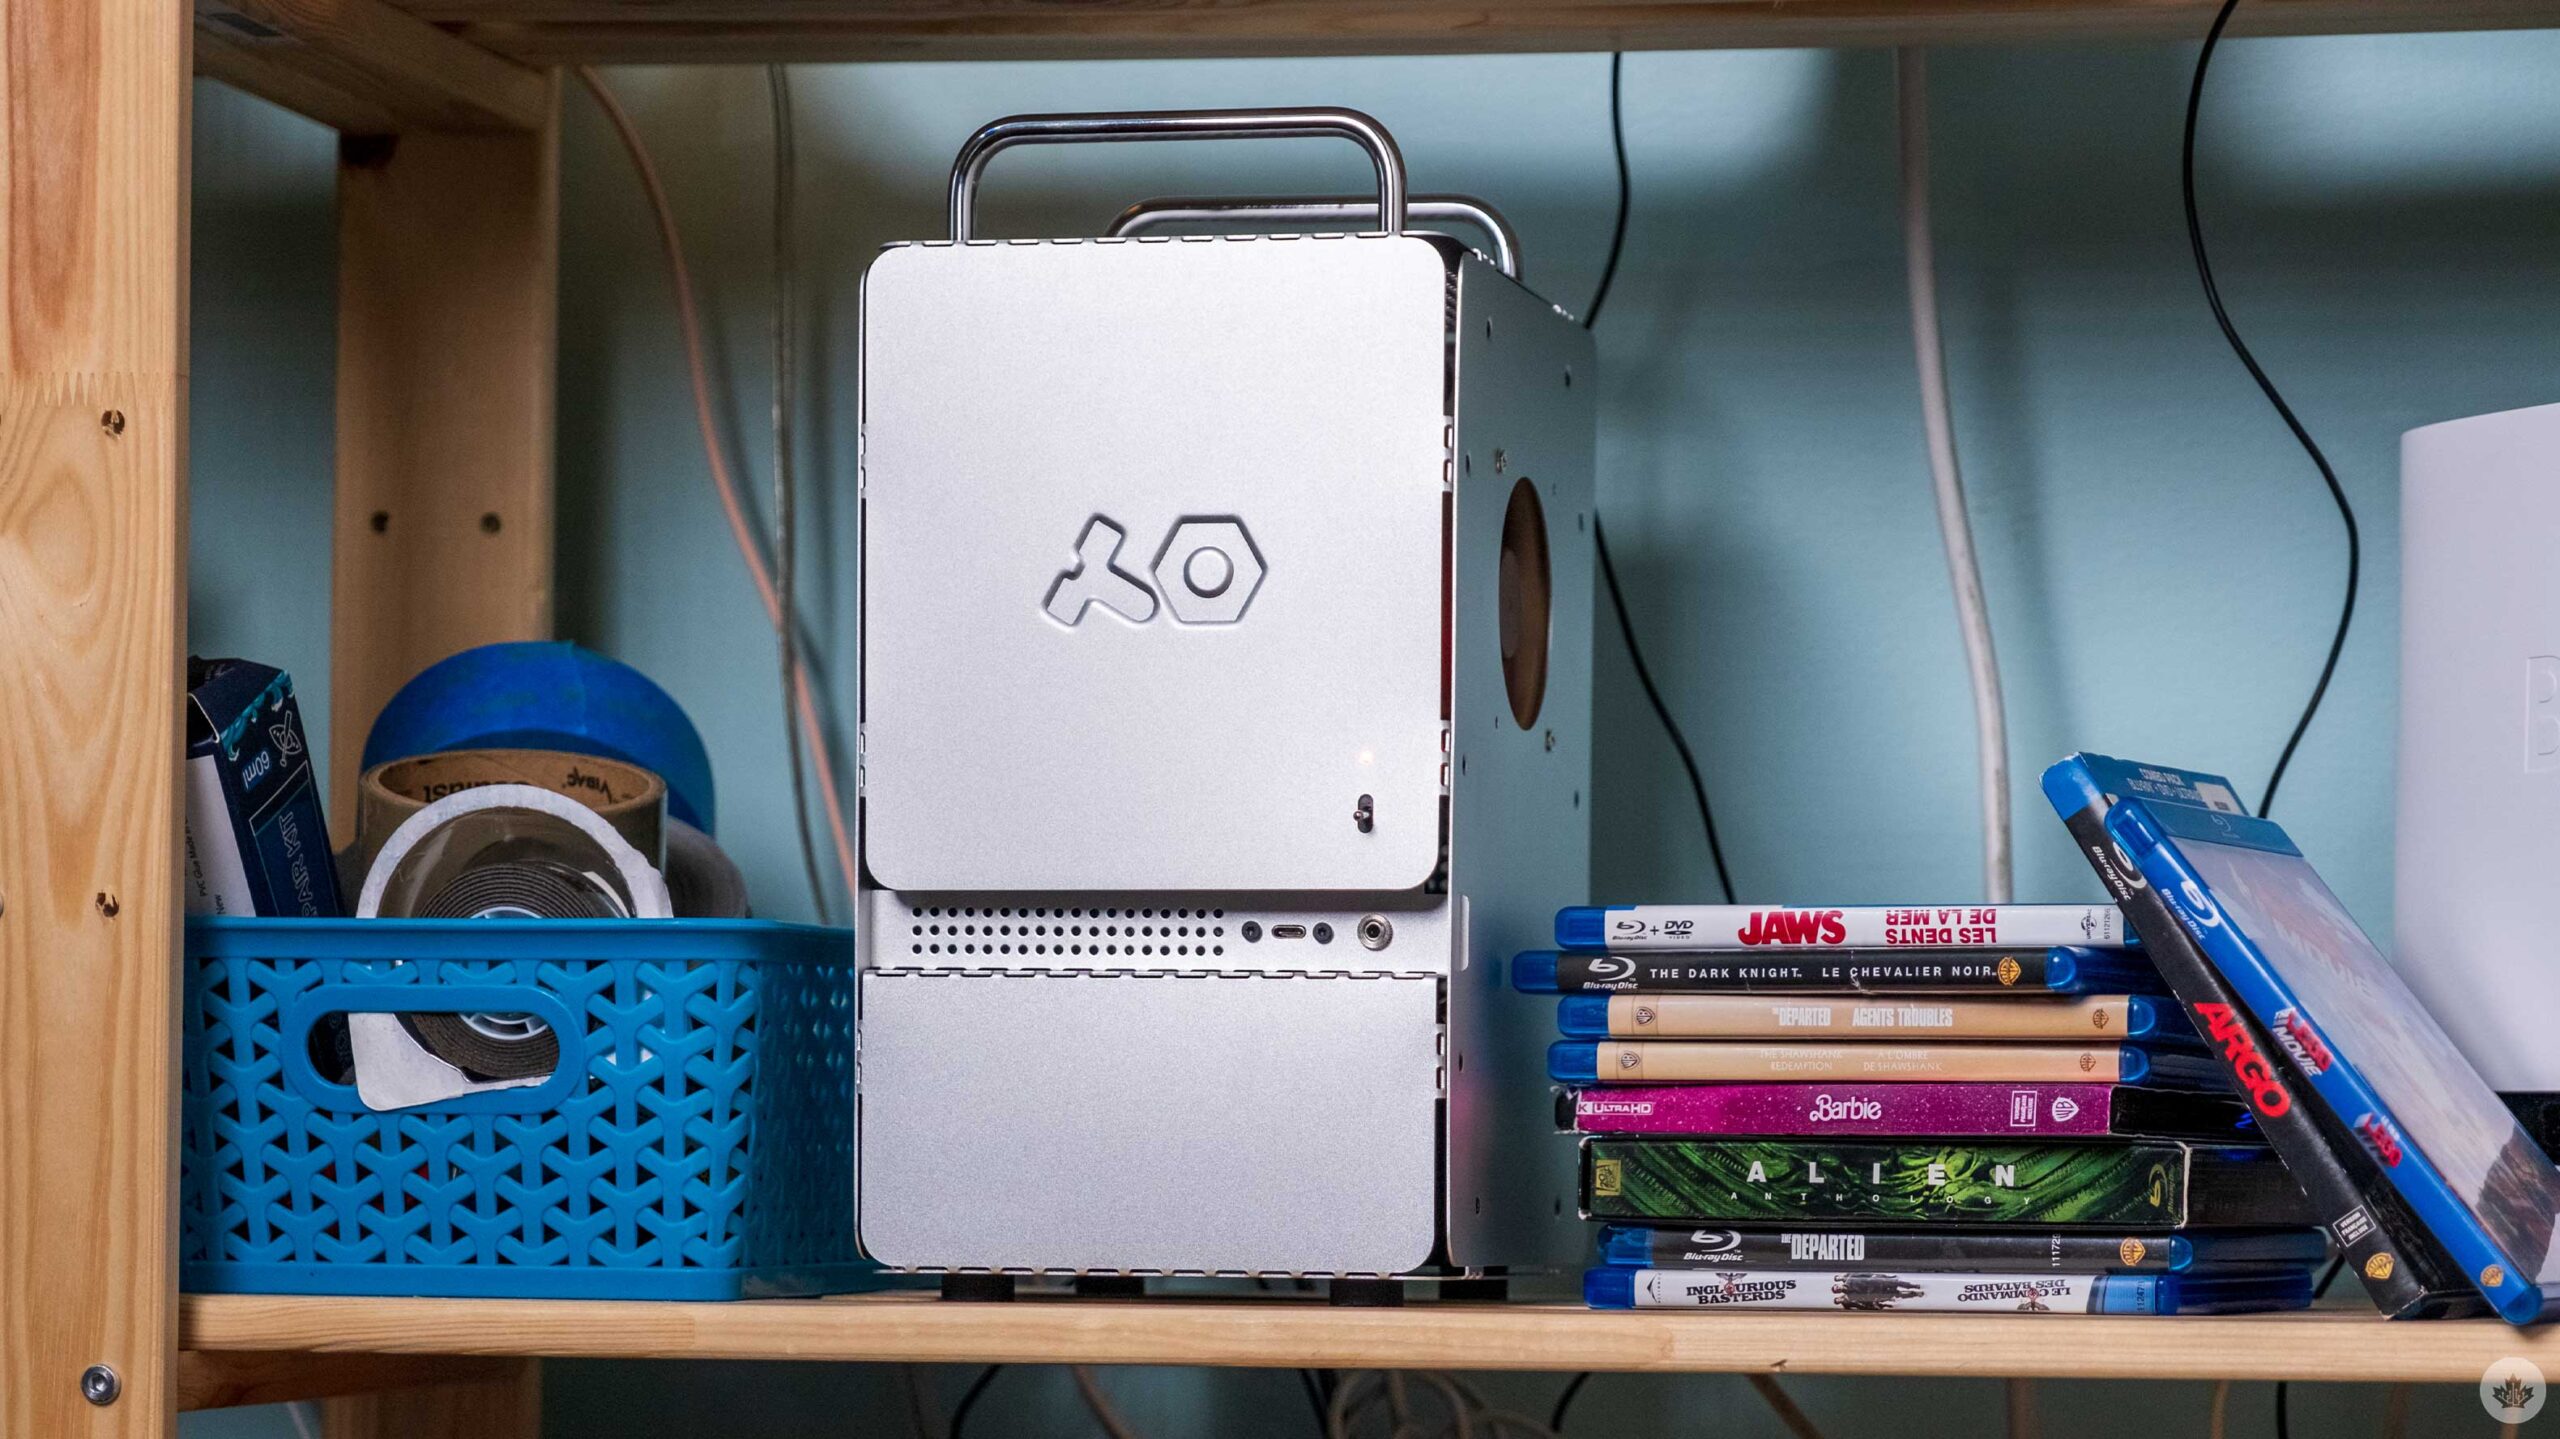
- Case: Teenage Engineering Computer-1
- Motherboard: Asus ROG B760-I
- CPU: Intel i3 12100
- RAM: 32GB 6000Mhz
- Storage: 1TB Kingston NV2, 2TB Western Digital Blue, 500GB Teamgroup SSD, 3TB Western Digital Blue HDD
- PSU: Corsair 750 SFF
- CPU Cooler: Noctua LH-L9
- Case Fan: Noctua NF-A8
- Monitor: Apple Cinema Display
- Keyboard: Super cheap ‘iTech’ model
- Mouse: Wired option stolen from Loyalist College in 2017
- Windows: Transferring from old Optiplex
Beyond the case, the first part I bought was the 750-watt power supply (PSU). I’m a fan of this power supply because it doesn’t run the fan when it’s not hot, which is great for people like me who want a silent computer. I needed it for last year’s PC building fiasco, so it was still in my Optiplex gaming build. I haven’t used the Optiplex as much as I wanted since newer games like The Last of Us: Part 1 struggled to run on its aging CPU. Beyond that, I planned to move the Windows license from the Optiplex to the new PC, so there was no reason to leave the PSU in it. All in all, for $140, I got a Windows 11 Pro license out of the Optiplex, and I’m still using the janky keyboard that came with it, so I’d call it a fair deal.
Learning from my partner Alex’s build, I went with a tiny Noctua NH-L9x65 CPU cooler and a Noctua NF-A8 case fan. Both are also basically silent and should be more than enough for the minimal heat coming off this i3.
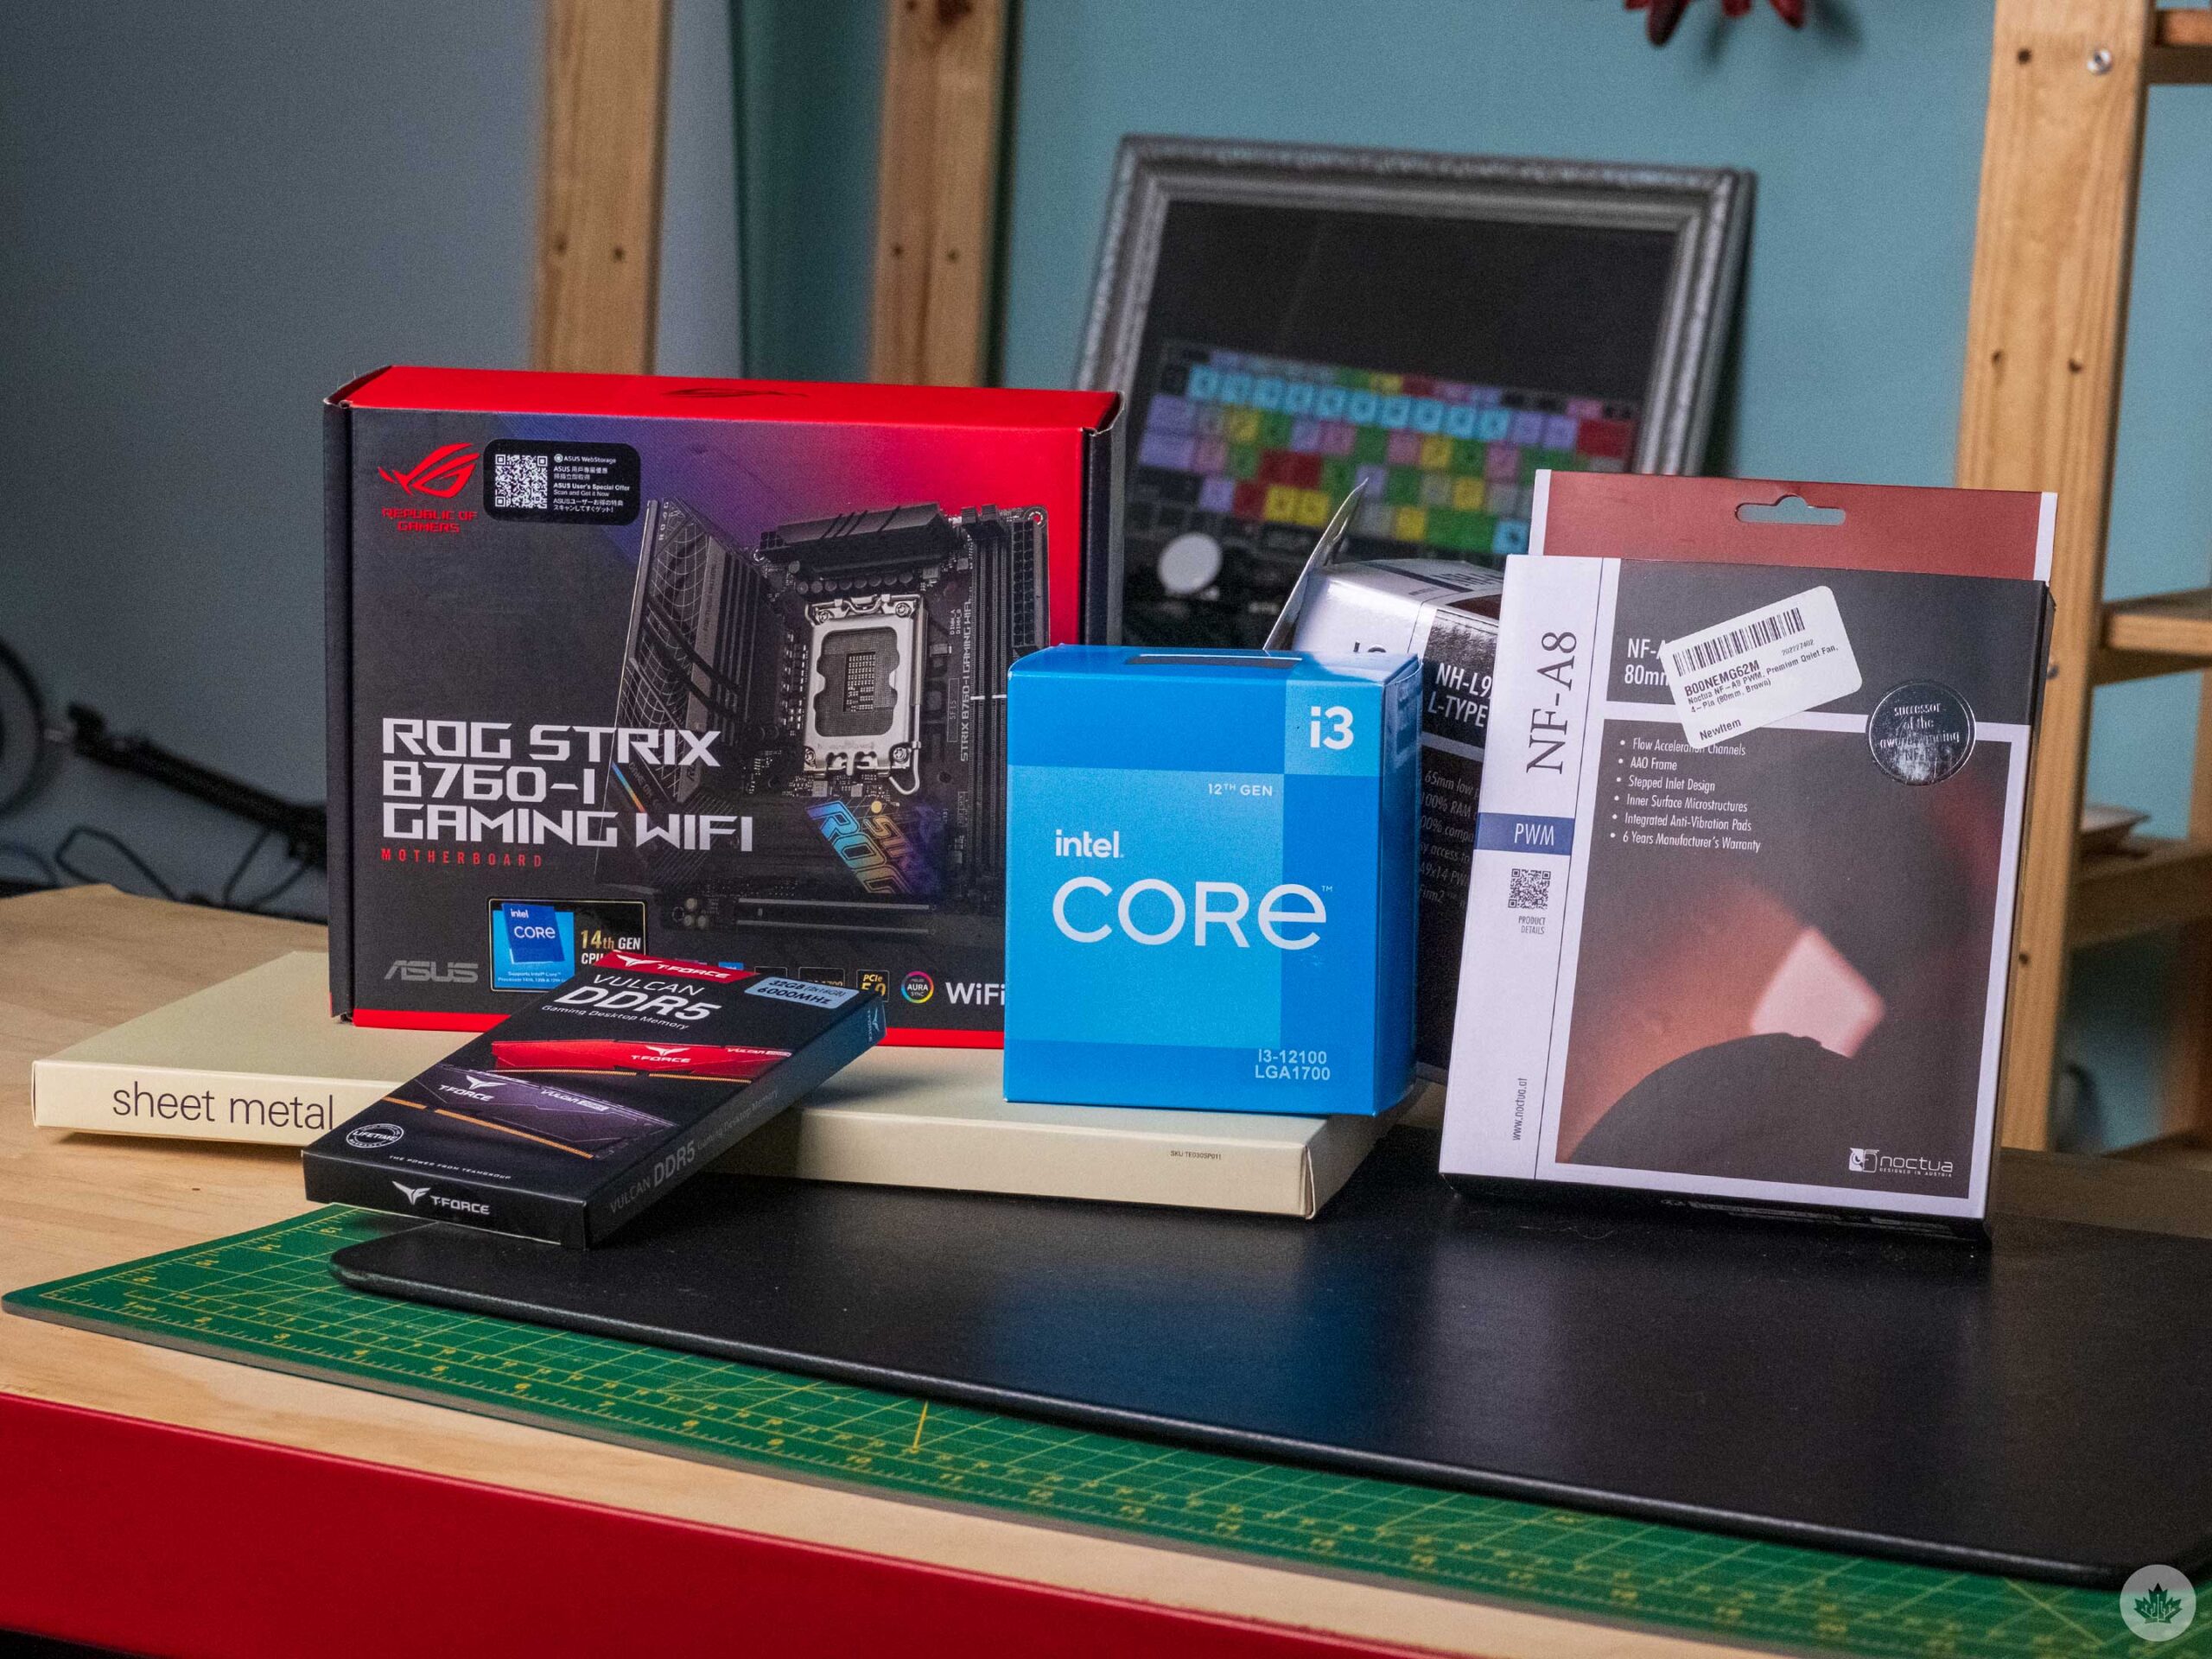 The motherboard was the most challenging part to buy. Not because there were too many options, but because there are basically none in the small form factor world, and the ones that do exist are very expensive. I settled on an ASUS ROG B760-I since it had Wi-Fi 6E, two M.2 SSD slots and a rear panel layout that I liked. Since I aimed to make this tiny PC a server, I needed to plan for as much storage as possible. In the end, this motherboard is way overkill for a Plex server, but it supports Intel 12th, 13th, and 14th-gen chips, so it gives me a pretty substantial upgrade path if I ever plan to use this motherboard for a gaming rig.
Speaking of the CPU, I went with a 12th-gen Intel i3 (12100). The main reason for this is that only Intel and Nvidia graphics support Plex’s hardware transcoding. Therefore, if you want to keep things small and power-efficient, Intel’s integrated graphics are the way to go. My i3 has the company’s lower form of integrated graphics (Intel UHD 730). I was initially worried about this and had an i5 in my cart with Intel UHD 770 graphics, but after reading a few Reddit posts, it seemed like the i3 would be enough. Plus, this was a good way to save a few bucks after overspending on the motherboard.
“I know that PC cases aren’t Teenage Engineering’s main forte, but modern audio and an ultra-fast USB-C port on the front would have been greatly appreciated.”
I had two mid-tier SSDs left over from the Optiplex for storage, but I bought a 1TB Kingston SSD to load into the M.2 slot in the back of the motherboard. I went a little overkill here, but the idea is that this will hold Windows and all my apps, letting me use all the accessible drives on the front of the motherboard to hold server content. I also moved over my old 3TB HDD that held all my existing Plex content. This case isn’t meant to hold hard drives, but since I’m forgoing a GPU, I can stick one in with a bit of outside-the-box thinking (double-sided tape).
Finally, I was ready to build, but at the last minute, I realized that the old DDR3 RAM from the Optiplex wouldn’t fit in the new motherboard, so I needed to make a trip to Canada Computers. They had no single-stick DDR5 options, so I settled on the cheapest kit I could find. It was 32GB of 6000Mhz RAM for $125. Again, it was way overkill for this PC, but I was too impatient to wait until the next day to let Amazon ship me a cheaper unit.
As I was saying, this parts list is pretty random. If I had been looking to stick to a tighter budget, I could have gotten a cheaper motherboard, 8GB of RAM, and a smaller power supply unit. The included CPU cooler would have also been enough to cool the chip since Plex doesn’t generate much heat. The way I built this means that swapping out for a better CPU and a GPU will instantly make this gaming-capable. I don’t know if I’ll ever do that, but it felt nice to leave some options open when I was picking parts.
The build
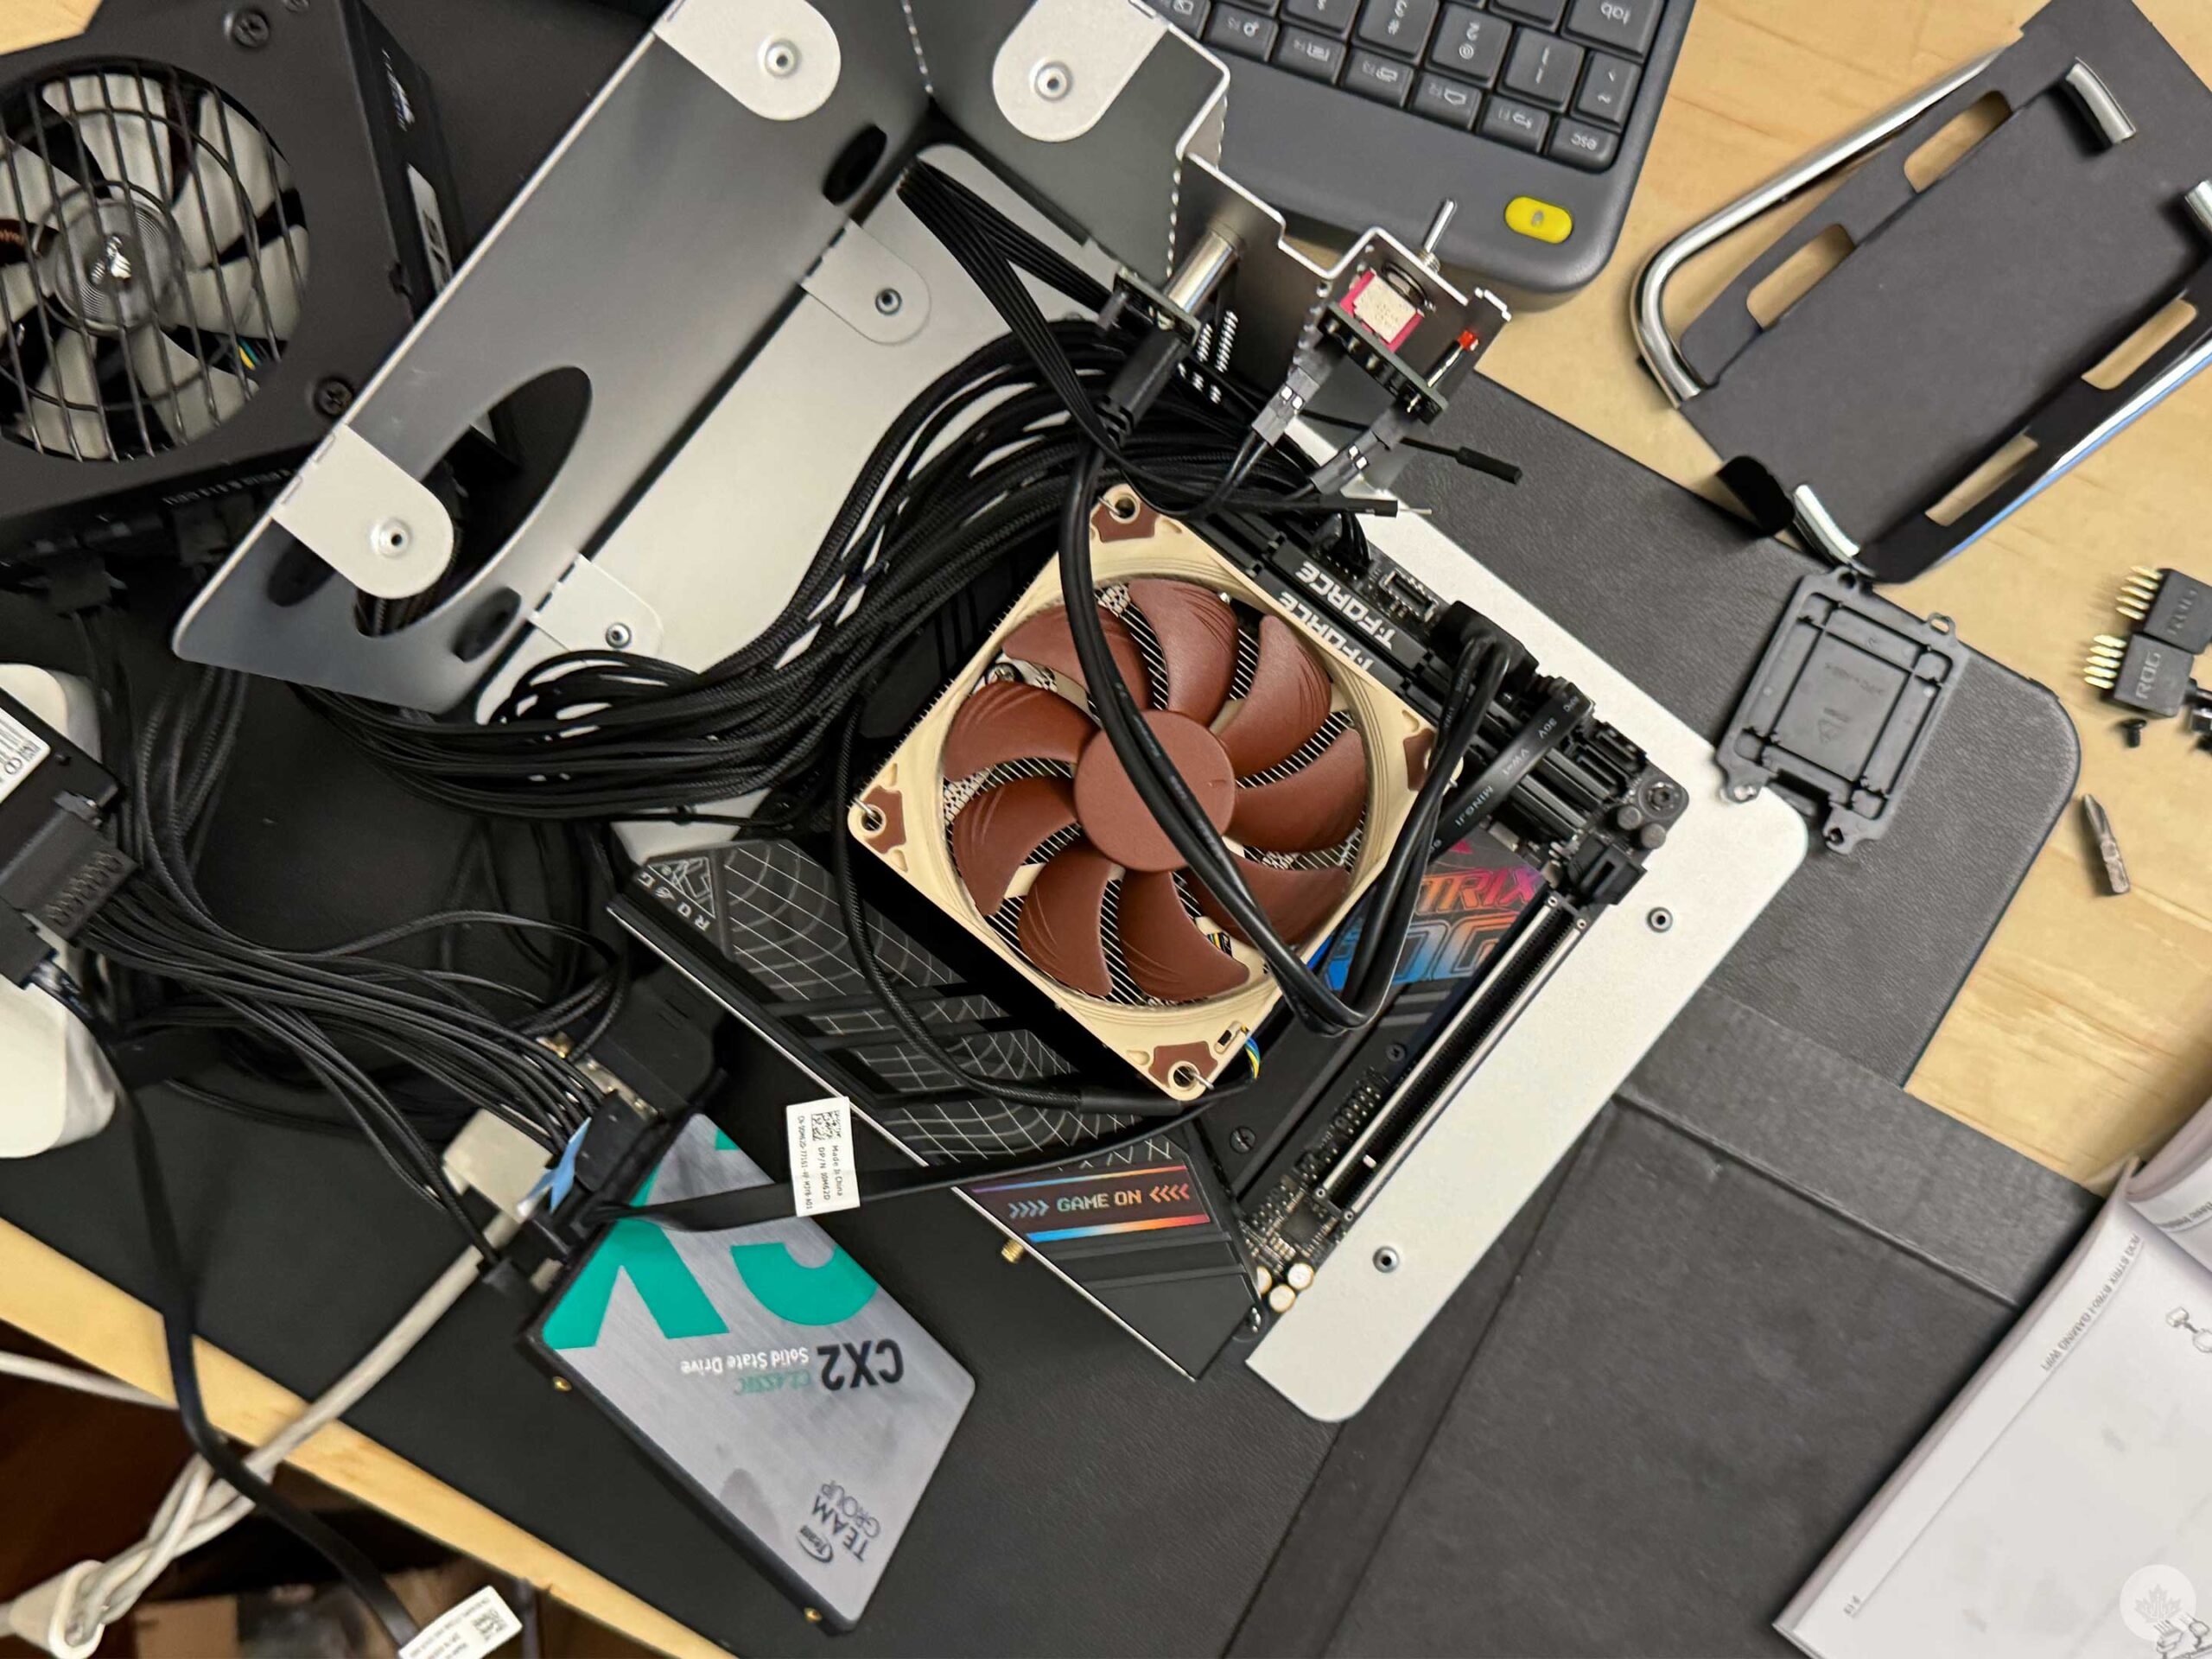
One thing I wish I would have splurged on is shorter power cables. Once it’s all packed together, the cables take up a ton of interior space.
Everything was pretty straightforward since this was my second time building in this tiny case. If you want to read more about the first time, you can do so here.
When I tried to boot it up, it wasn’t getting power. To remedy this, I needed to re-seat the power connectors, which is much easier in a full-sized case than in a half-built shoebox. At one point, I needed to remove the case fan since it was just getting in my way, but getting it back in took way longer than I’d care to admit.
The screw holes for the case fan are also not large enough for modern fan screws, so it’s a bit of a pain to get in the first time. It’s worth pre-tapping these holes. It’s also worth picking up a fan guard since the fan is exposed without it. I didn’t buy one for myself, and I’ve already jammed my fingers in the fan while moving the PC around to plug USB accessories into the back.
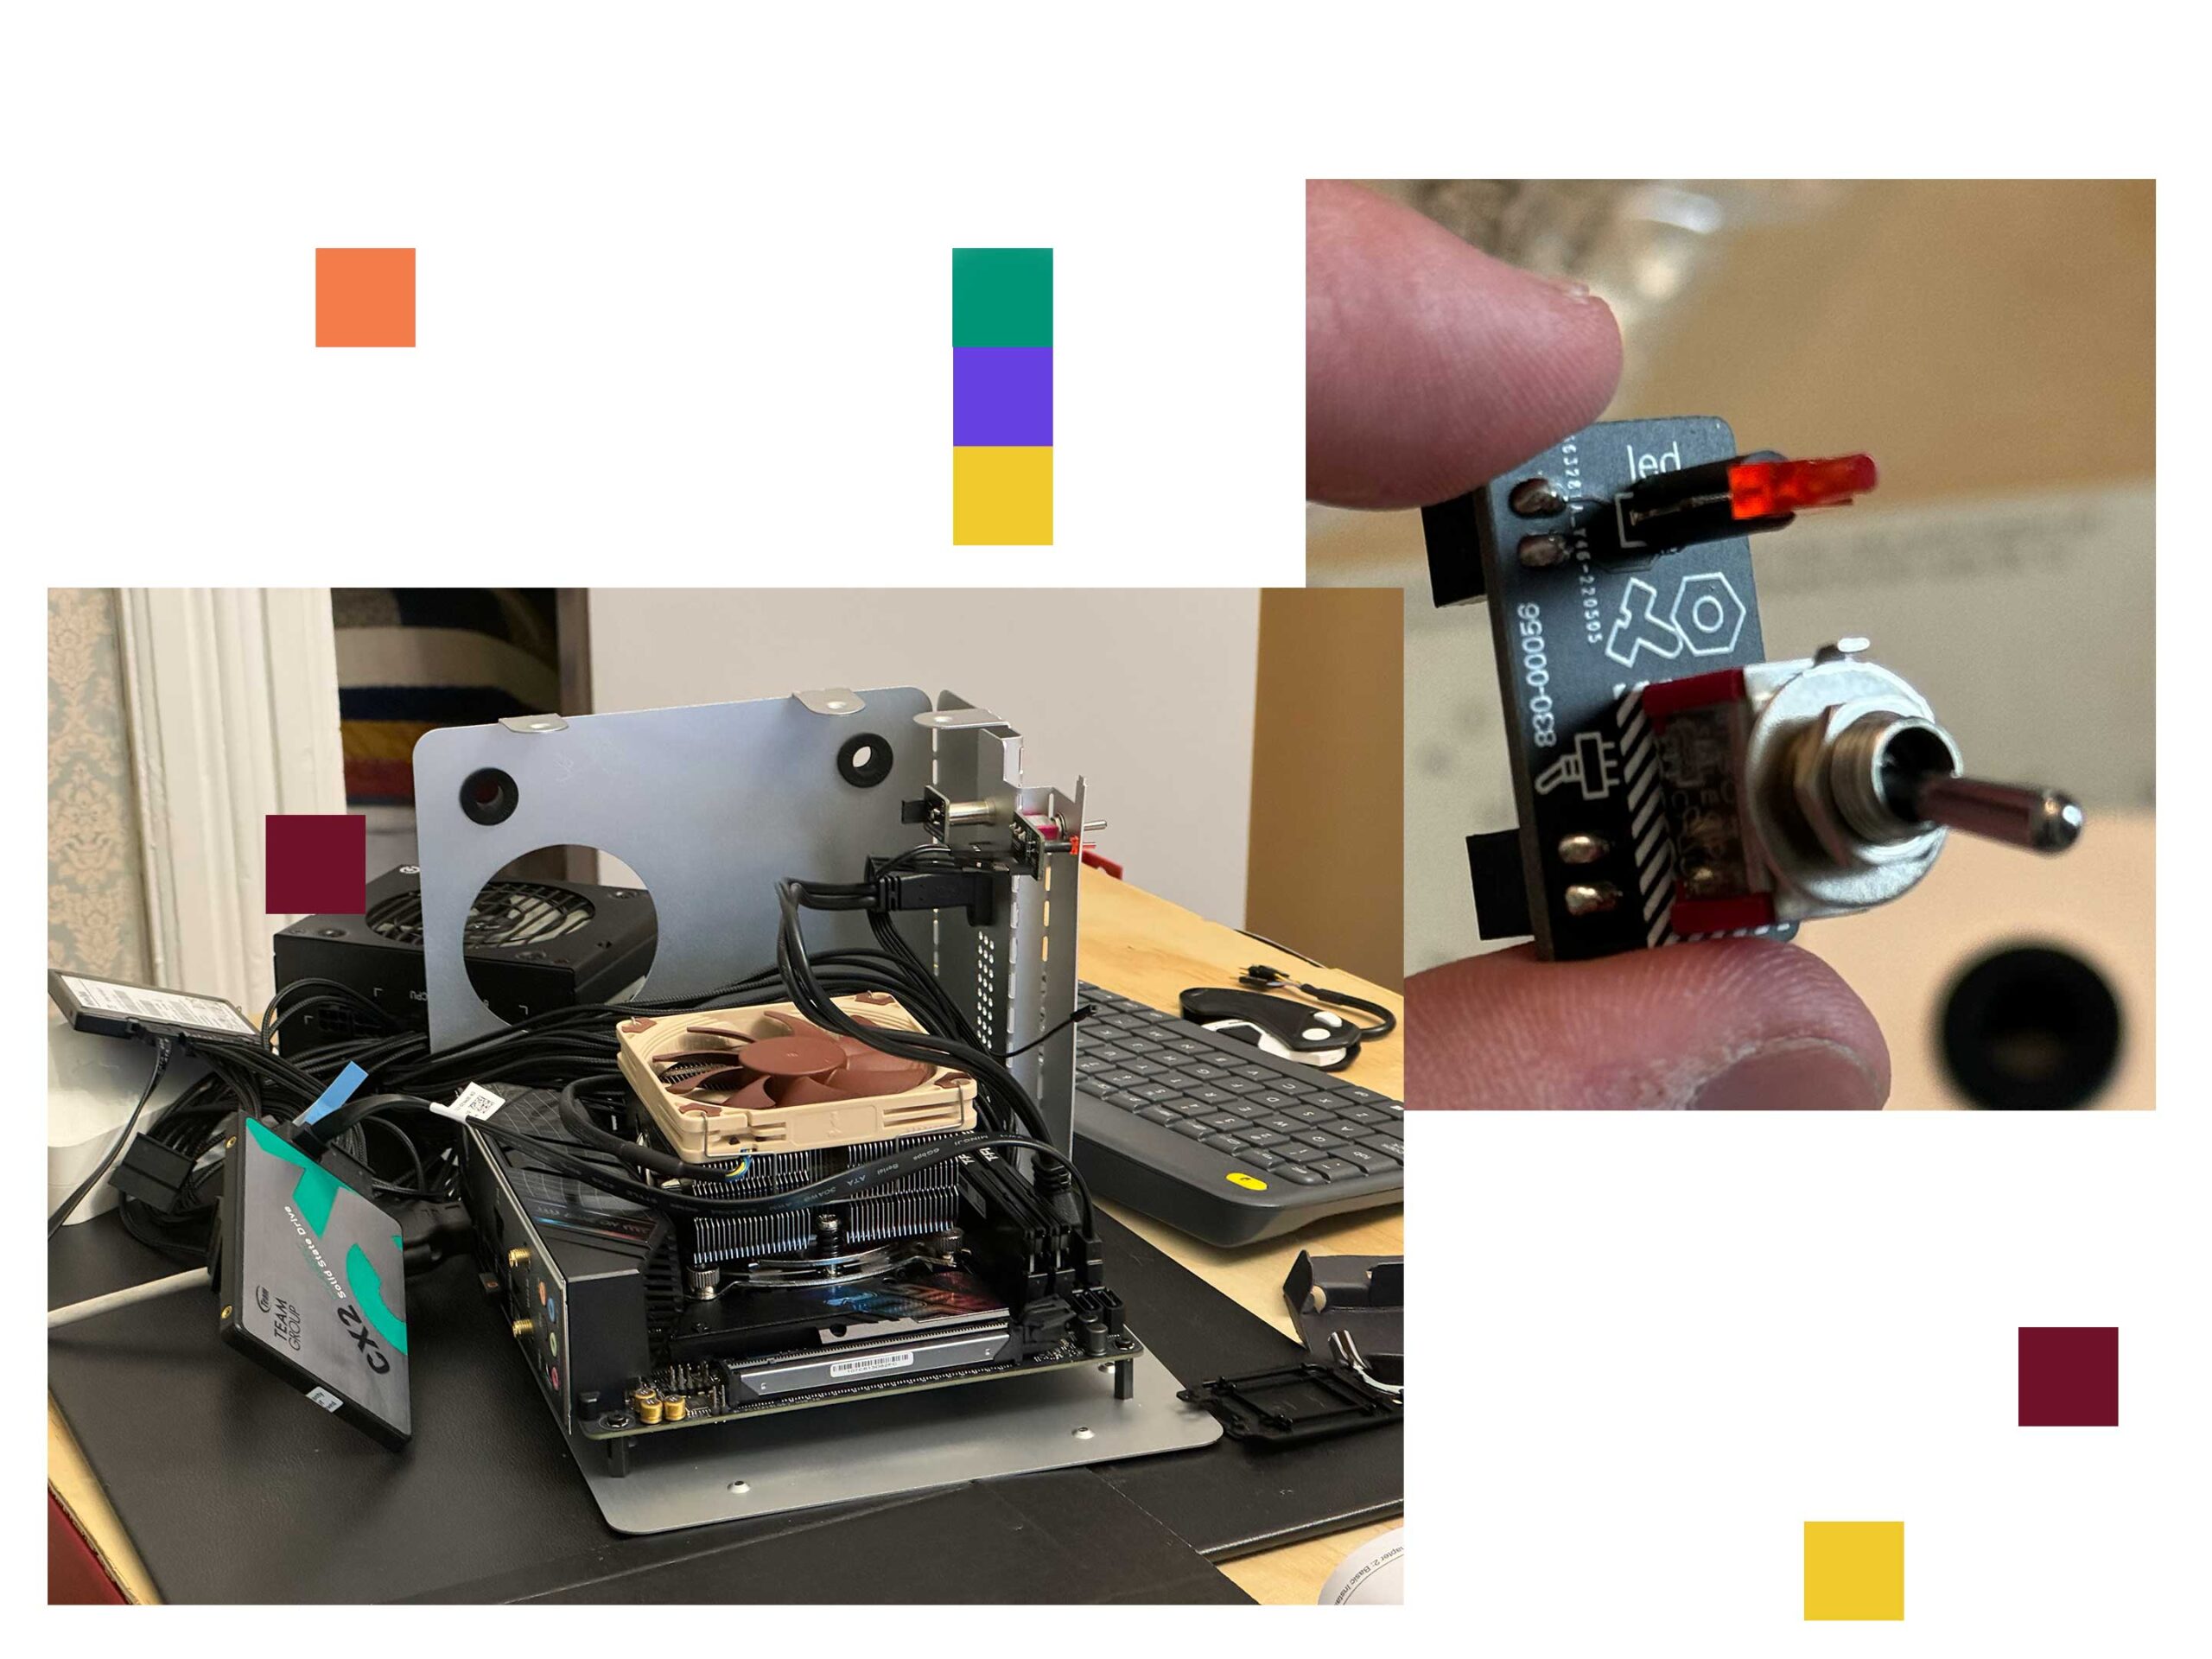 Overall, the instructions for this case are pretty solid, but after two builds, I’m still disappointed with the front panel audio setup. It uses an old TRS cable split that’s difficult to get working on modern motherboards. I know that PC cases aren’t Teenage Engineering’s main forte, but modern audio and an ultra-fast USB-C port on the front would have been greatly appreciated. At the end of the day, I gave up and didn’t even bother connecting my front panel AUX this time since Alex’s has been so hit-and-miss.
The real struggle was fitting in my old HDD. The Teenage Engineering case only has mounting points for two SATA SSDs. However, it is designed to hold a small graphics card at the top. Since I was forgoing one of those, I used my double-sided tape to fasten the HDD to the top of the case. It’s also perched on the motherboard’s top edge, so some upward force is holding it from below. I know this is pretty risky, but the goal is to hopefully catch a 4TB SSD on sale sometime soon and swap the HDD out.
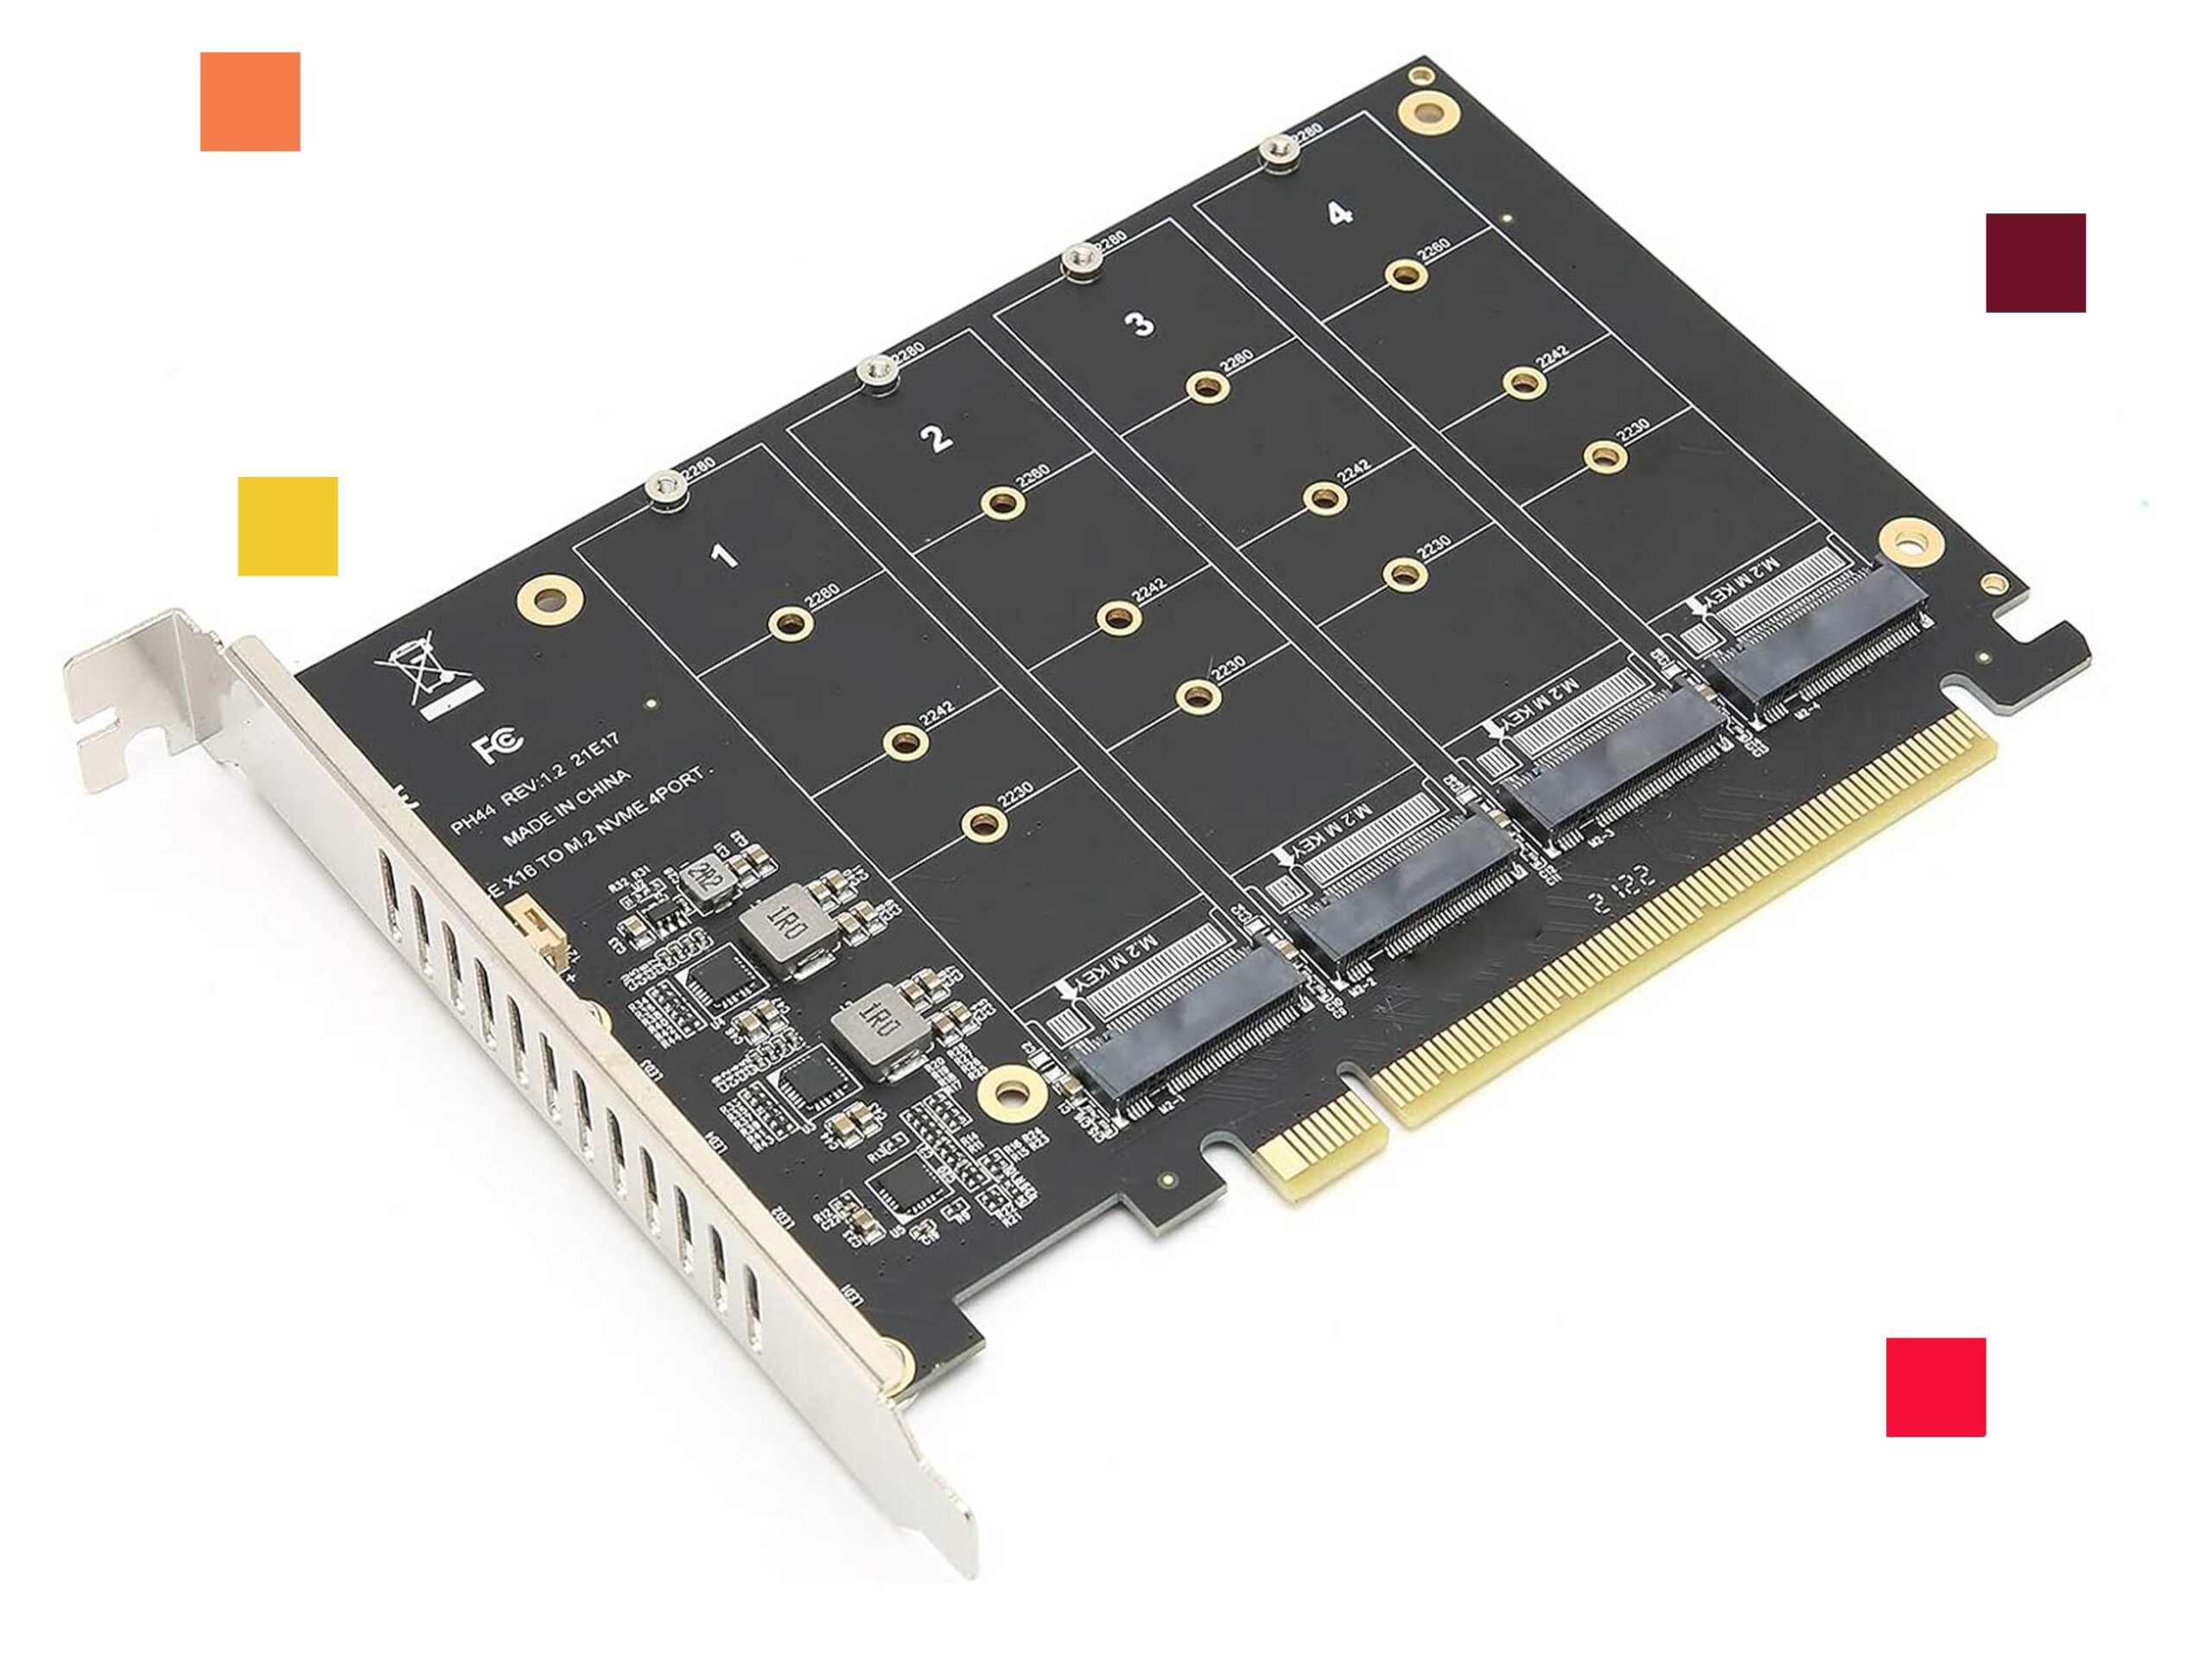
I haven’t bought this yet, but once I fill up all my SATA SSDs, I’ll get one of these to maximize my storage options.
The motherboard can take six storage drives in total (four SATA and two M.2/NVME). Once I fill all those, I plan to add a PCIe SSD adapter to fit in more M.2 slots where the GPU would sit. Realistically, if I packed all these drive slots (minus the one on the back of the motherboard) with 4TB SSDs, I could have a total of 36TB packed into this tiny PC, and while I probably won’t do it any time soon since it’s so expensive, it’s more storage than I thought I’d be able to fit in here when I started building.
I’ll also mention that all the cables inside make things very tight. Therefore, I decided to tape my two SSDs together so I could mount them both using the same hole. This worked well, but because SATA drives need so many cables to install I’m going to try and add more M.2 SSDs first.
The next steps
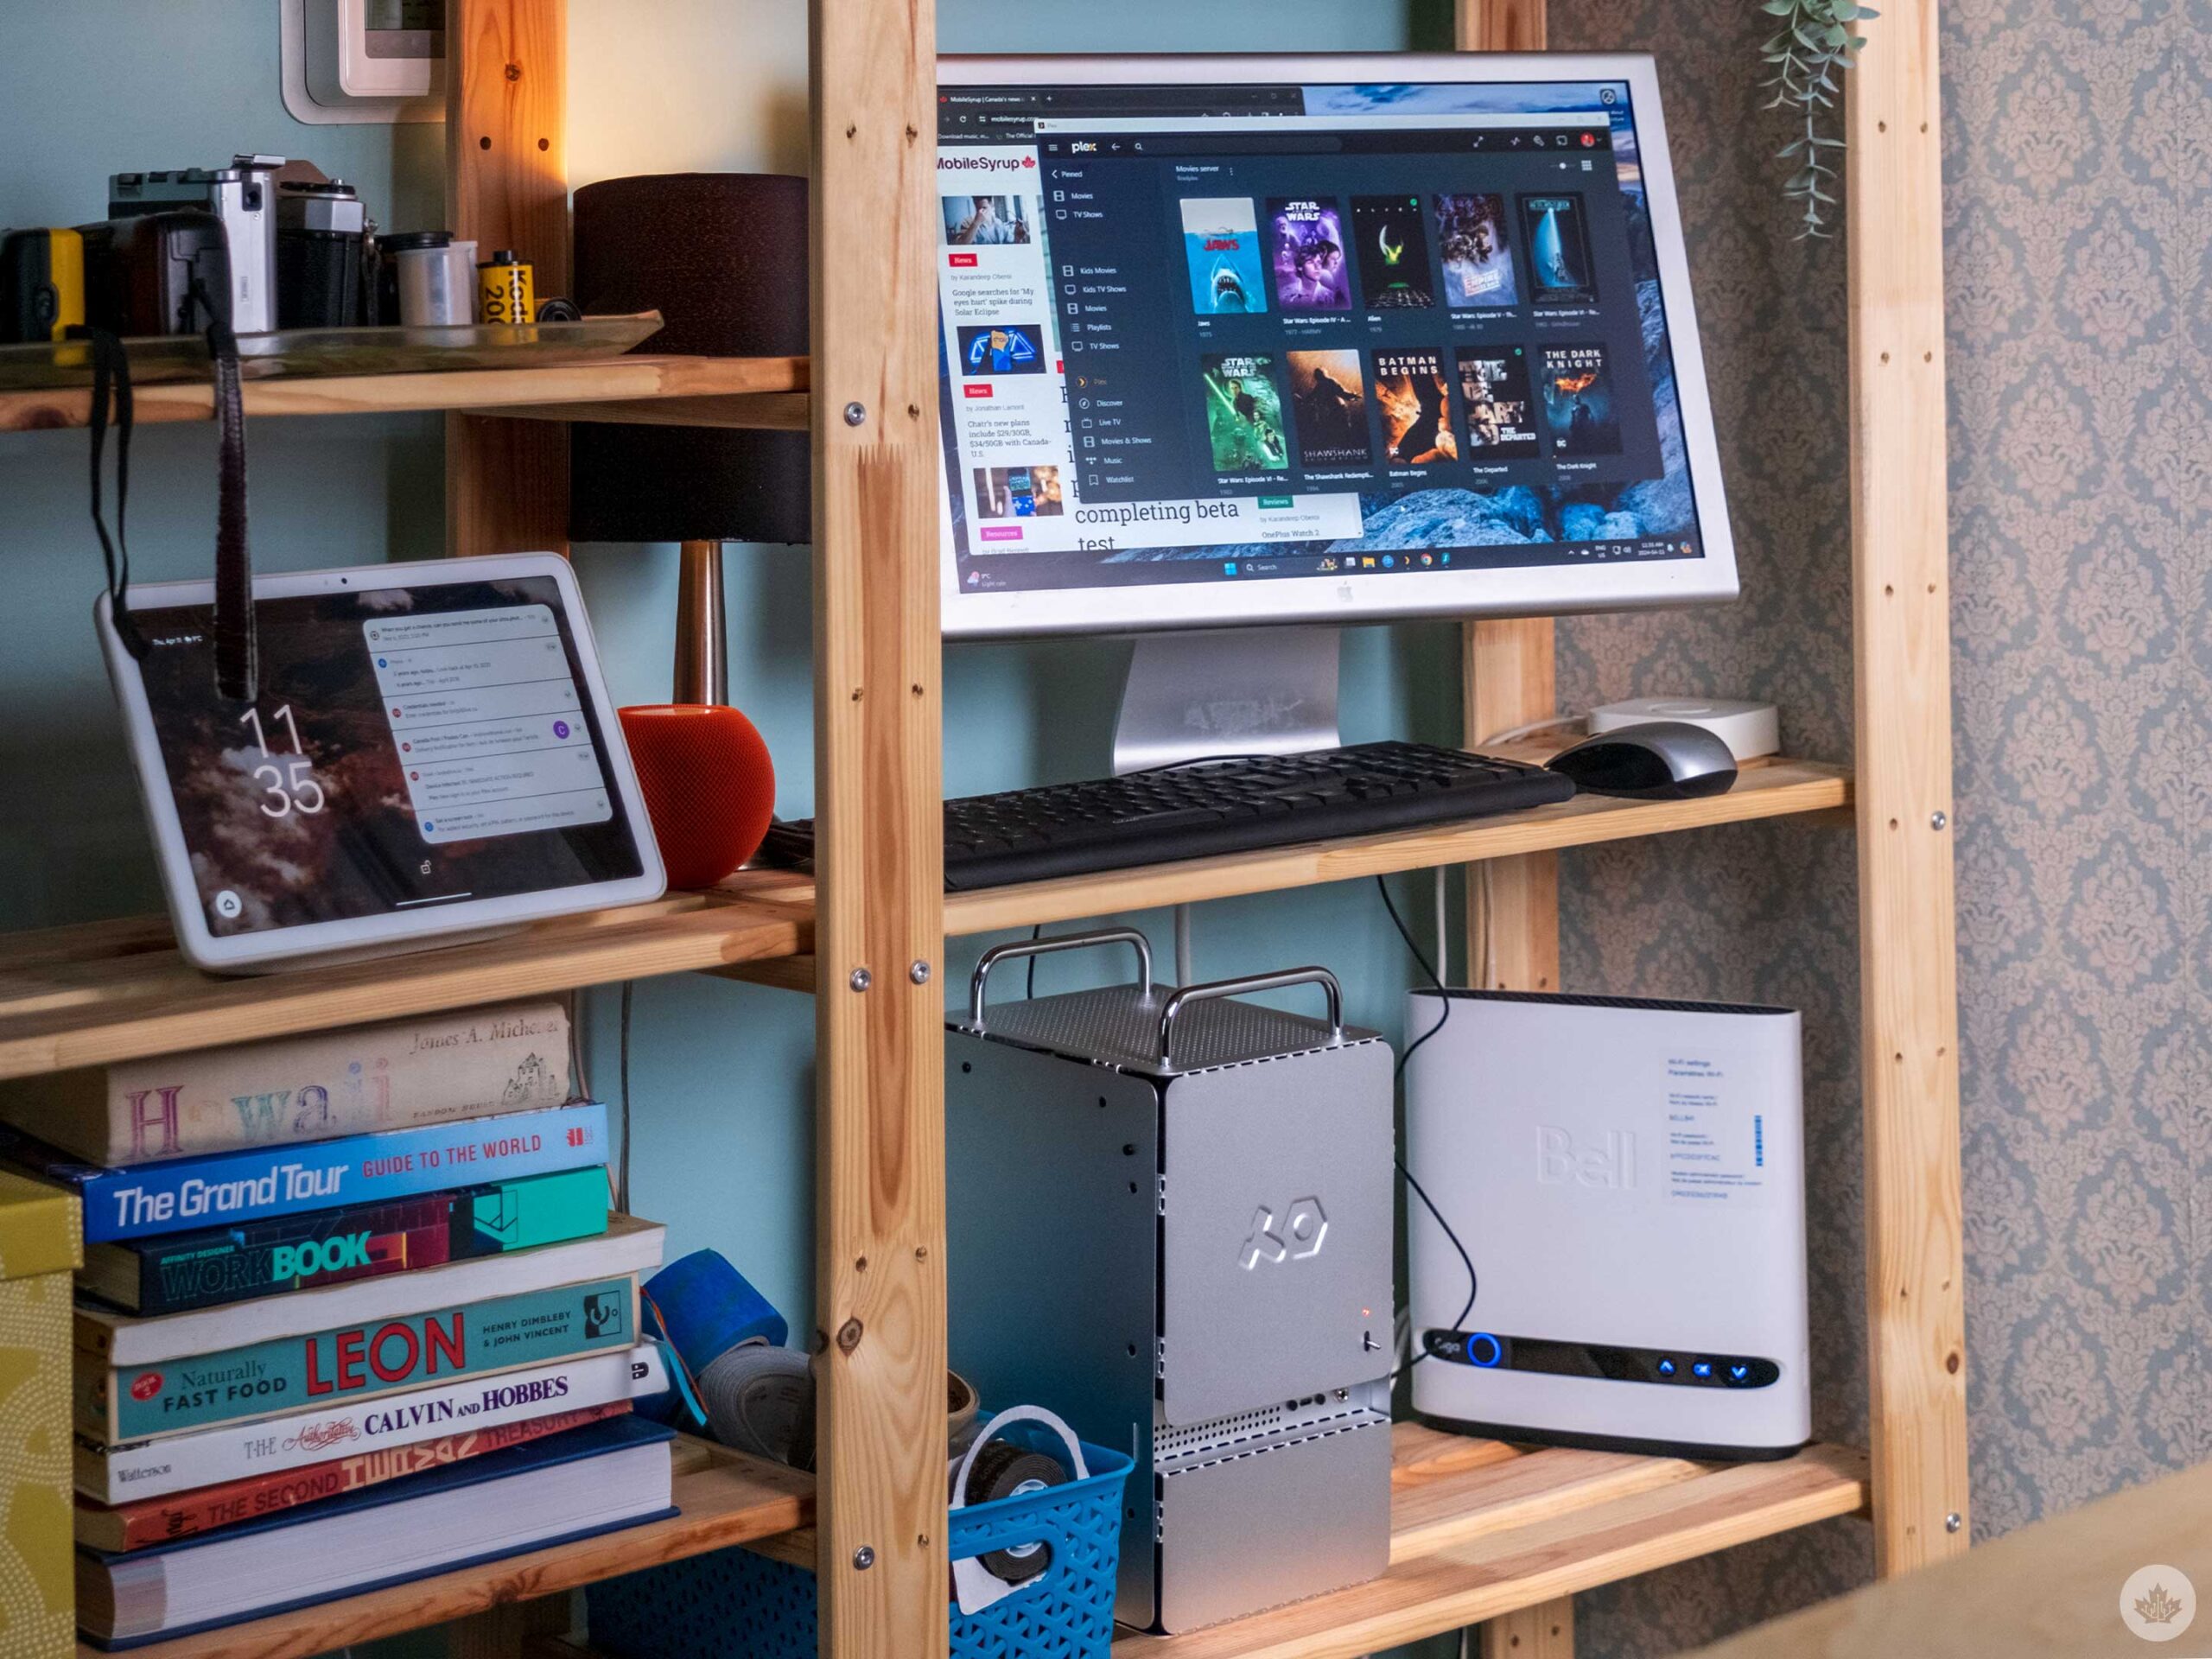 Once I finished building the computer, I did a fresh install of Windows 11. After getting through various driver updates and downloading all my apps, I finally had the standalone Plex server I always wanted.
After testing the server, it’s able to transcode about four 4K streams down to 1080p, which is more than enough for me and the few friends I share my server with. At one point, I thought about running NAS or a Linux version instead of Windows, but since I know Windows the best and plan to use this server for more than just Plex, it made sense to stick with it.
Stay tuned for a follow-up to this story focused on setting up a Plex server and sharing it.
MobileSyrup may earn a commission from purchases made via our links, which helps fund the journalism we provide free on our website. These links do not influence our editorial content. Support us here.
