
I recently got my hands on my grandpa’s old 8mm video camera from the early 2000s, so I thought I’d share how I digitized the footage.
This unit is a Samsung MyCAM SC-M52 that shoots 8mm tapes. From what I’ve digitized so far, these can hold upwards of two hours of footage, depending on your recording settings.
What you need
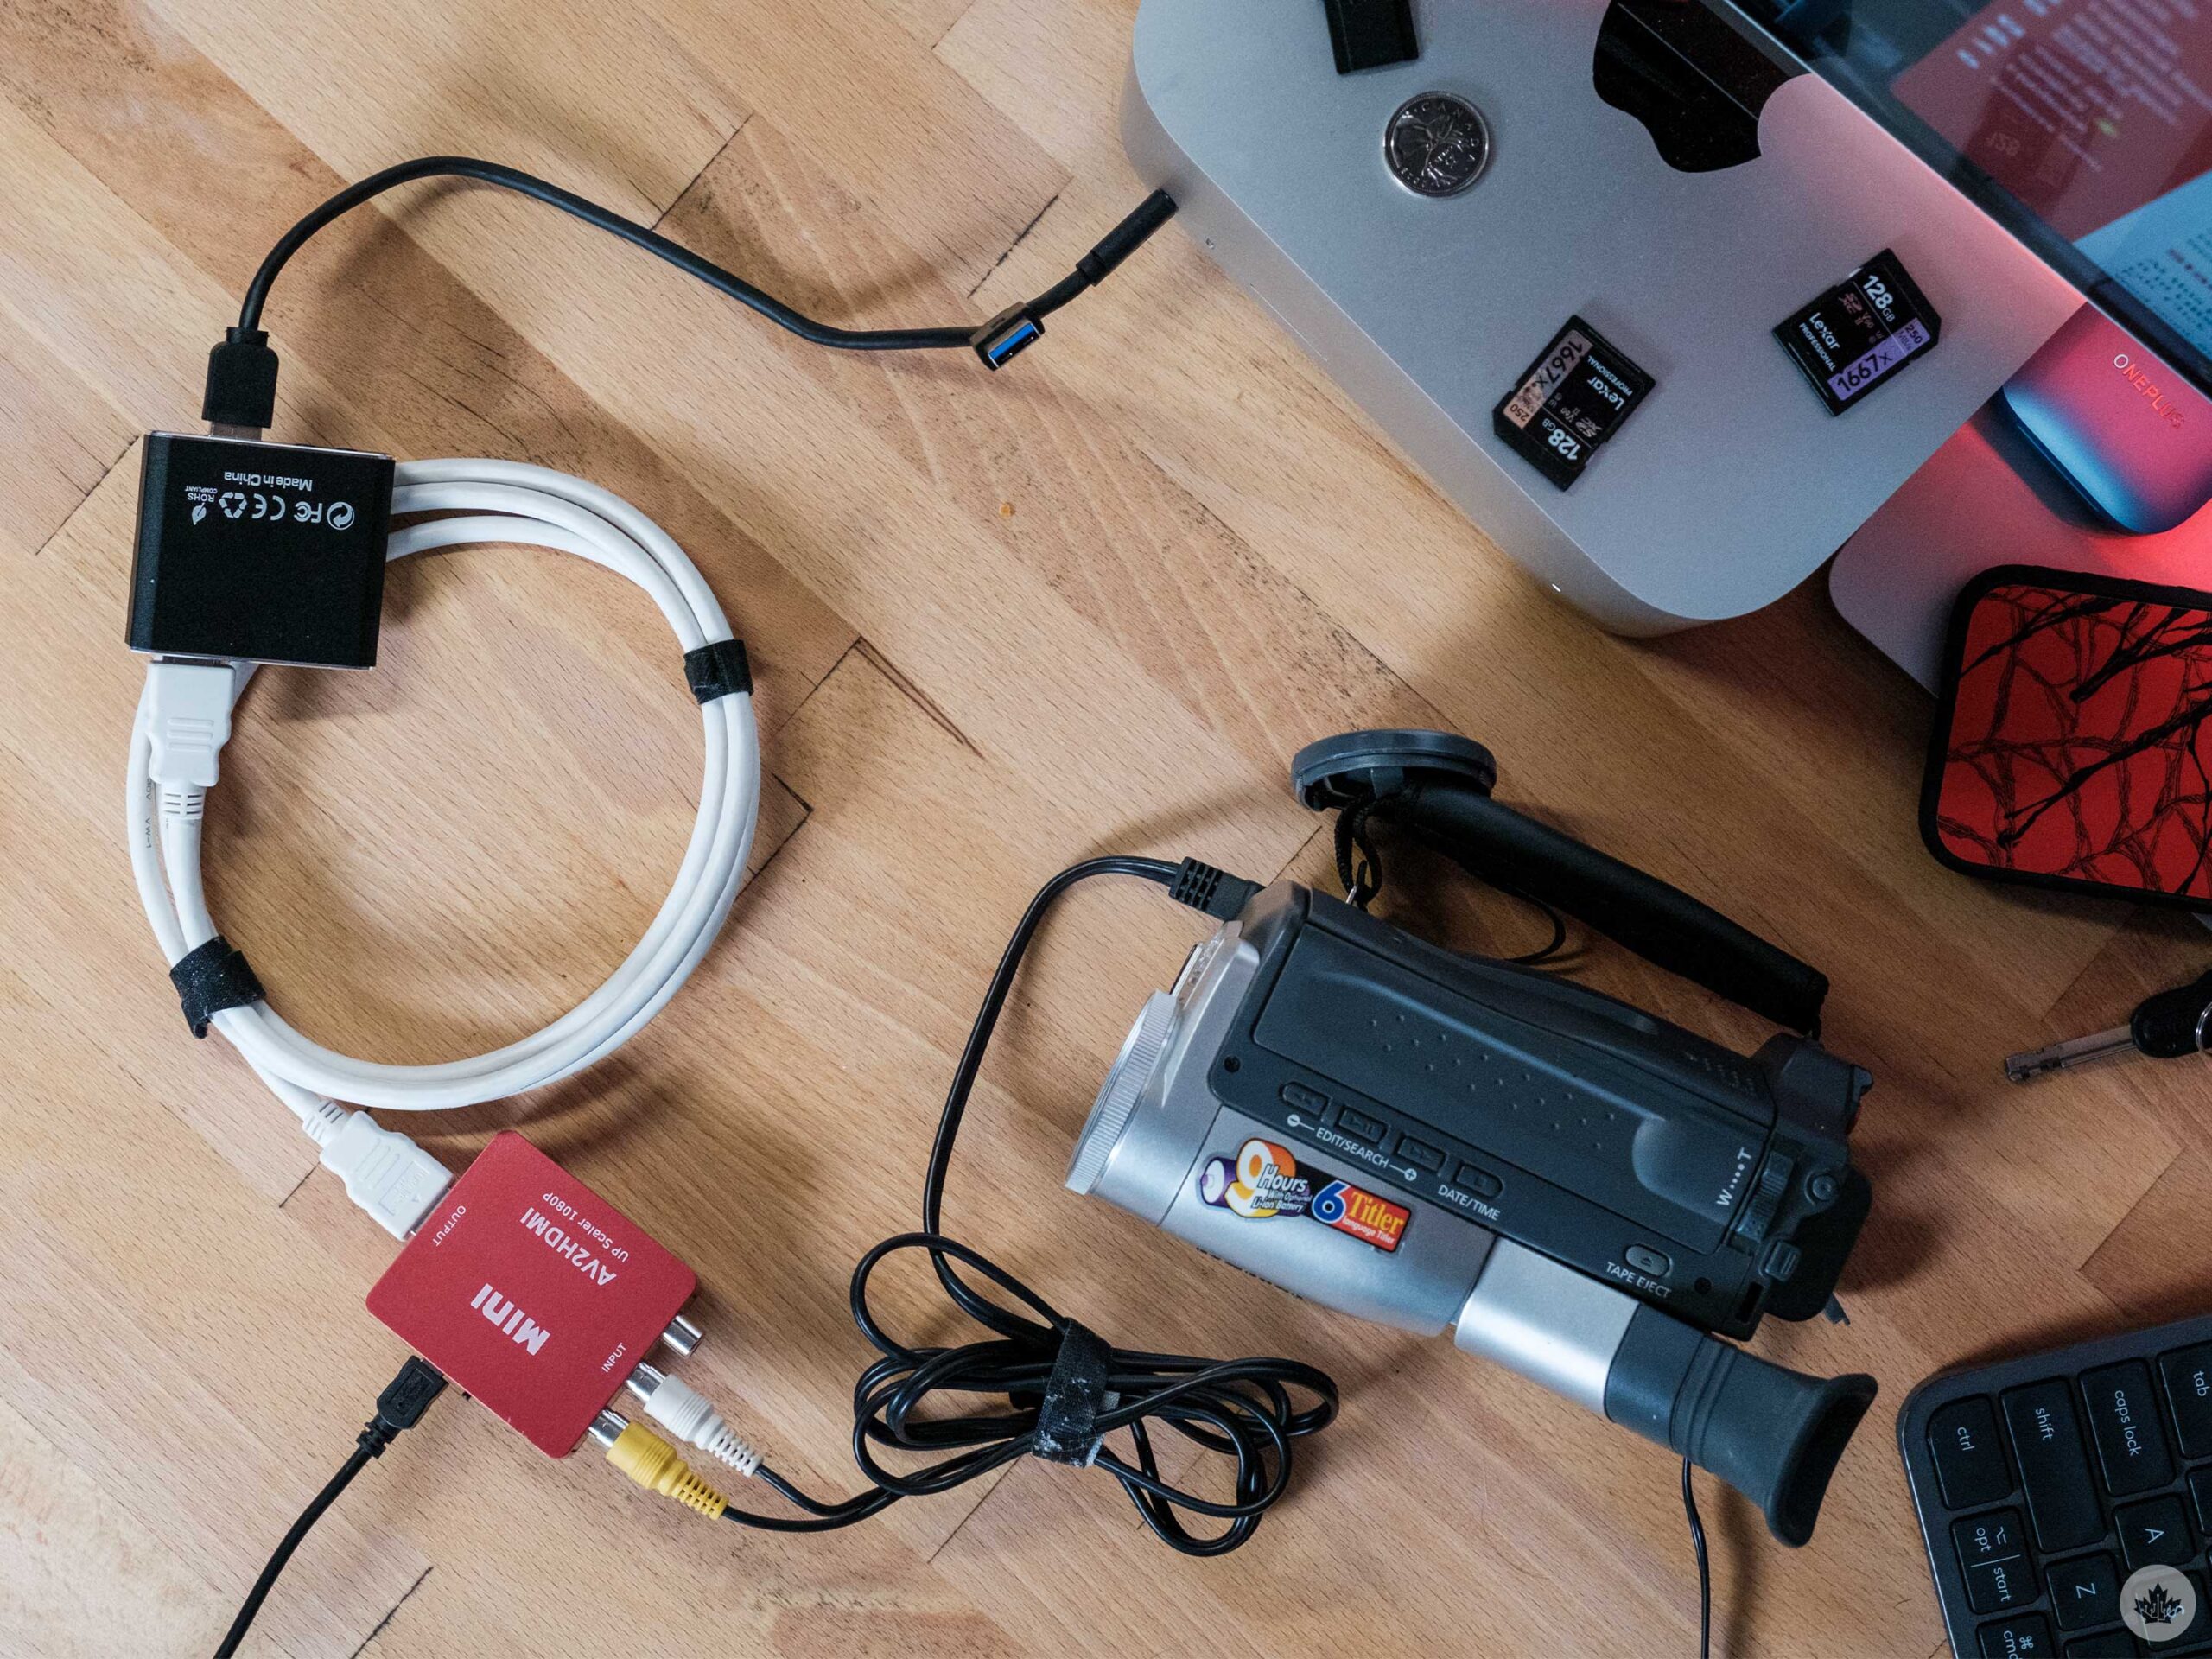
- Capture card (I used a dirt cheap one)
- Composite to HDR converter (also used cheapest one on Amazon)
- HDMI cable
- Computer (Windows/Mac/Linux)
- Open Broadcast Software (OBS)
- Old video camera
- Power for camera
- Camera’s AV cables
The AV cables are likely the hardest to track down if you no longer have them with your camera. My camera used a weird cable that goes from 3.5mm AUX to a White and Yellow composite.
Getting started
To start, I’m going to assume that you know how to use your camcorder to playback tapes, so if you don’t, take some time to sort that out. It may be second nature to some, but I’m going to be honest: it took me a while to remember that you need to hit stop to make tapes rewind automatically.
After you’ve mastered your camera, download Open Broadcast Studio (OBS) for your operating system. Once it’s open, you should be greeted by a large window that will show your video with five tabs below it.
We’ll work from left to right, so start in the ‘Scenes’ tab and create a new one. I called mine ‘Convert Tape.’
The Sources tab is next, and it’s how you tell the app to view footage from your camera. At this point, you’ll need to wire your camera to your computer. In my case, that meant taking the Aux to composite cable and running it from the camera to my composite to HDMI adapter. My adapter needs USB power, so I’ve also got it plugged in. From there, I take my HDMI cable and run it to the input side of the capture card. Then, I plug the USB of the capture card into my computer.
 Back in the Sources tab in OBS, click on the plus icon and choose ‘Video capture device,’ not ‘Capture card device.’ Once you select it, a screen will appear. Choose ‘USB video’ device or whatever the name of your capture card is. Then, name it after your camera to keep things organized.
Now we can jump over the ‘Audio Mixer’ and ‘Scene transition’ tabs to the ‘Controls.’ In this tab, you’ll see a button to ‘Start Recording.’ Press it whenever you start playing footage on your camera.
Just to keep you caught up, what we’ve done so far is set up our computer to mirror and record whatever the camera sees. It only works when my camera is in ‘Player’ mode, but I think that’s just one of the camera’s limitations.
Starting the recording
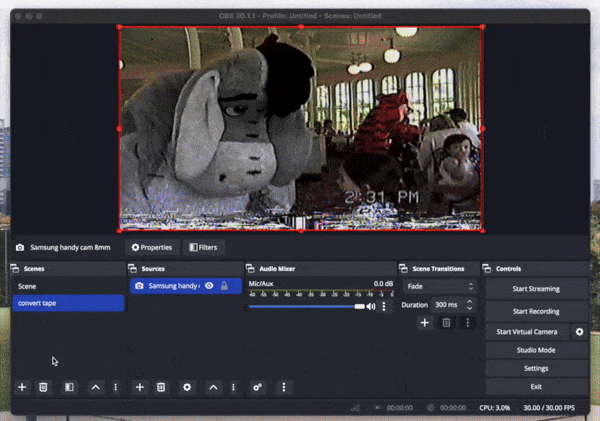 At this point, you can queue up a video on your camera, and when it plays, you should see it in OBS. If you want to record it, hit the Start Recording button in the Controls tab. Click it again to save your video.
If you want to select a specific folder to save your videos, click the Settings button and navigate to the Output section. In the Recording section, you can choose your preferred recording path.
One thing to be wary of is that you won’t be able to hear your video, but if everything is set up correctly, you should see the decibel meter bouncing. If not, you’ll want to ensure your composite cables are in the correct slots.
Anyway, here’s a demo of how the footage came out. I also applied some vocal isolation in Final Cut Pro to get rid of some static.
MobileSyrup may earn a commission from purchases made via our links, which helps fund the journalism we provide free on our website. These links do not influence our editorial content. Support us here.
