Gazing into the night sky is a peaceful hobby that’s accessible to all, no matter where on the Earth you’re located. However, once you add photography to the mix, the hobby promptly becomes an expensive one.
You start looking at telescopes and find that not all of them are suitable for taking images of the night sky. You then realize that some telescopes are suited for observing the night sky, while others are better for taking images. And getting the best of both worlds comes at a cost — normally over $1,500 for a decent setup.
Then comes the mount. You can’t just pick up an expensive telescope and a (CCD Charge Coupled Device) or CMOS (Complementary Metal Oxide Semiconductor) camera and be ready for astrophotography. You need an equatorial (EQ) mount that aligns with the rotational axis of the earth to track an object and cancel out star trailing in long exposure images.
As the weight of your scope goes up, so does the price of the EQ mount. Alas, let’s not forget about the learning curve. Locating objects in the dark night sky requires practice, patience and persistence. Although bright objects like the Moon, Jupiter and its satellites would be accessible at first try, fainter deep space objects would likely not.
This is where ZWO comes in. ZWO was established in 2011, and it is one of the staples in the astrophotography market. It manufactures a range of products, from mounts and telescopes to astrophotography cameras, software and accessories.

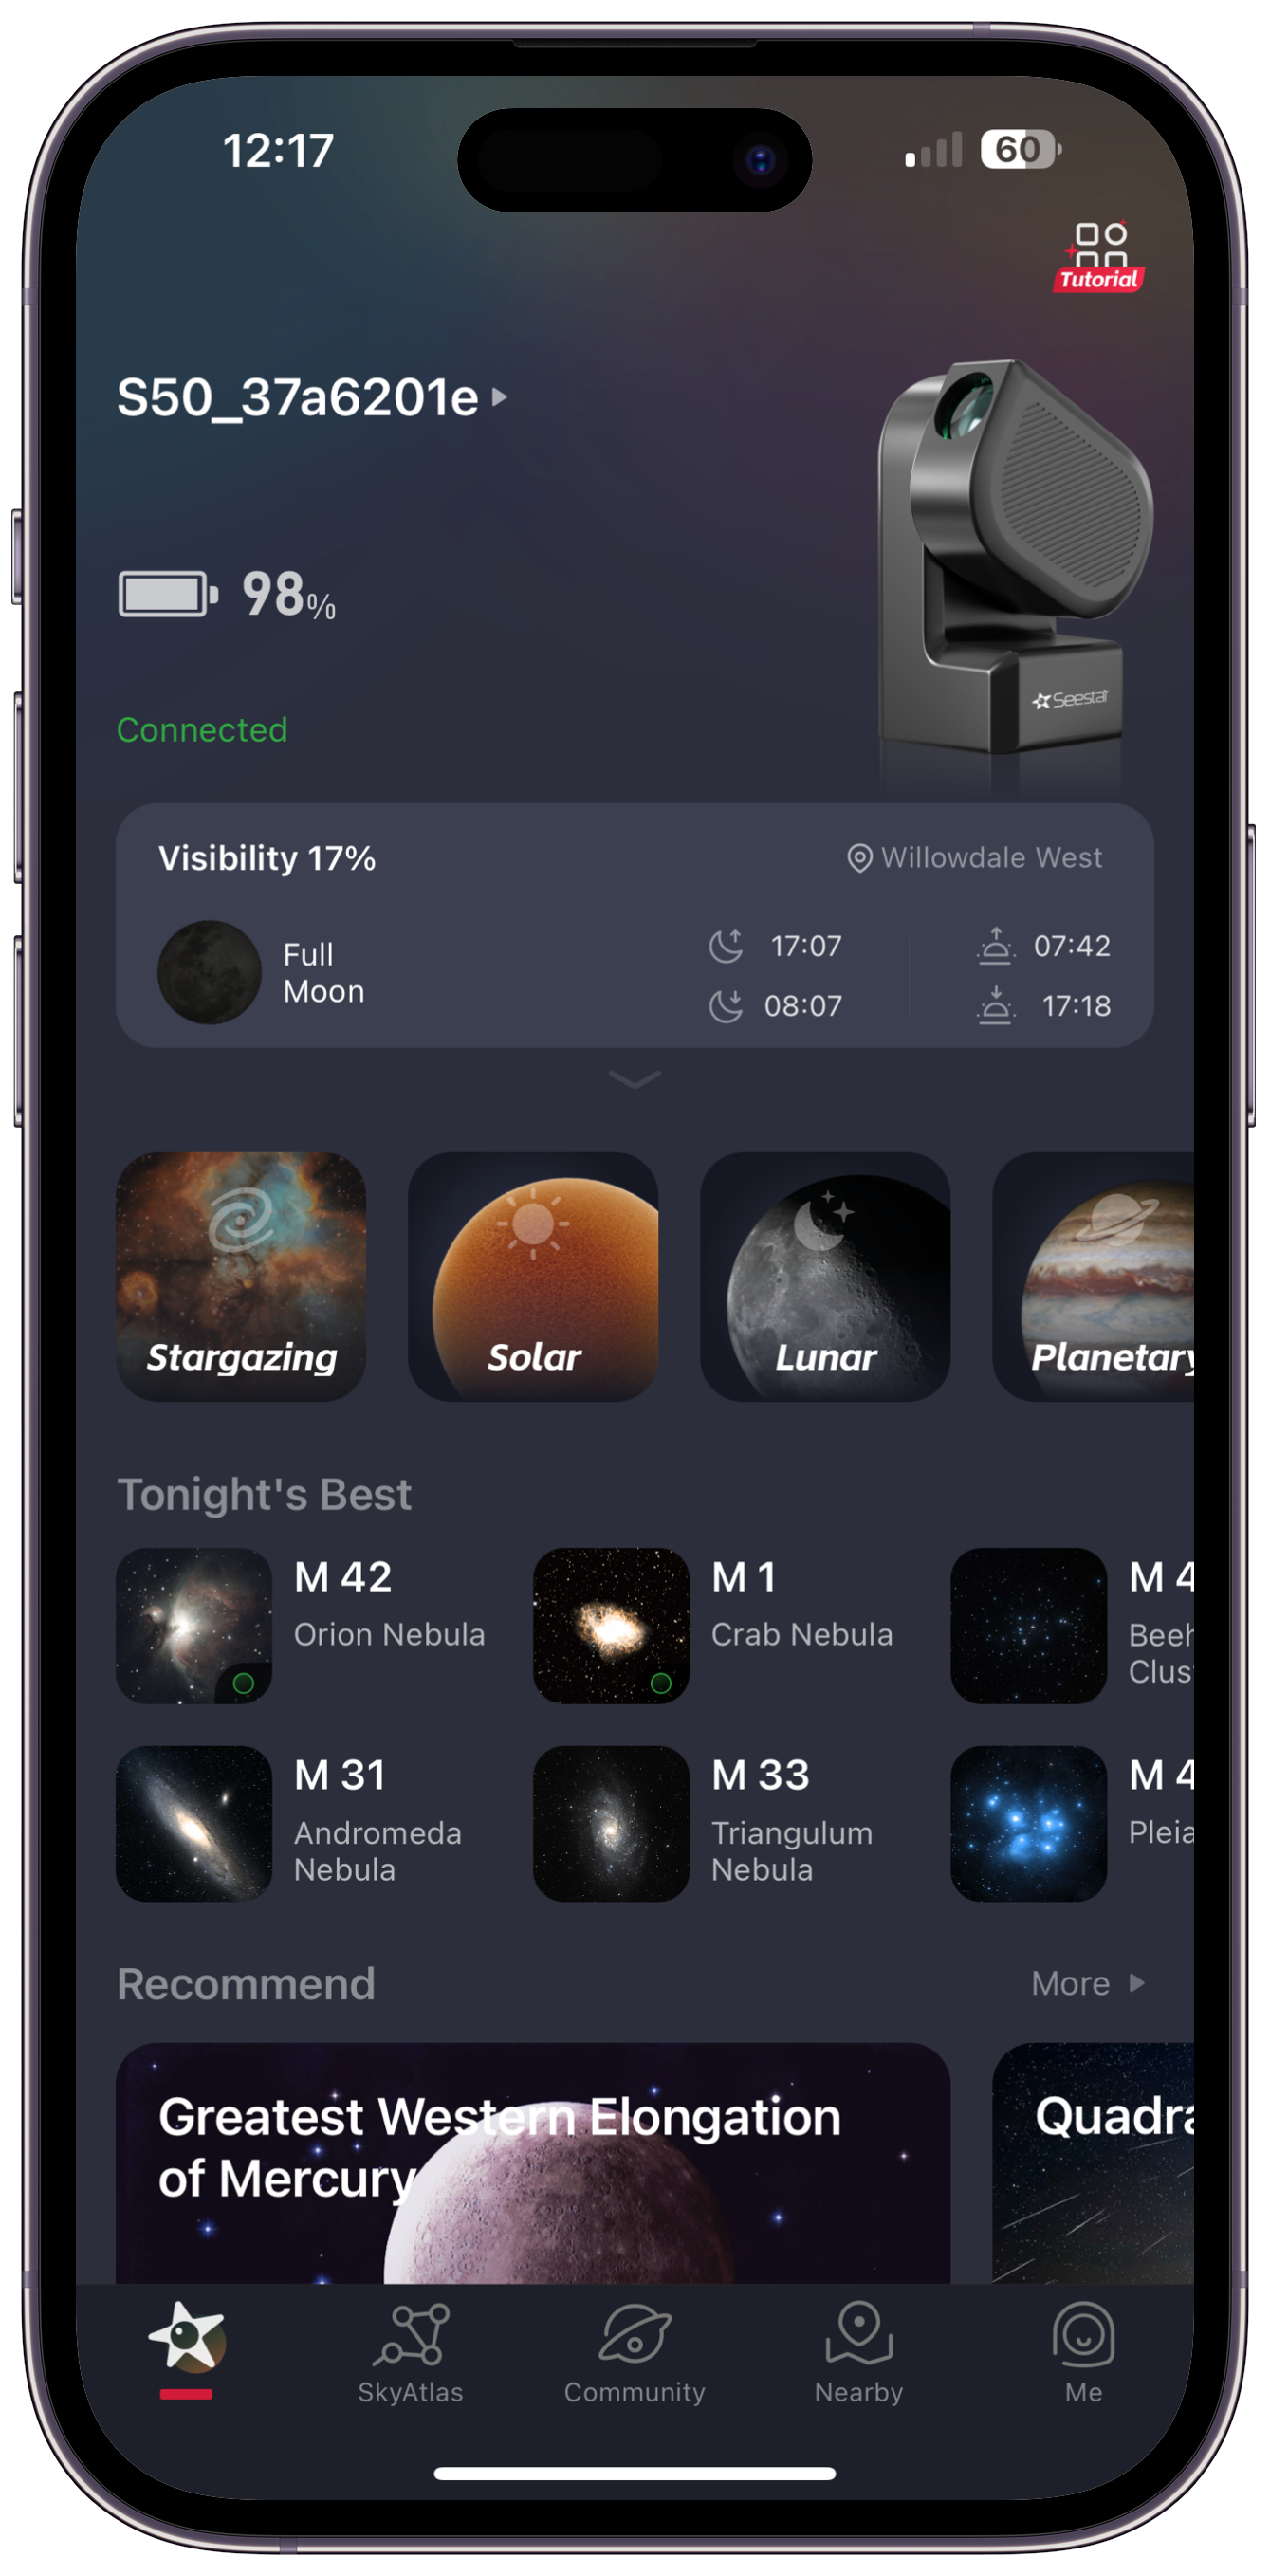
In April 2023, the company announced a new smart telescope called the Seestar S50 for $674 , and since then, it’s been flying off shelves.
What the Seestar S50 essentially does is combine all of the aspects of a regular astrophotography rig, and offer it in a compact and easy-to-use package.
It’s aimed at beginners and enthusiasts who want to enjoy the wonders of the night sky without the hassle of setting up and aligning a traditional telescope and camera, though beginners aren’t the only ones who would enjoy using the Seestar S50. More experienced amateur astrophotographers who don’t have the time to set up full rigs on certain days or those unable to lift the heavy load of standard rigs would also love the Seestar S50.
I have experience using telescopes, but I have no prior experience using an astrophotography rig. So, in essence, I went into testing the SeeStar S50 as a complete astrophotography noob.
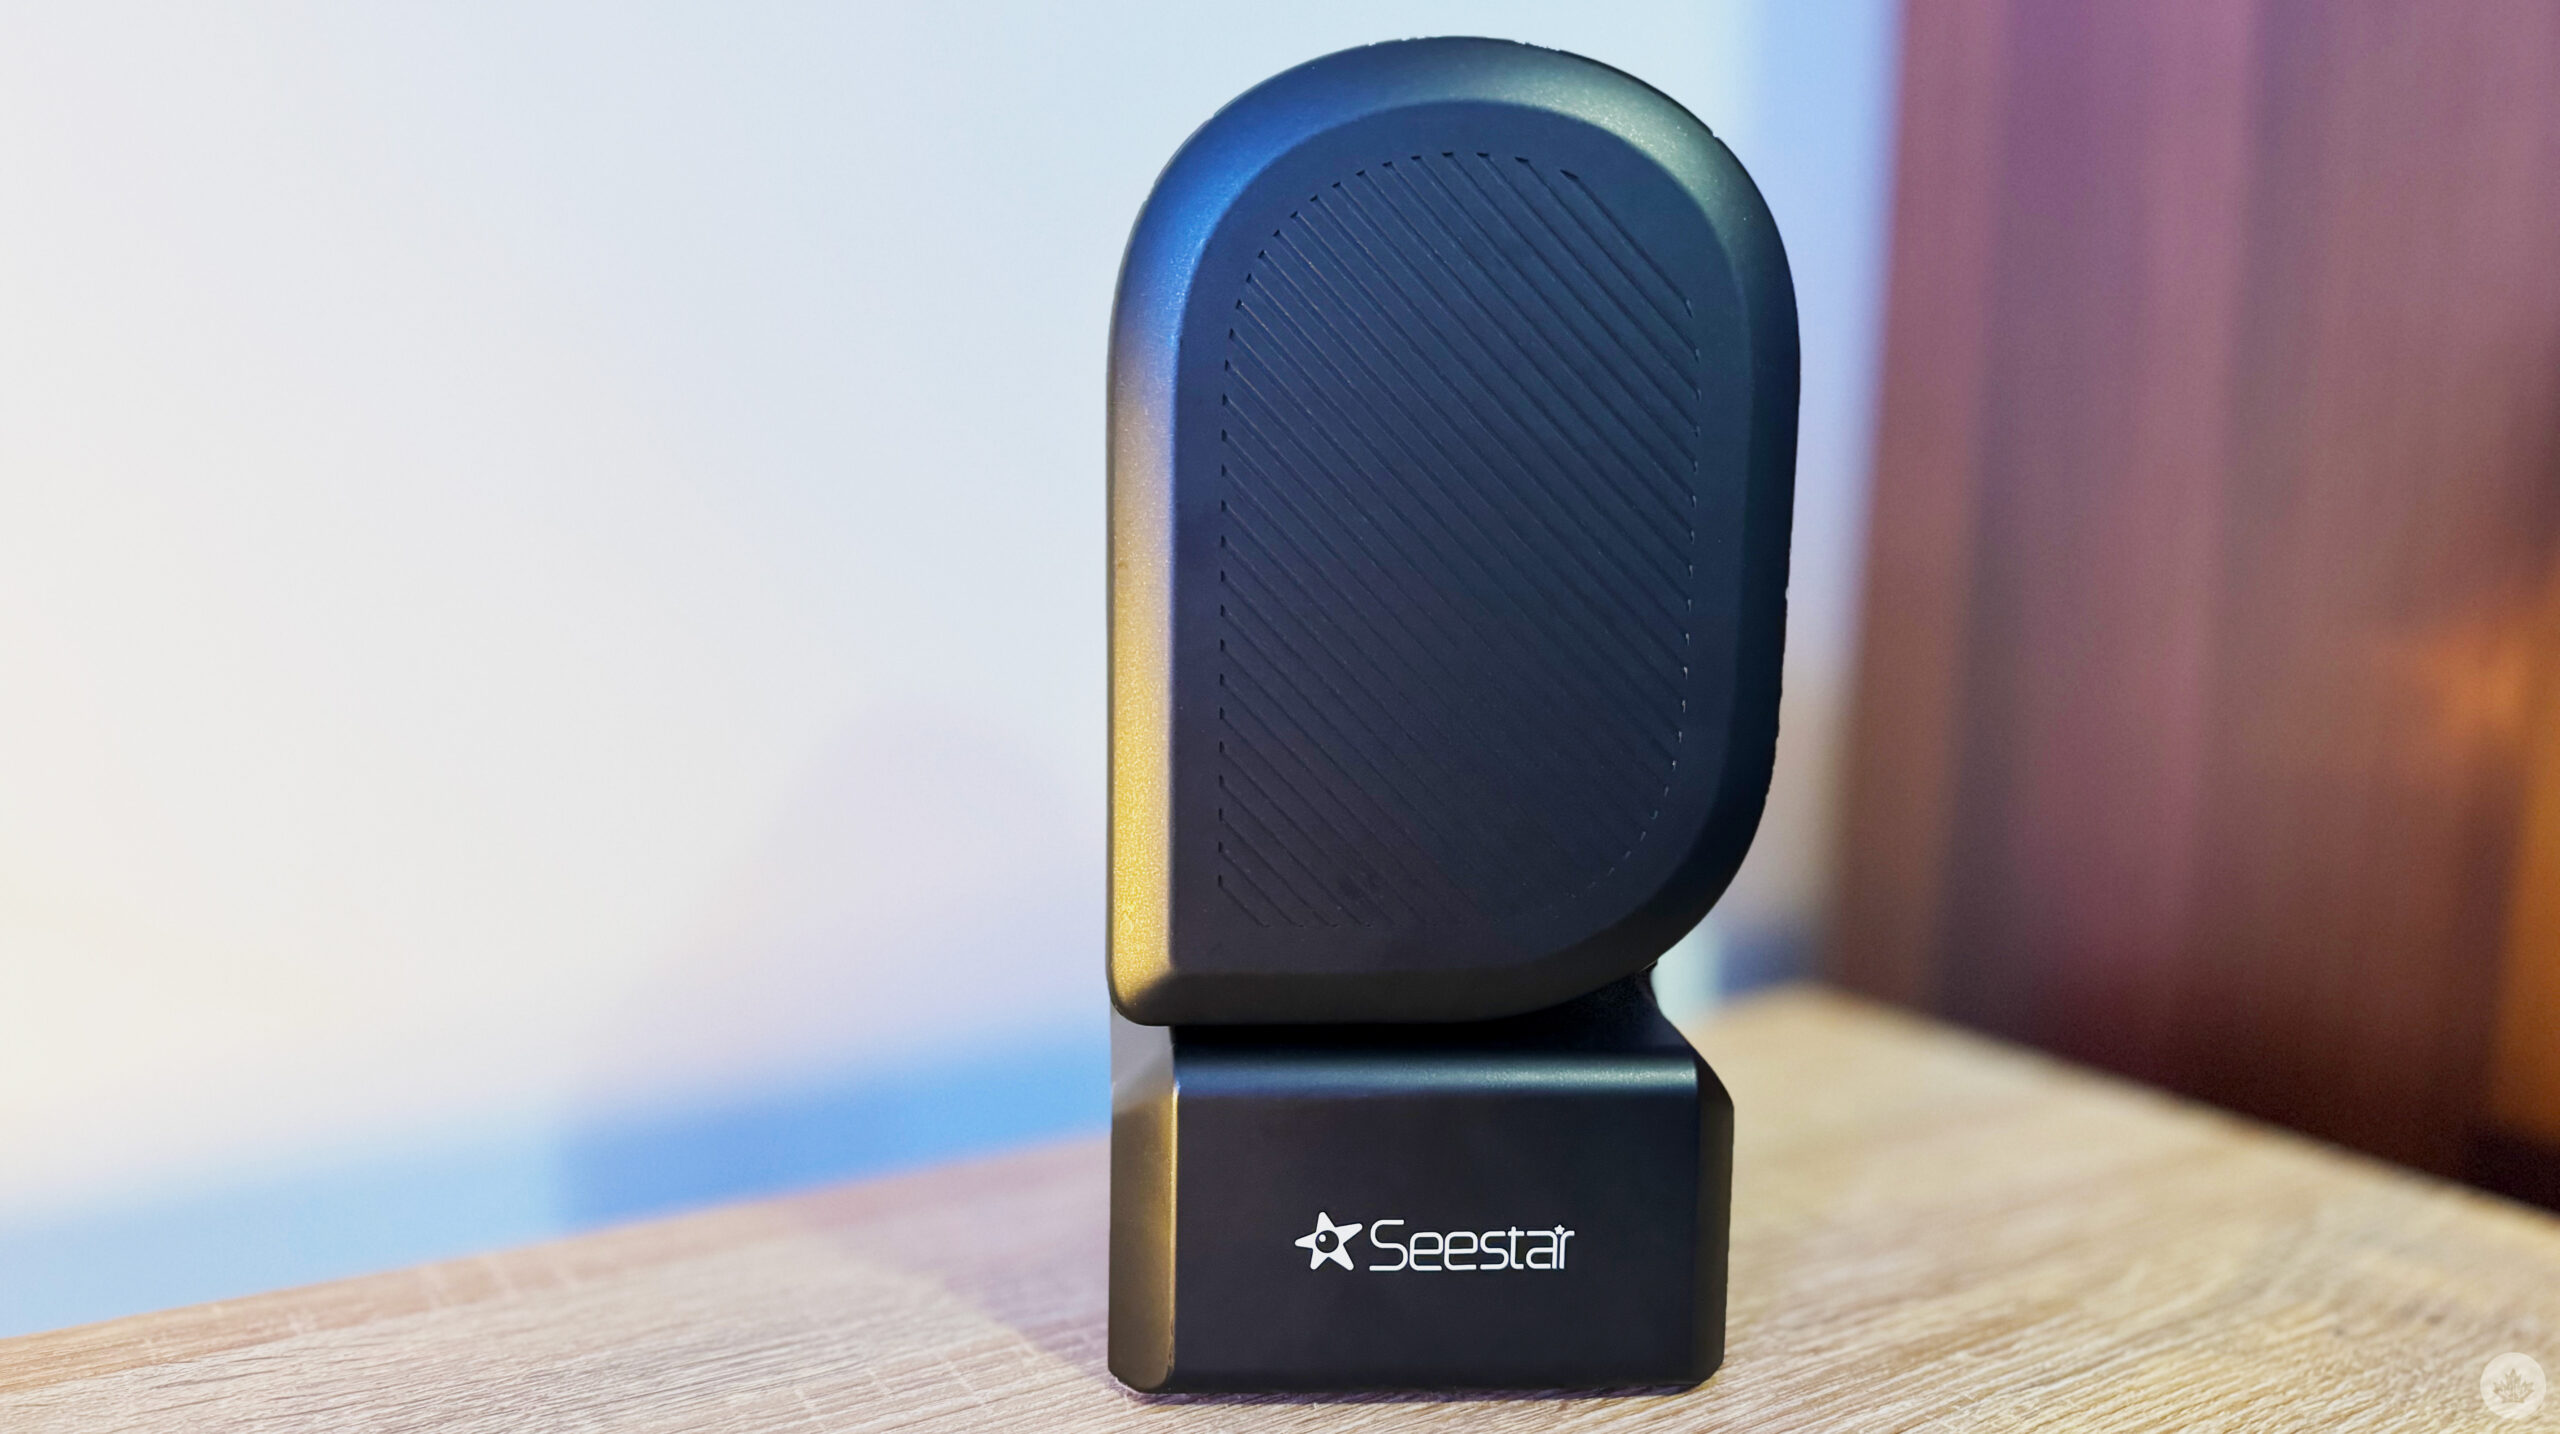
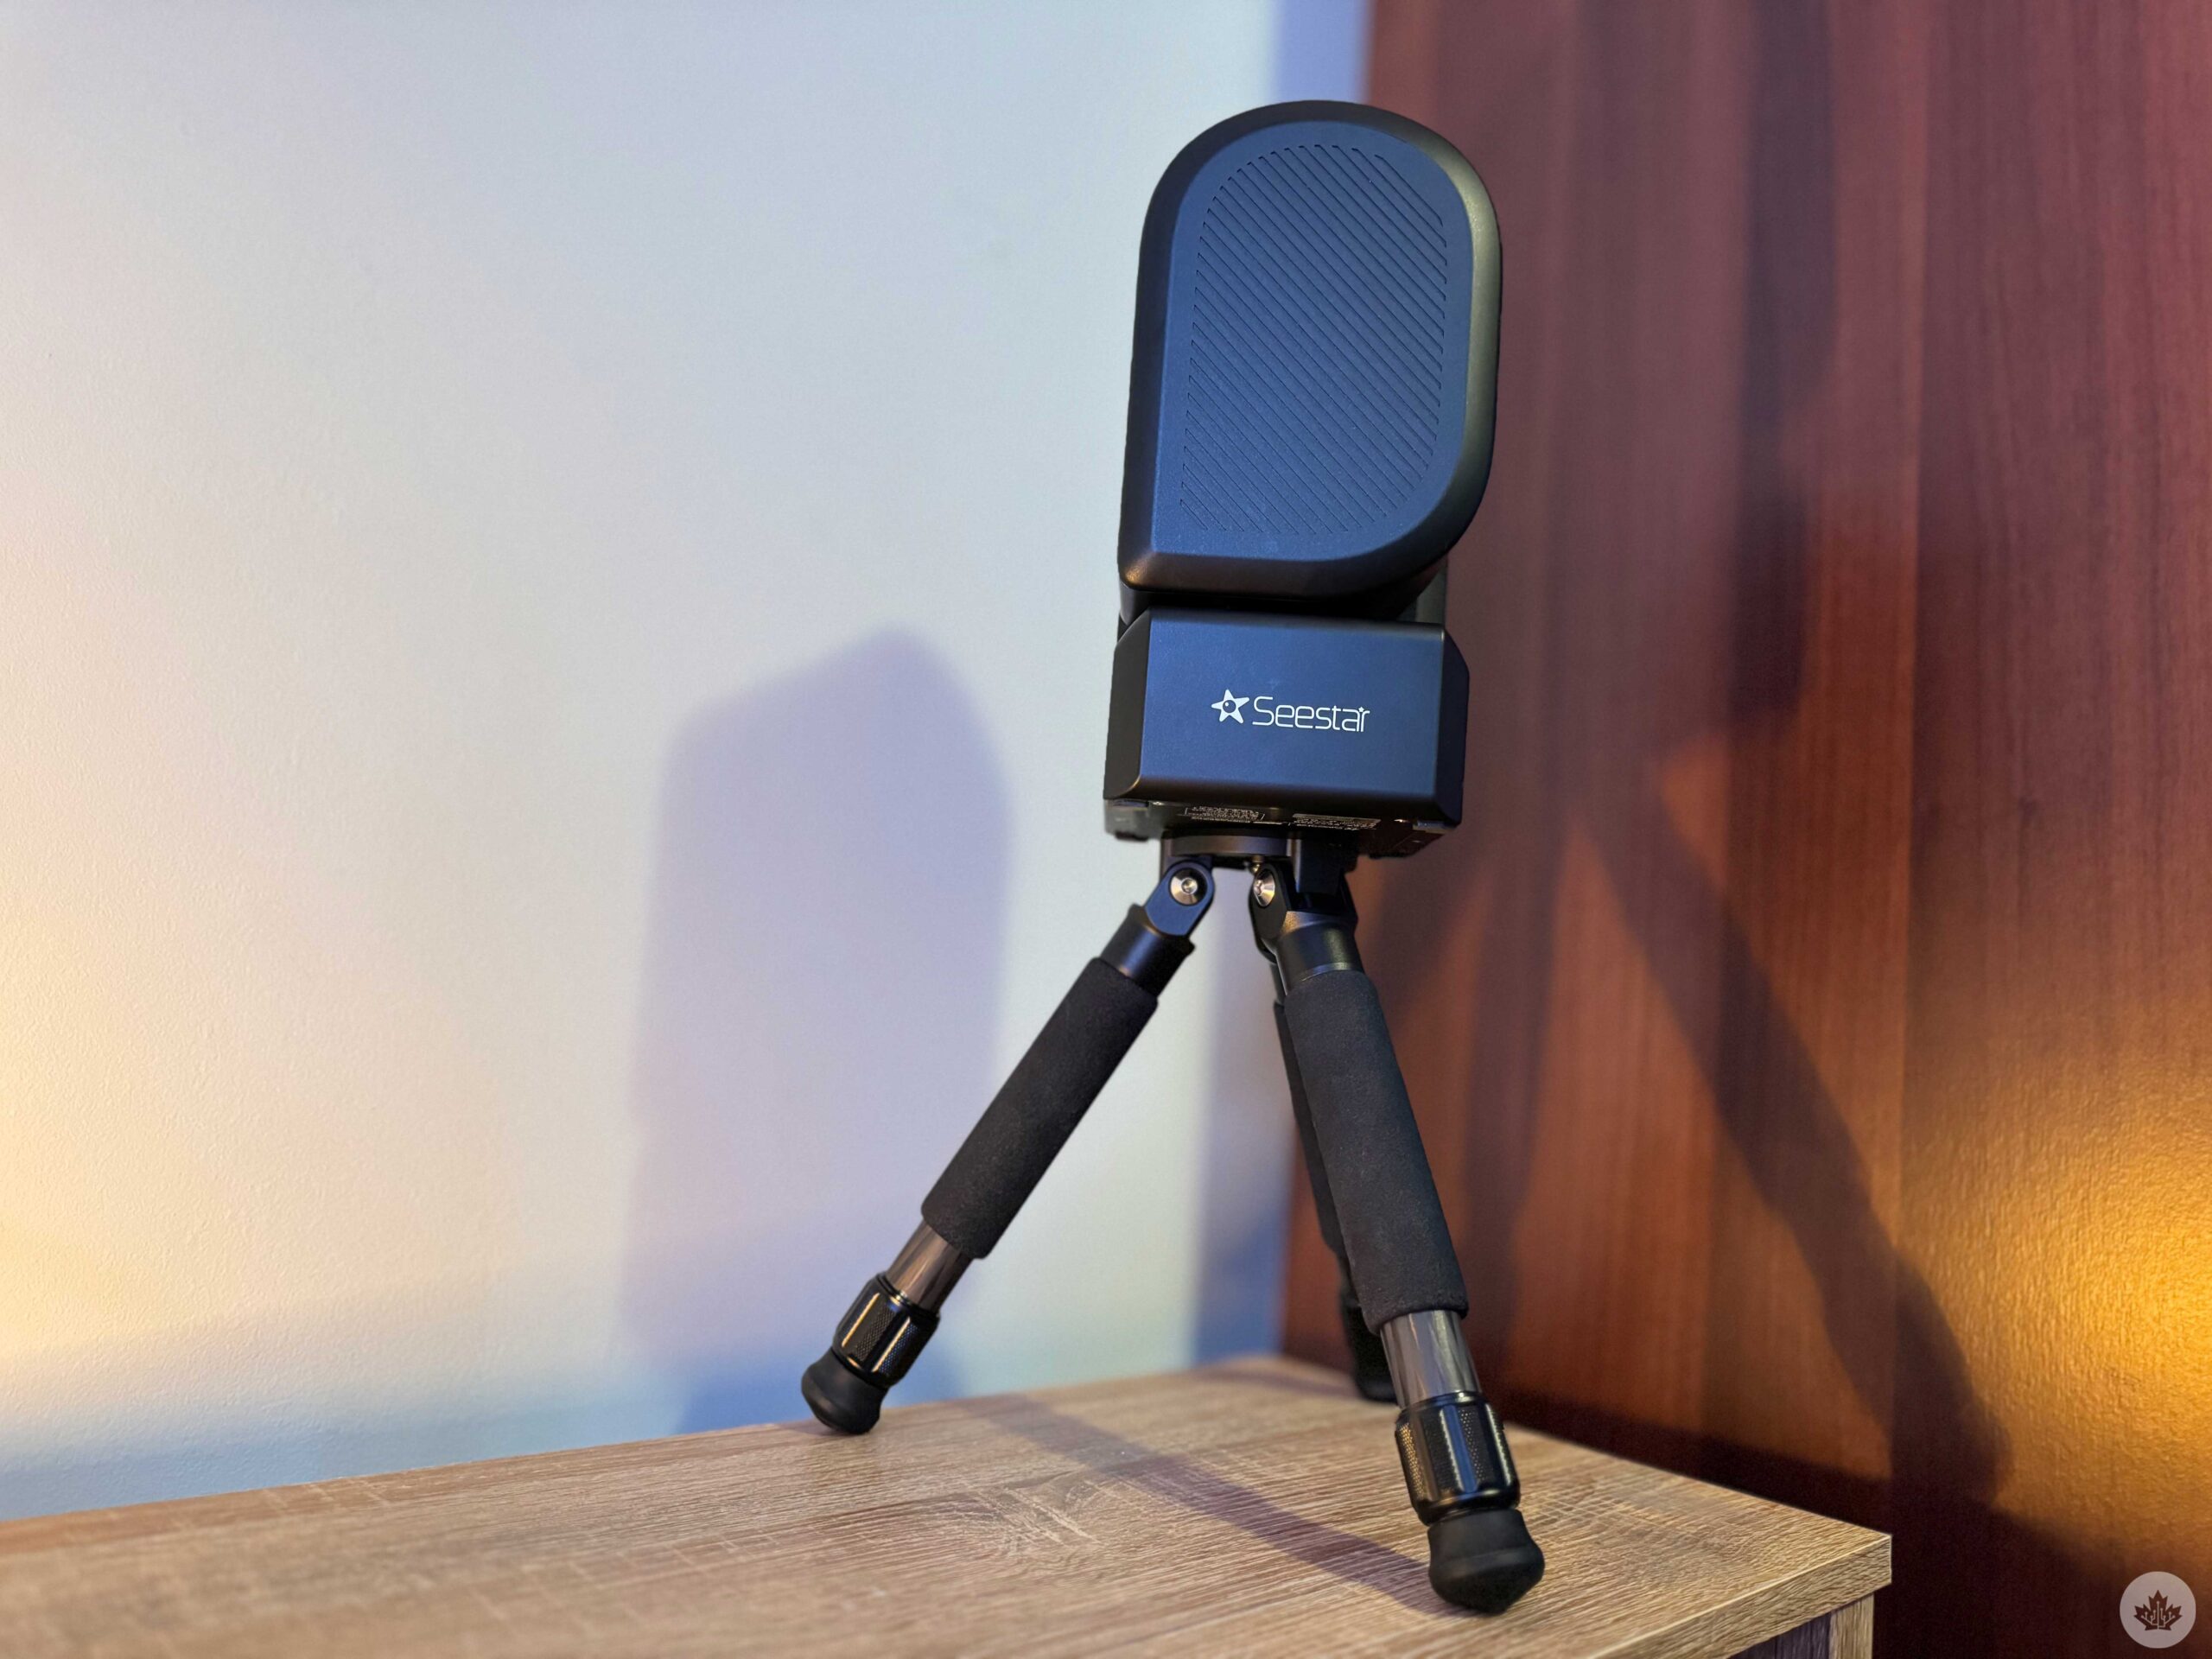
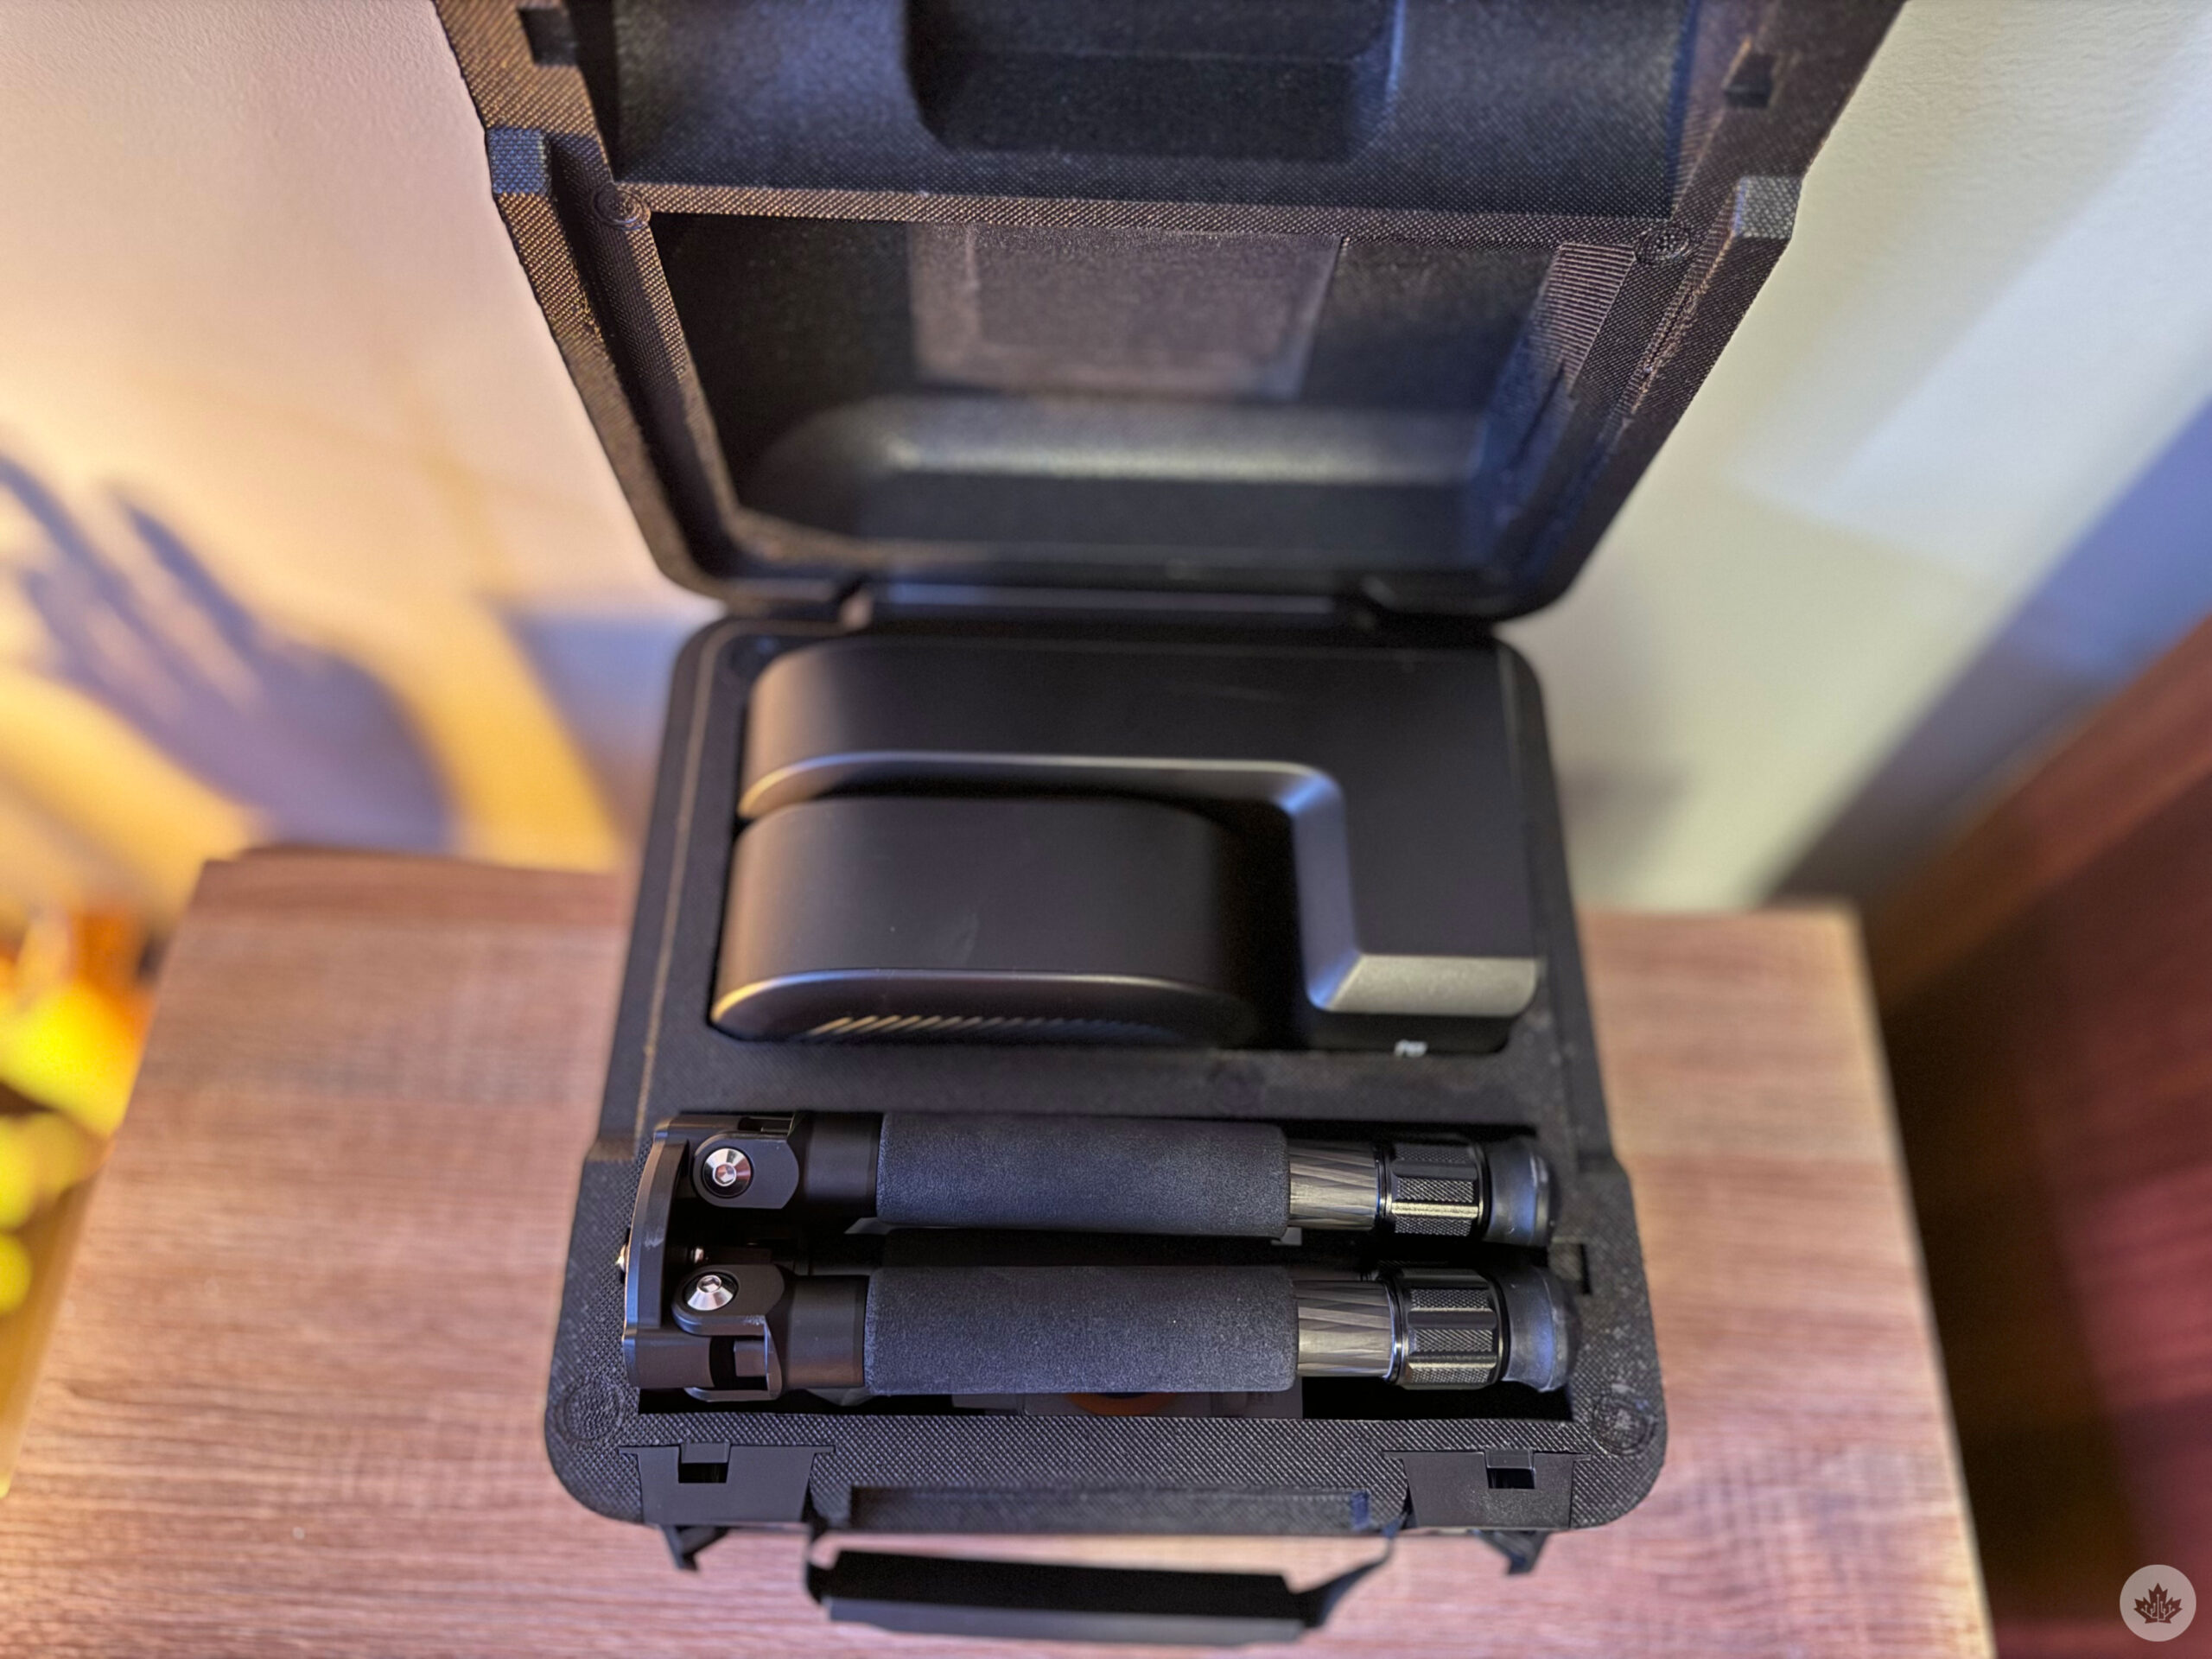
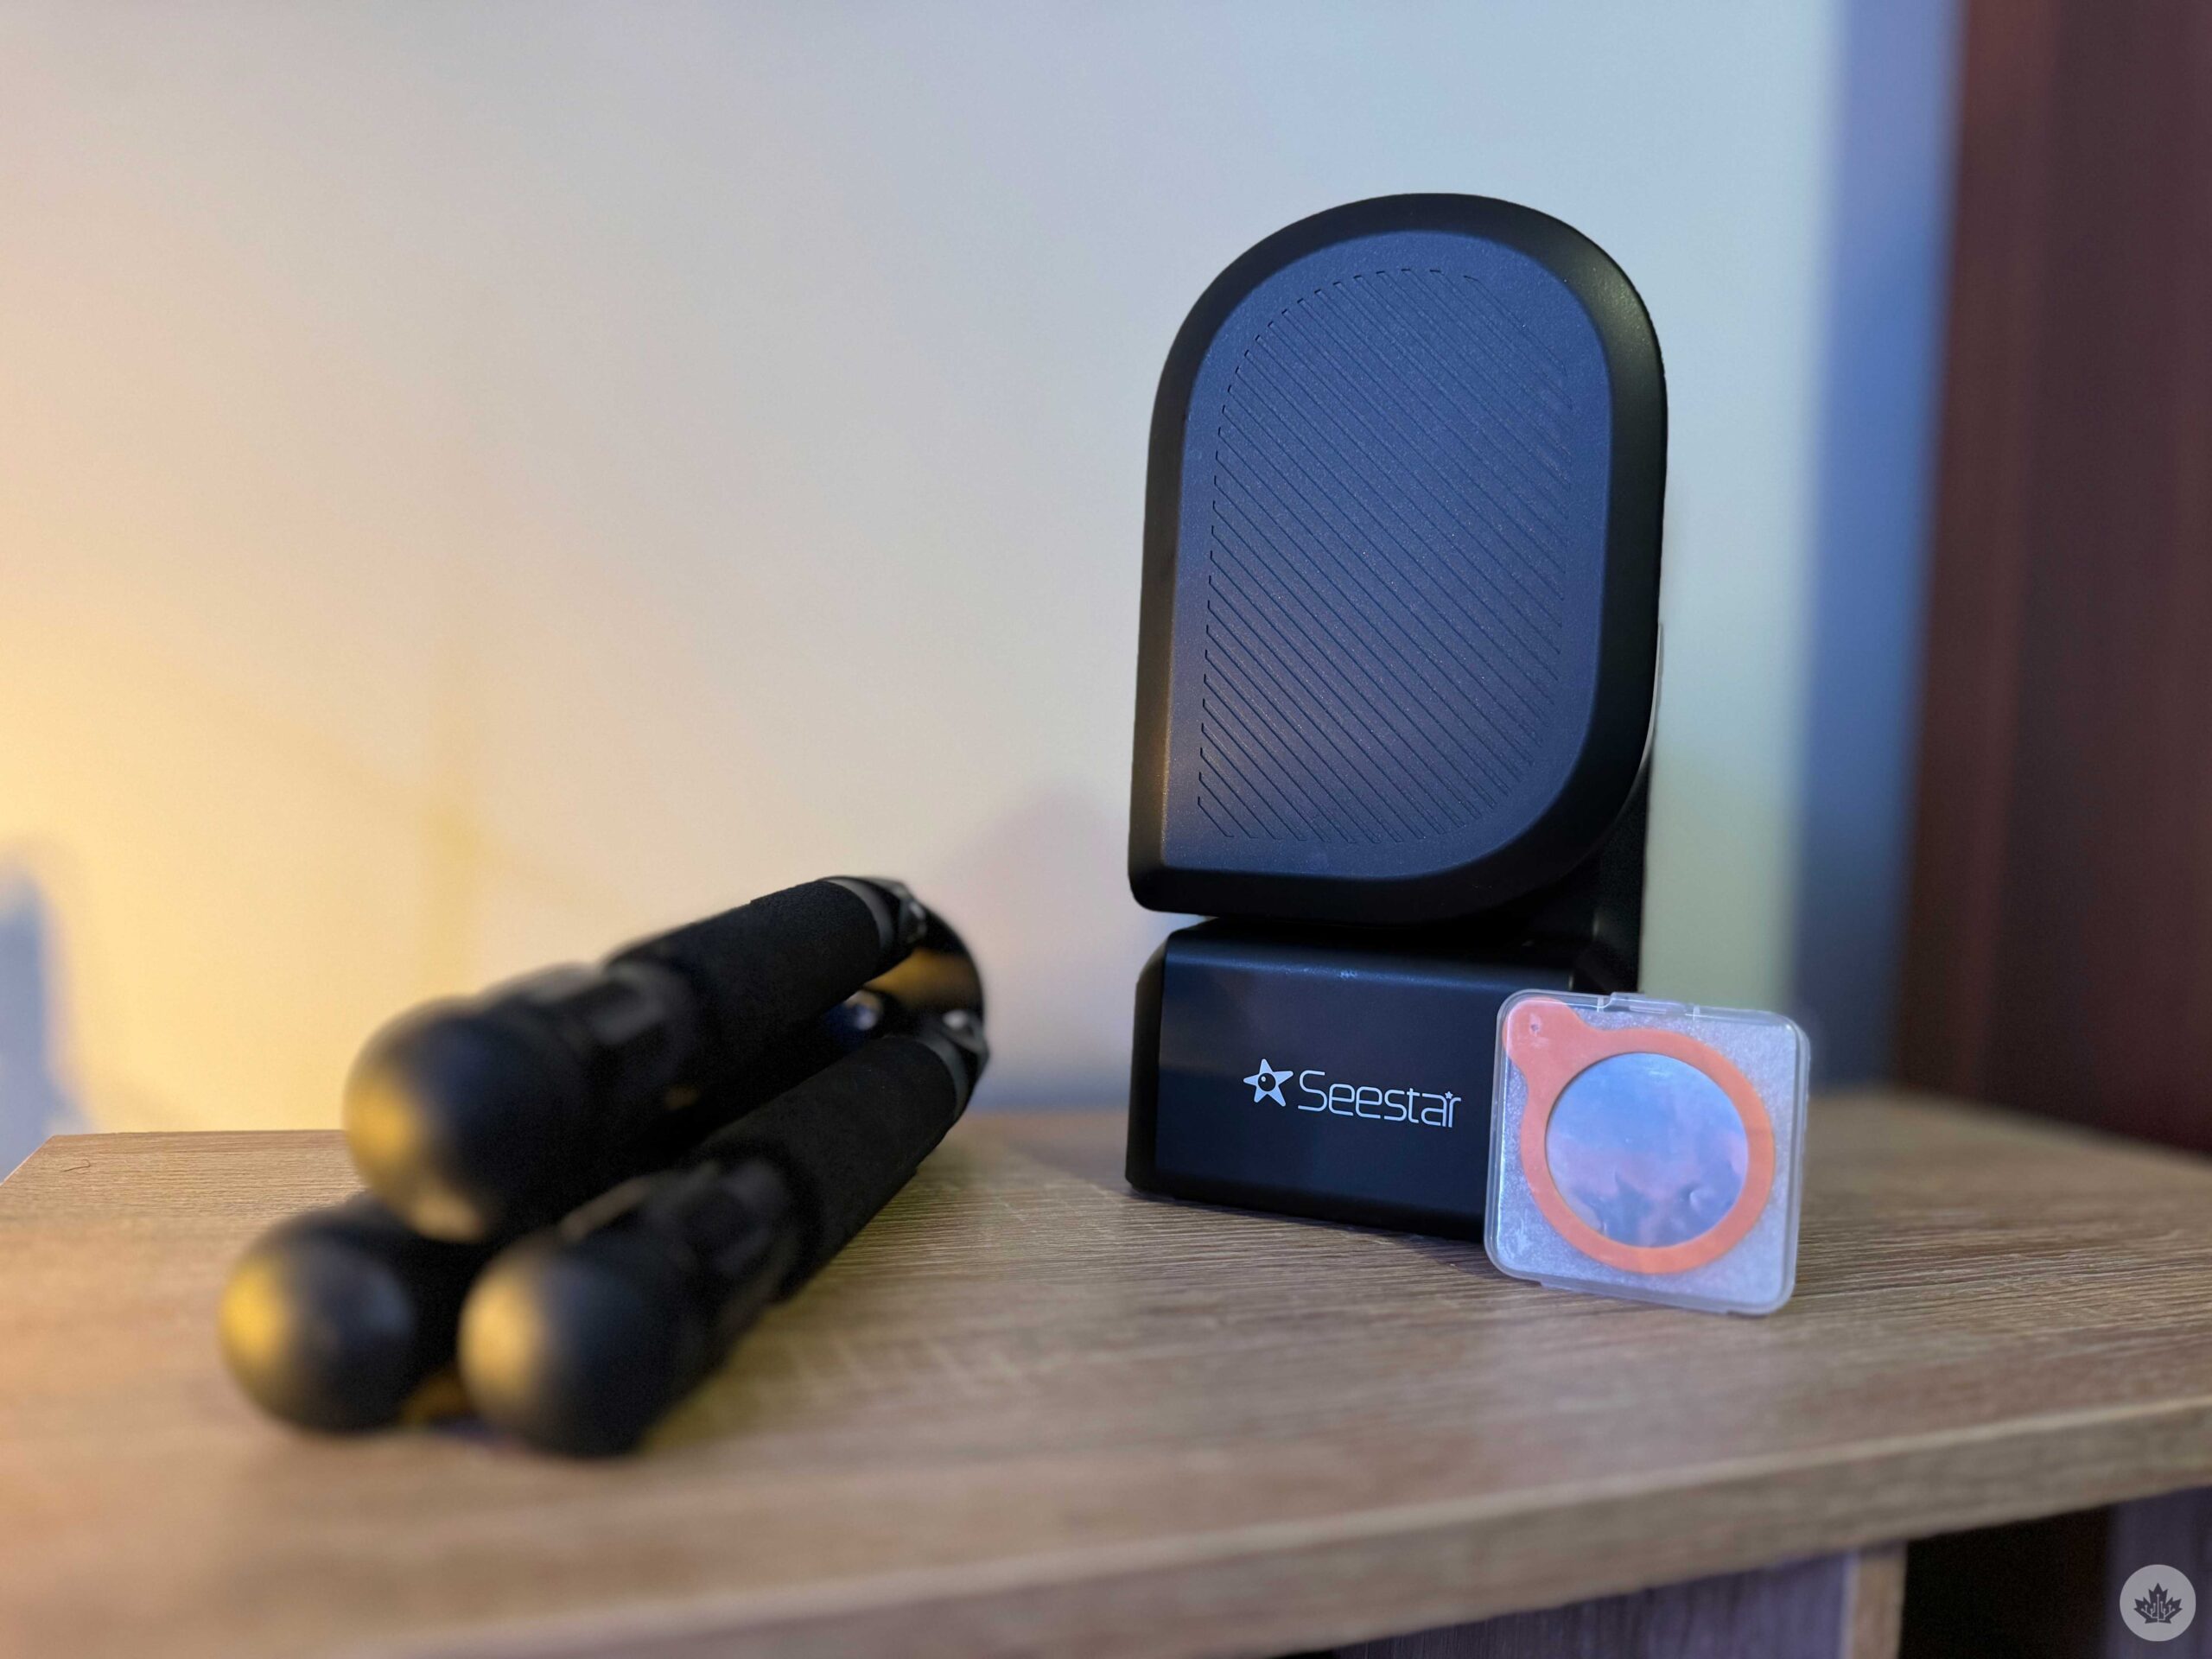
What I like the most about the SeeStar S50 is its small form factor and its futuristic design. It weighs roughly 3kg, making it easy to carry around and transport. It comes with a sturdy carbon fibre tripod that can be extended if needed, a solar filter for looking at and imaging the sun, a USB-A to USB-C Cable, and ZWO managed to fit all of that in a compact storage case with a handle.
It doesn’t have an eyepiece to look through like a traditional scope. Instead, it connects to the SeeStar app on your phone or tablet and displays what the scope sees. What this means is that you can set the scope out, align and calibrate it, and then hop back inside the comfort of your house and continue to observe or shoot, which is especially useful during the frigid Canadian winters.
The app allows users to select and track celestial objects, capture and stack images, and even share them online. The app guides users through the setup and operation of the telescope when using it for the first time. Although this was a bit confusing at first, over the course of 2-3 sessions, I got the hang of the app and all its ins and outs.
The Seestar s50 features a triplet 50mm apochromatic lens with a focal length of 250mm and a focal ratio of f/5. The unit also has a built-in dew heater to prevent condensation on the lens. Inside, it features a Sony IMX462 sensor CMOS sensor with a 1920 x 1080 pixel resolution that features high sensitivity and low readout noise, making it suitable for capturing faint objects.

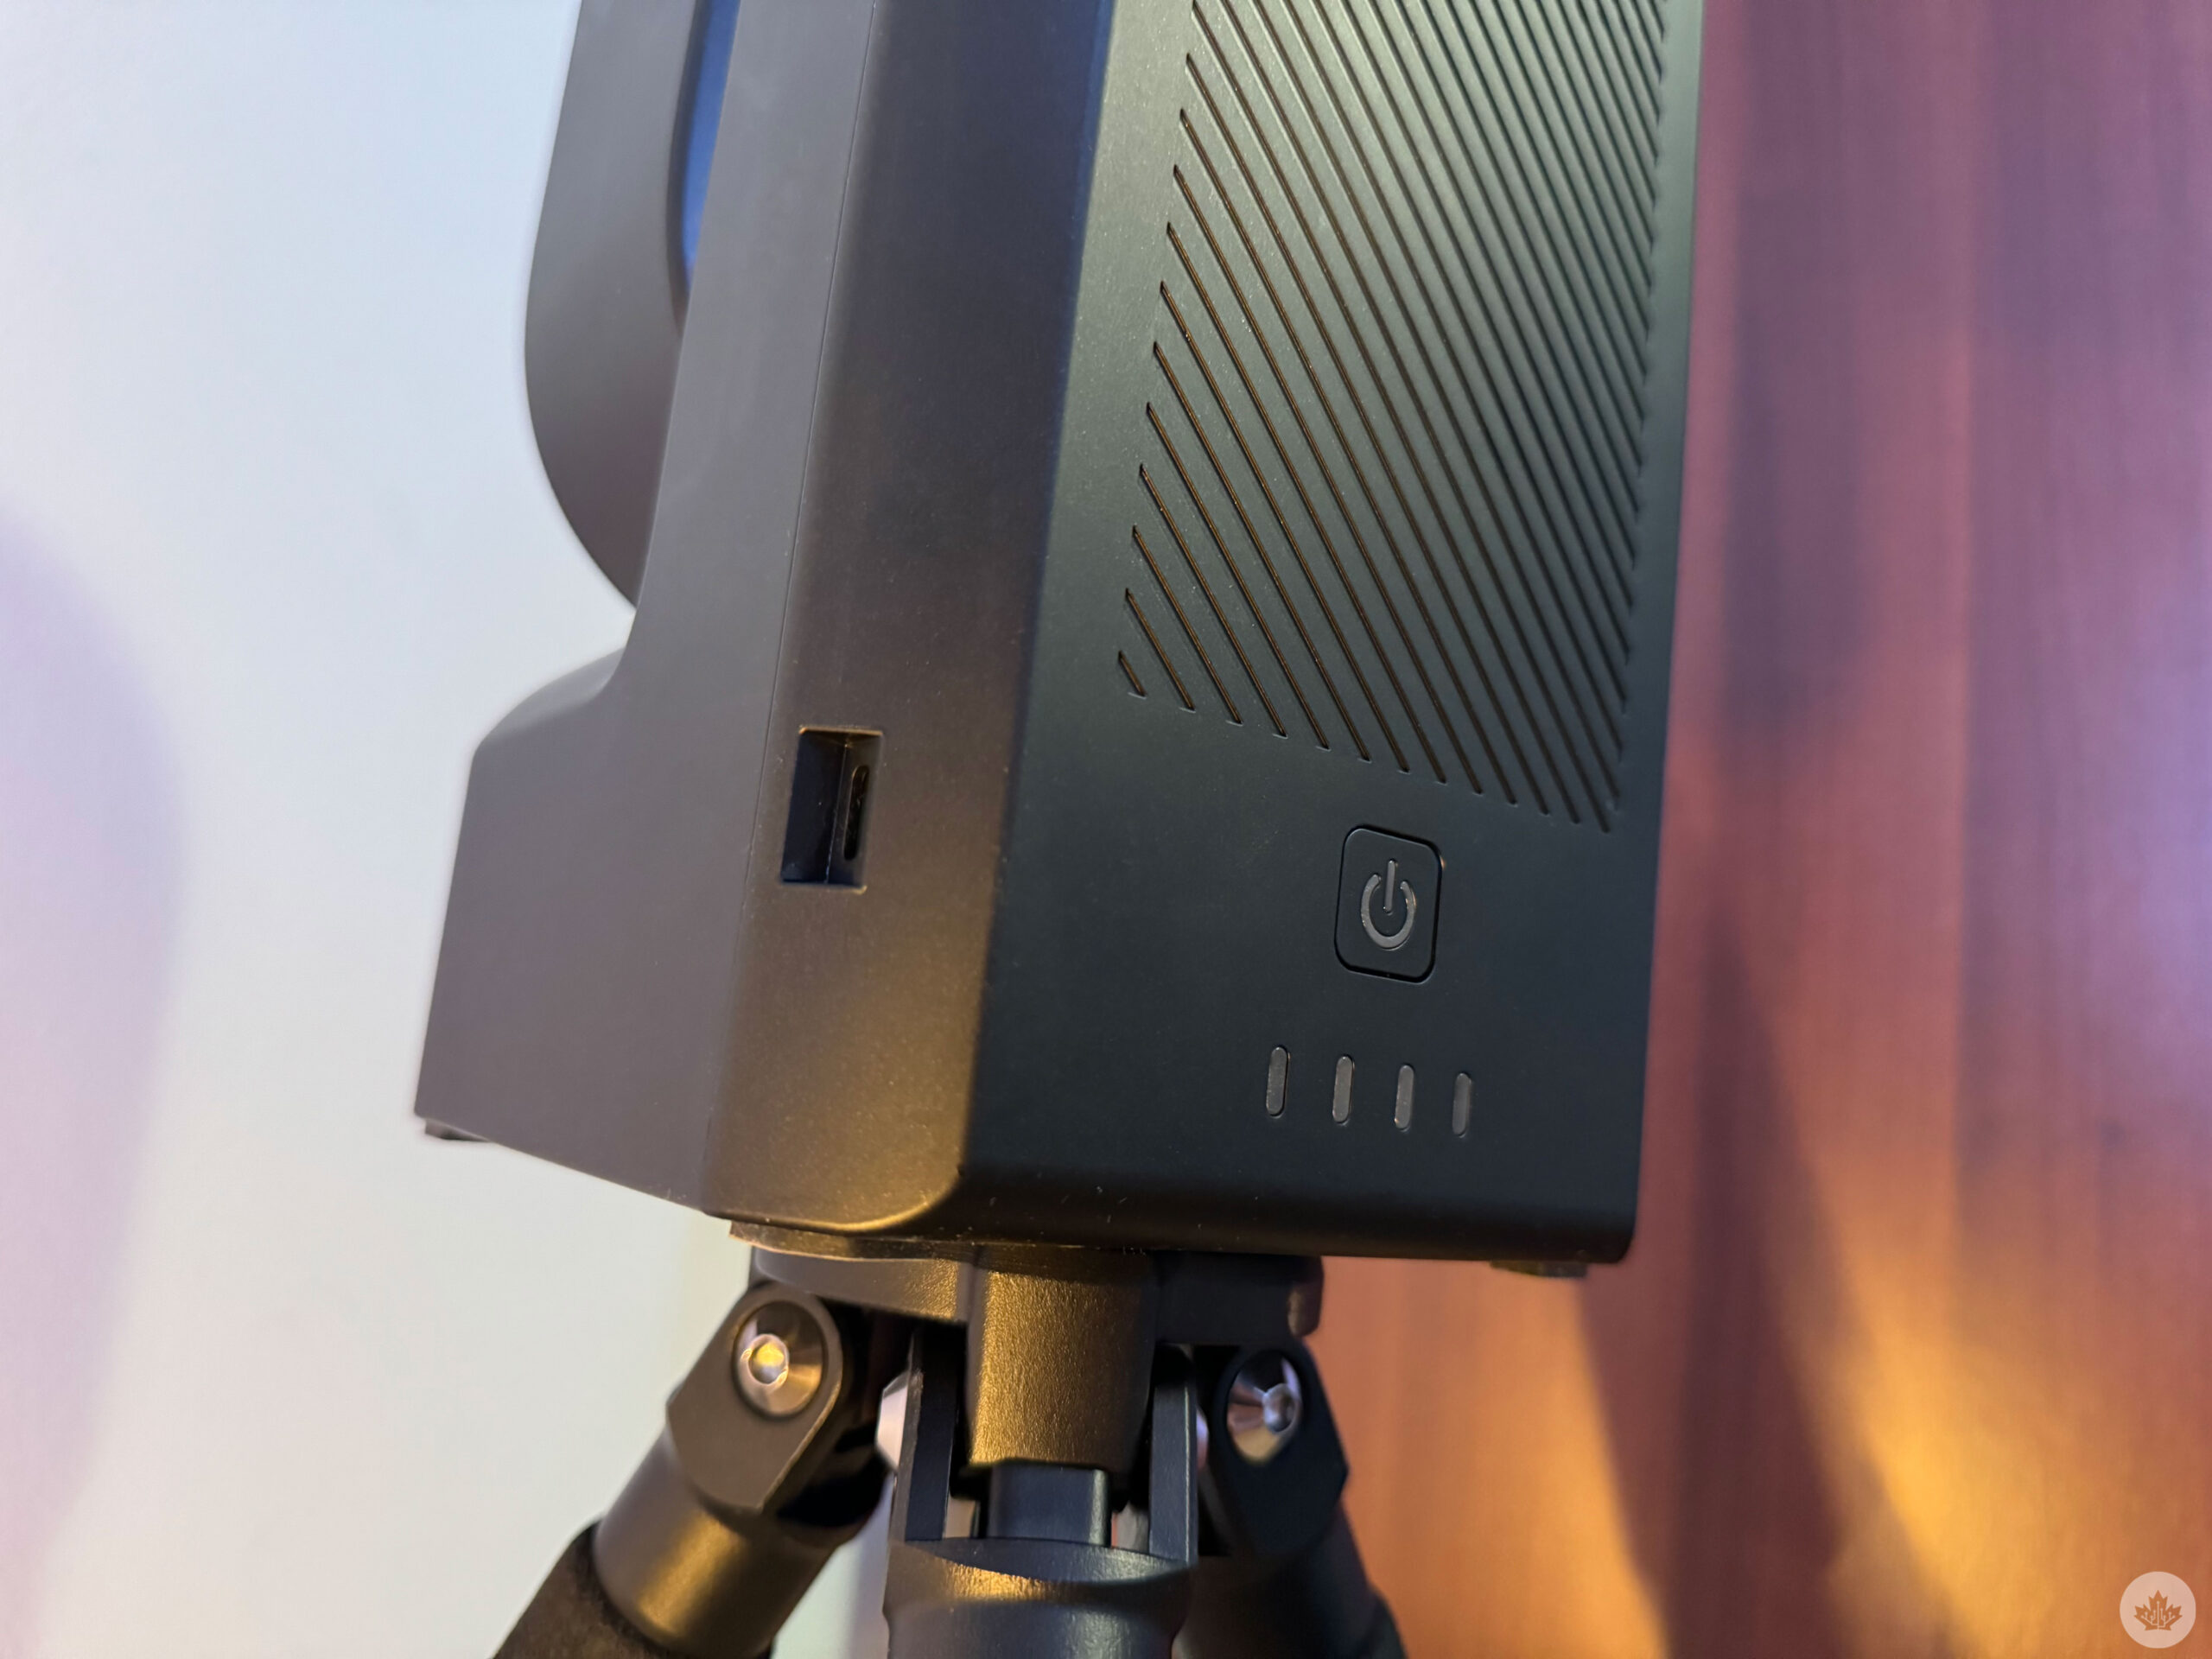
The device also has 64GB of built-in storage to store the subs that you shoot. The SeeStar S50 features a 6,000mAh battery that’s good for roughly 5 hours, in my experience. It’s recharged via a USB-C cable and can be plugged in directly when shooting.
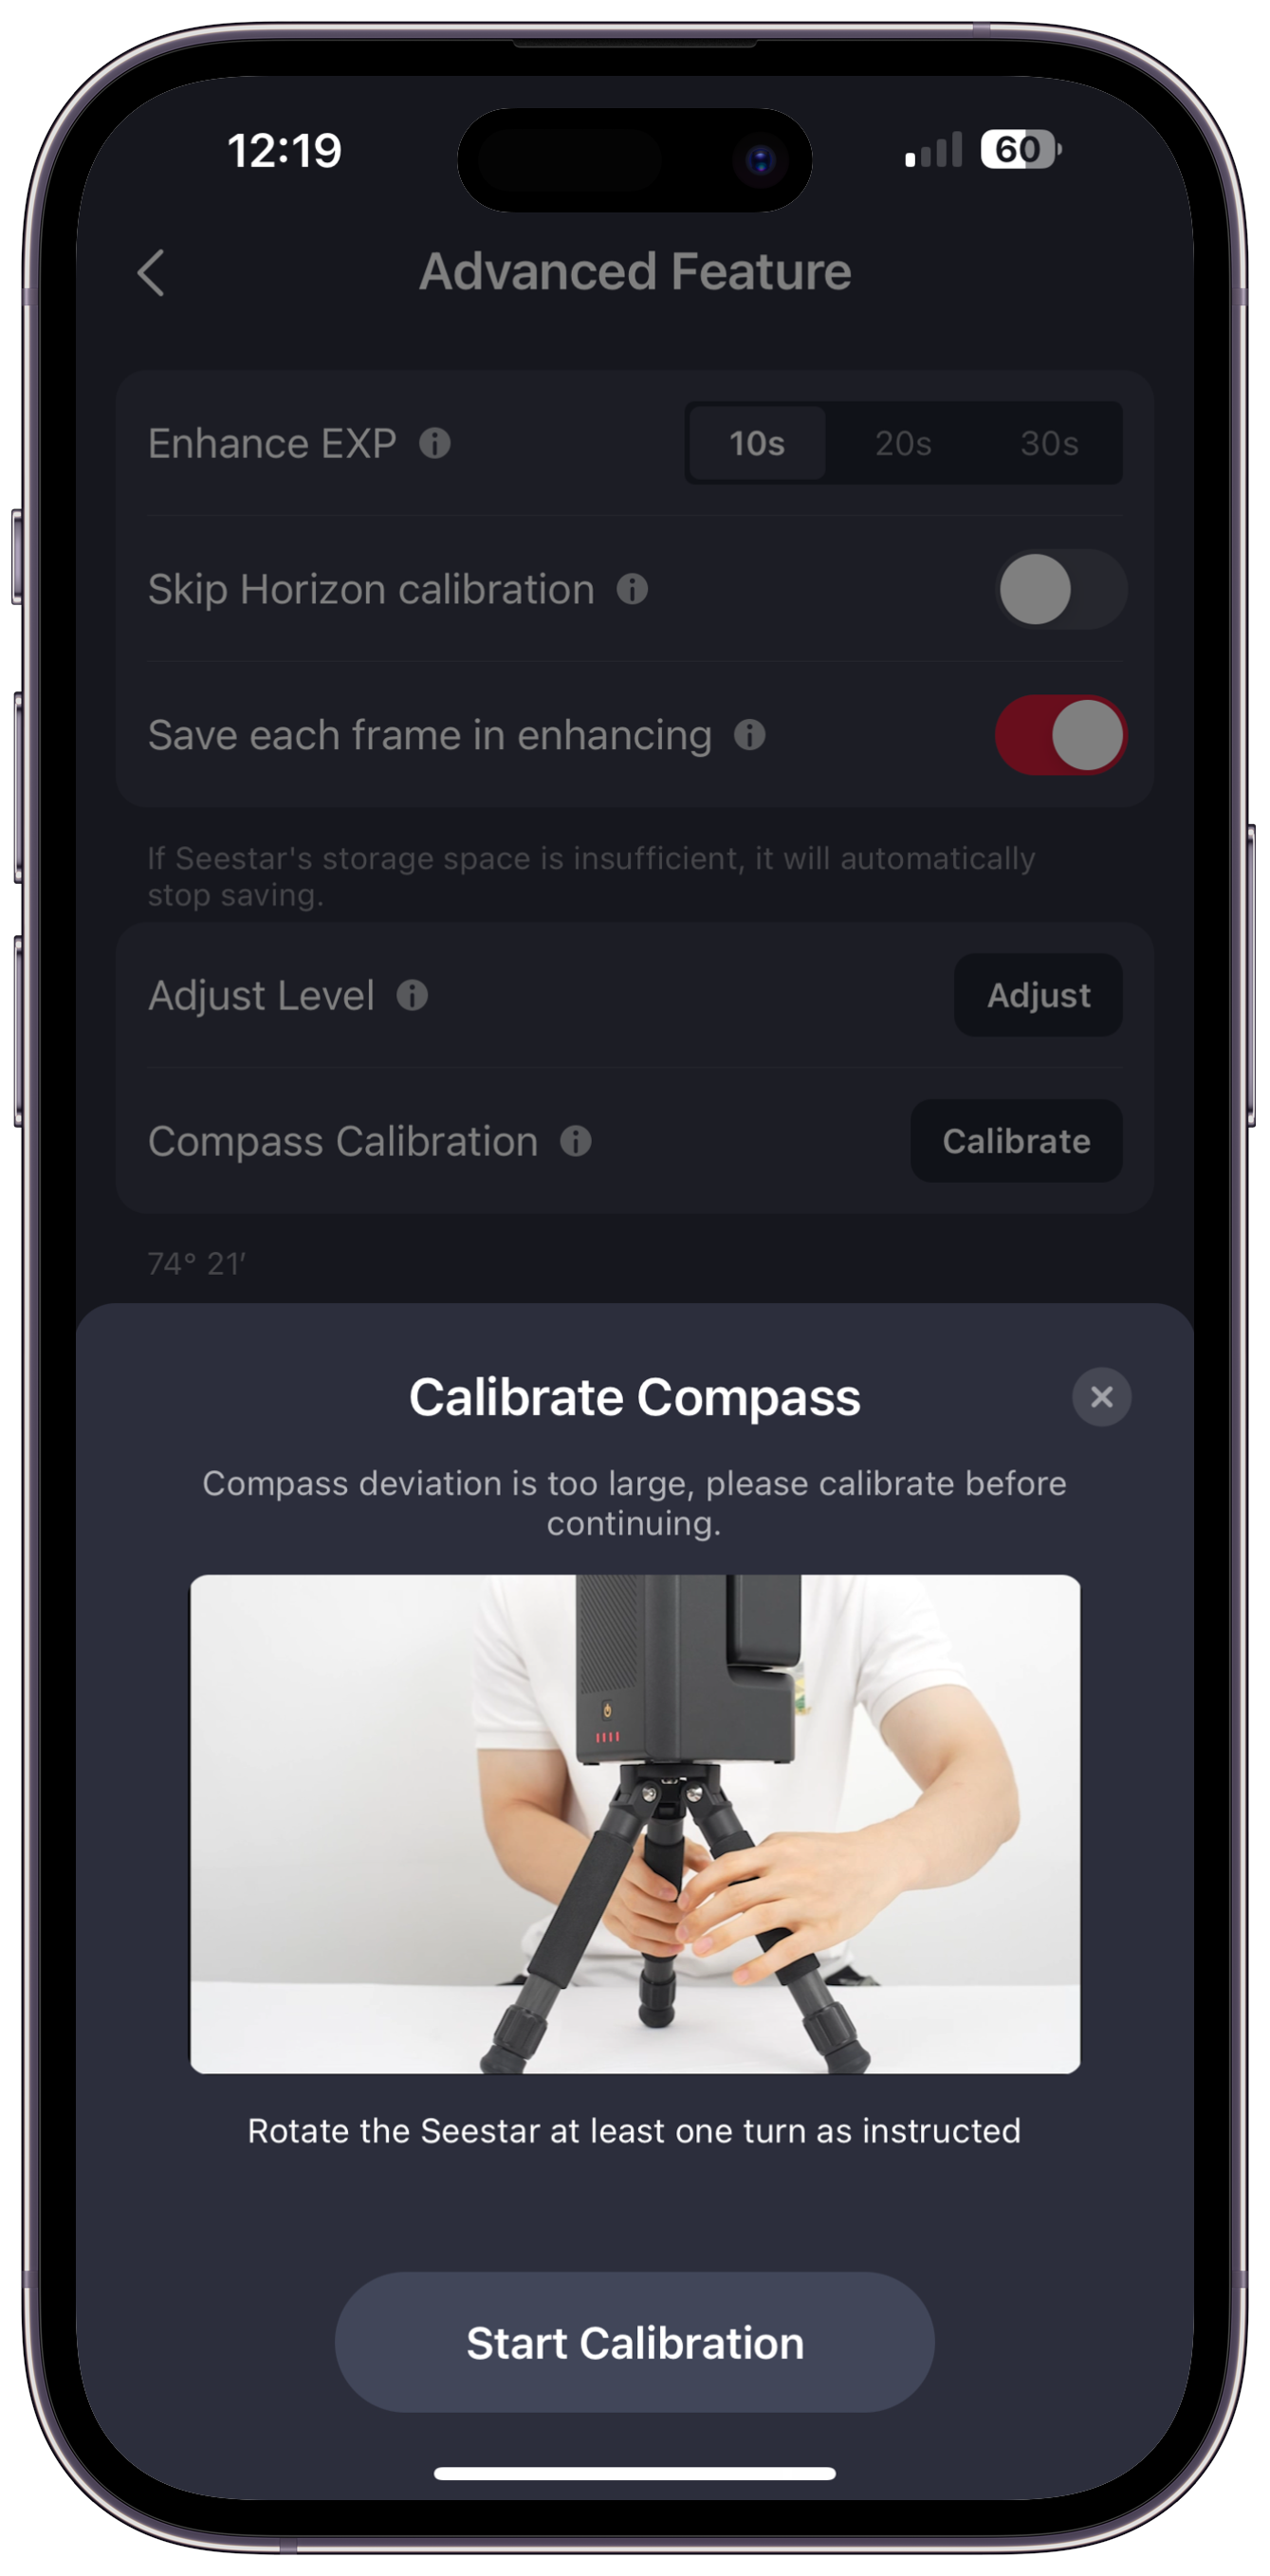
Setting up the SeeStar S50 is fairly easy, though it might seem confusing at first. There are two main steps that need to be followed: ‘Compass Calibration’ and Adjust Level.’
Compass calibration essentially tasks you with rotating the SeeStar S50 on its tripod for roughly 10 rotations. This allows the device to calibrate its compass and understand where exactly it is. The second step is to adjust the tripod’s level. The device needs to be standing on level ground for it to work properly, though that is not always possible. With the ‘Adjust Level’ feature, users can adjust individual tripod legs to level the device.
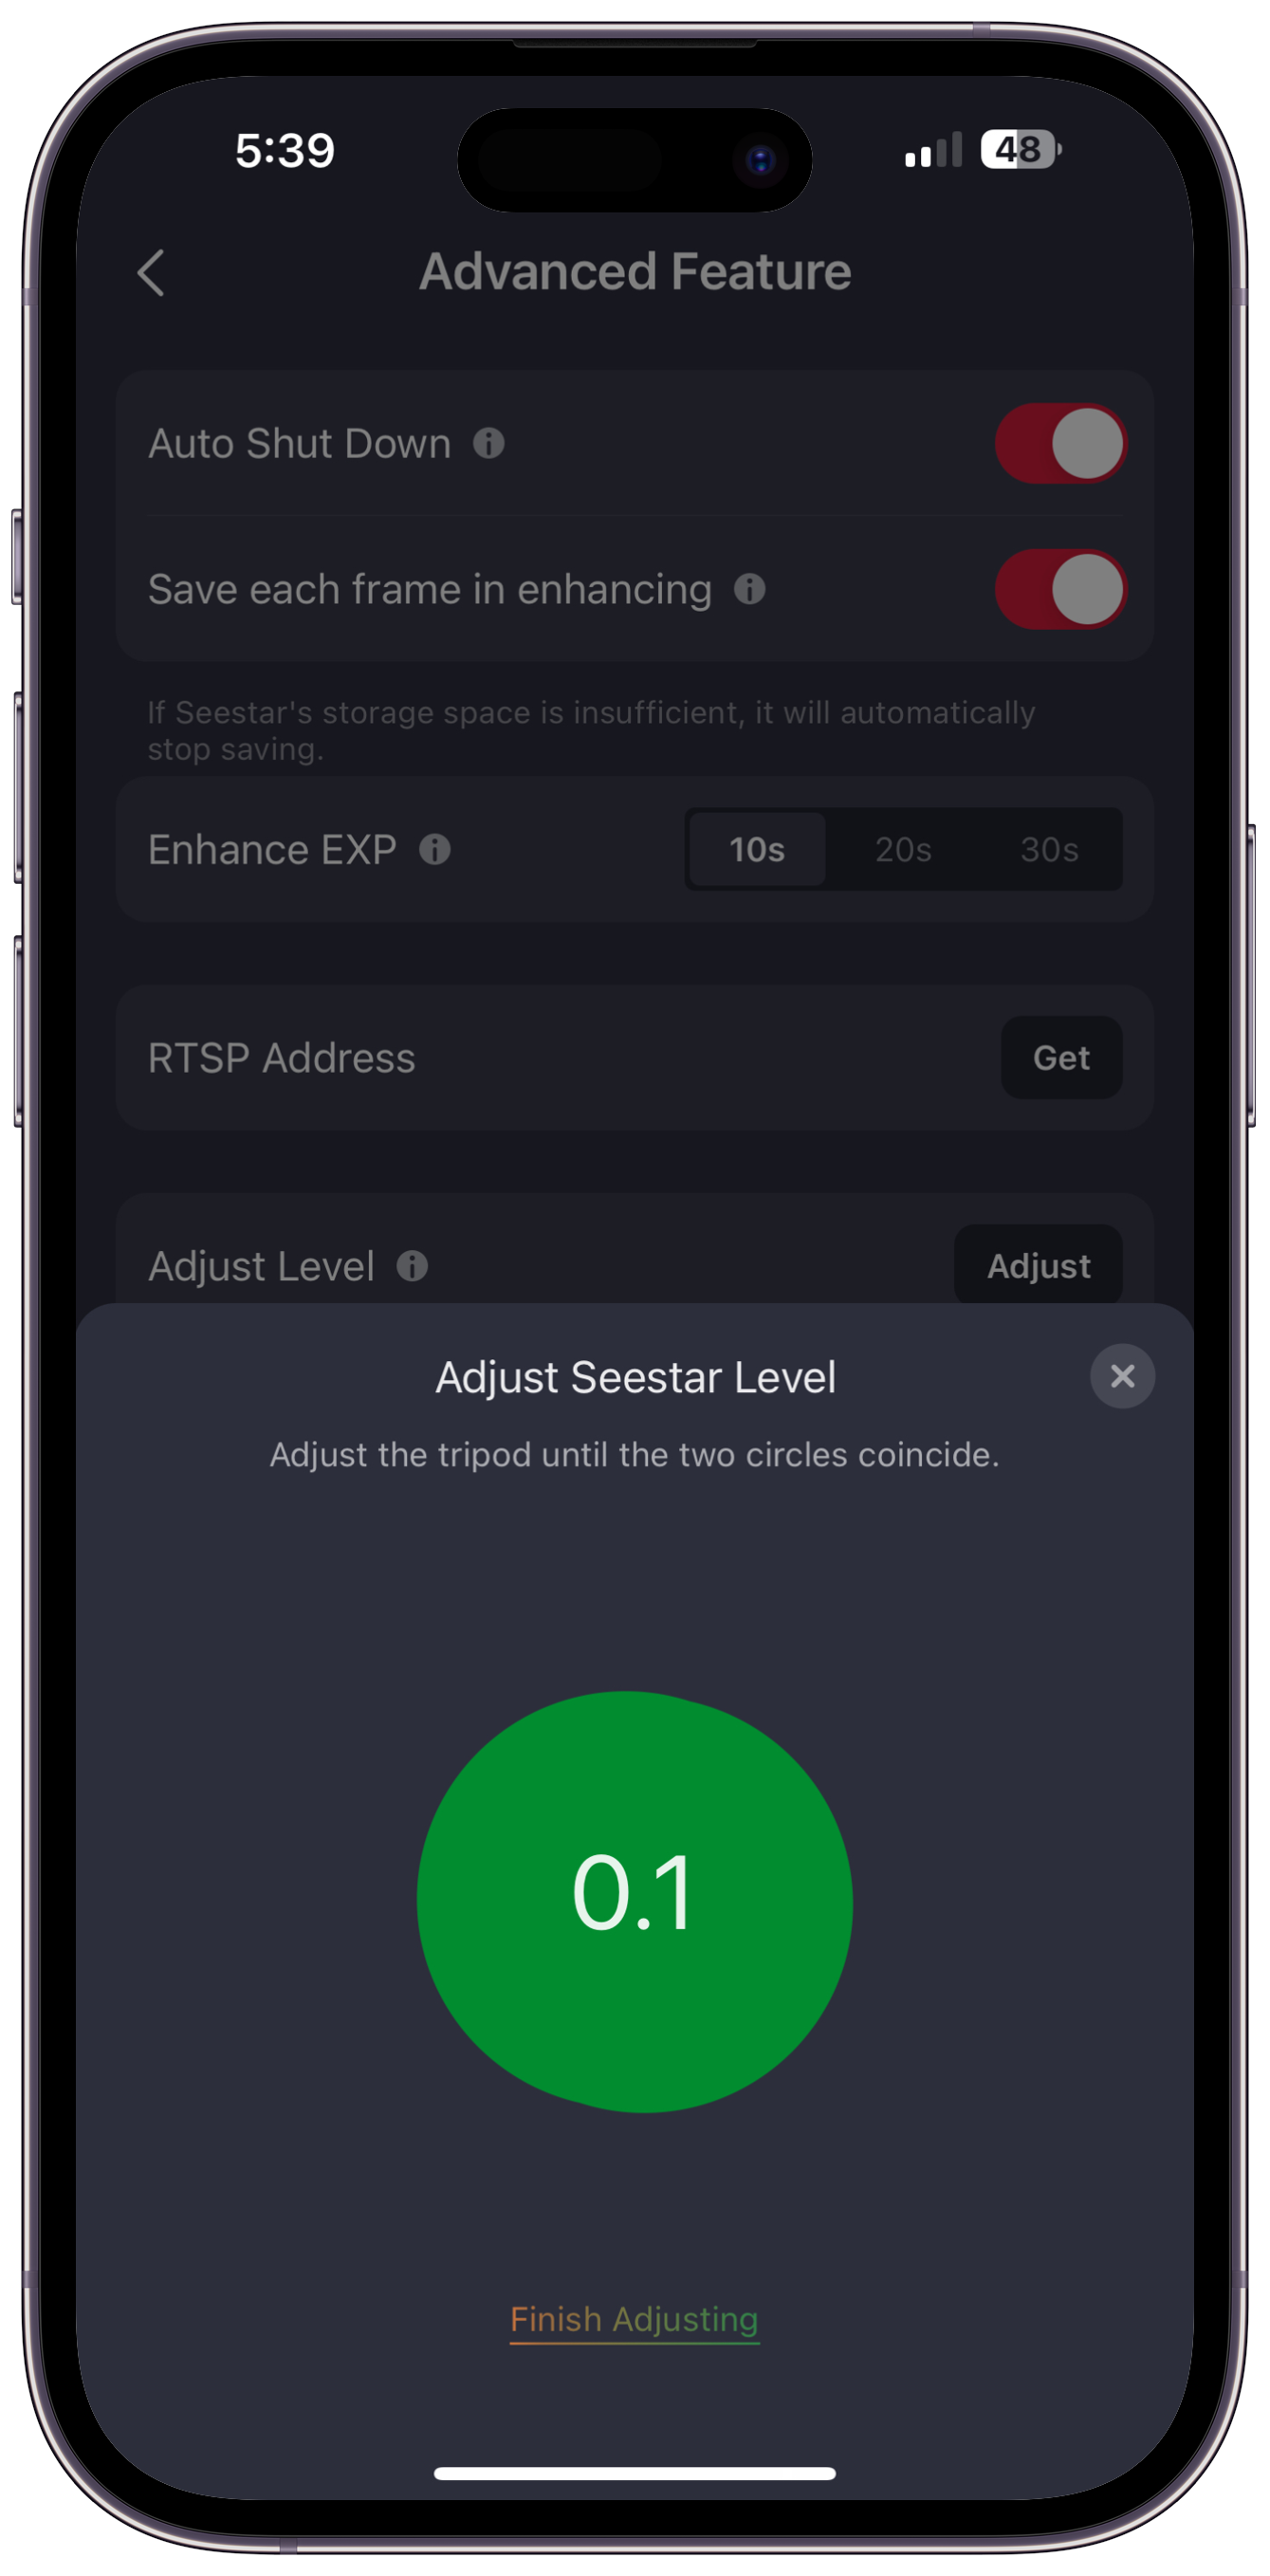
To help you with levelling, the SeeStar app has a bubble level that shows you how close or how far you are from achieving levelling. In my experience, anything under 0.5 works perfectly. Both steps take less than 5 minutes, which is a lot less than what it takes to set up a traditional rig.
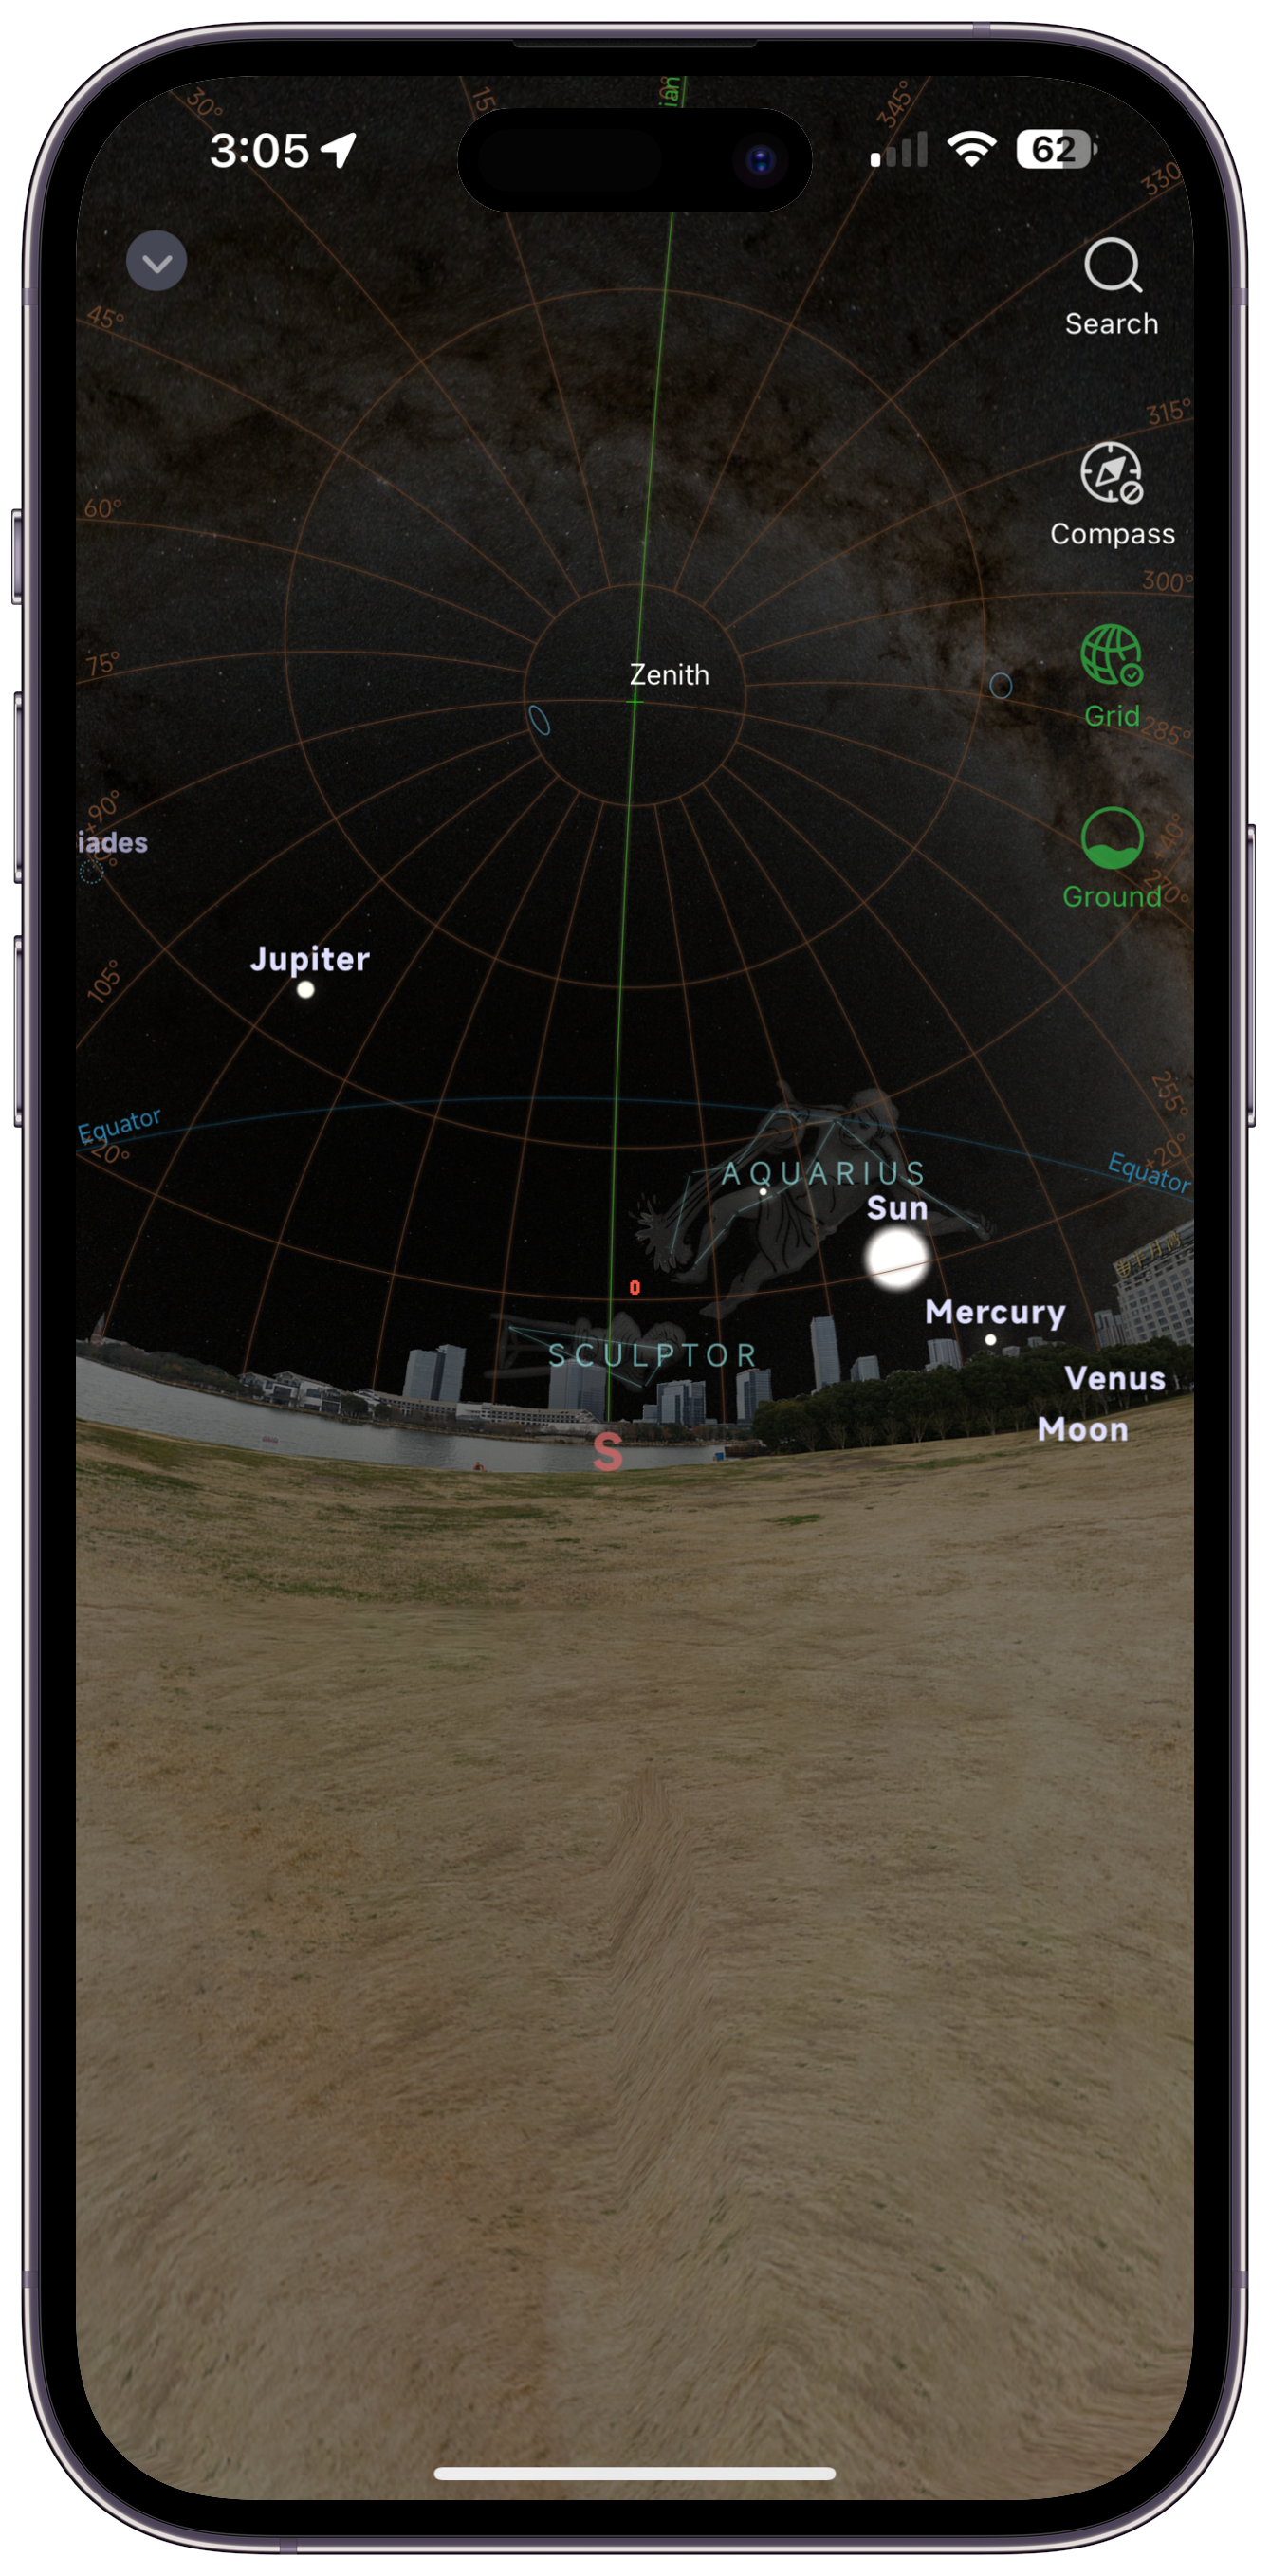
Once calibrated, you can manually slew to objects in the night sky if you know their position, or use the GoTo system that allows you to select from a catalogue of items that the scope can automatically slew towards. This is great for someone who’s just getting into the hobby.
The app also has a sky map that shows a live view of the sky from the user’s location, allowing you to learn the positioning of celestial objects while slewing towards them.
Once on an object, the app performs plate solving, which is essentially a process of identifying the stars in the image and matching them to its star catalogue. This allows the scope to center itself on the target and improves its tracking. The scope can now automatically adjust the exposure and gain to enhance the image. I was impressed by how well done the internal software was when it came to identifying objects promptly.
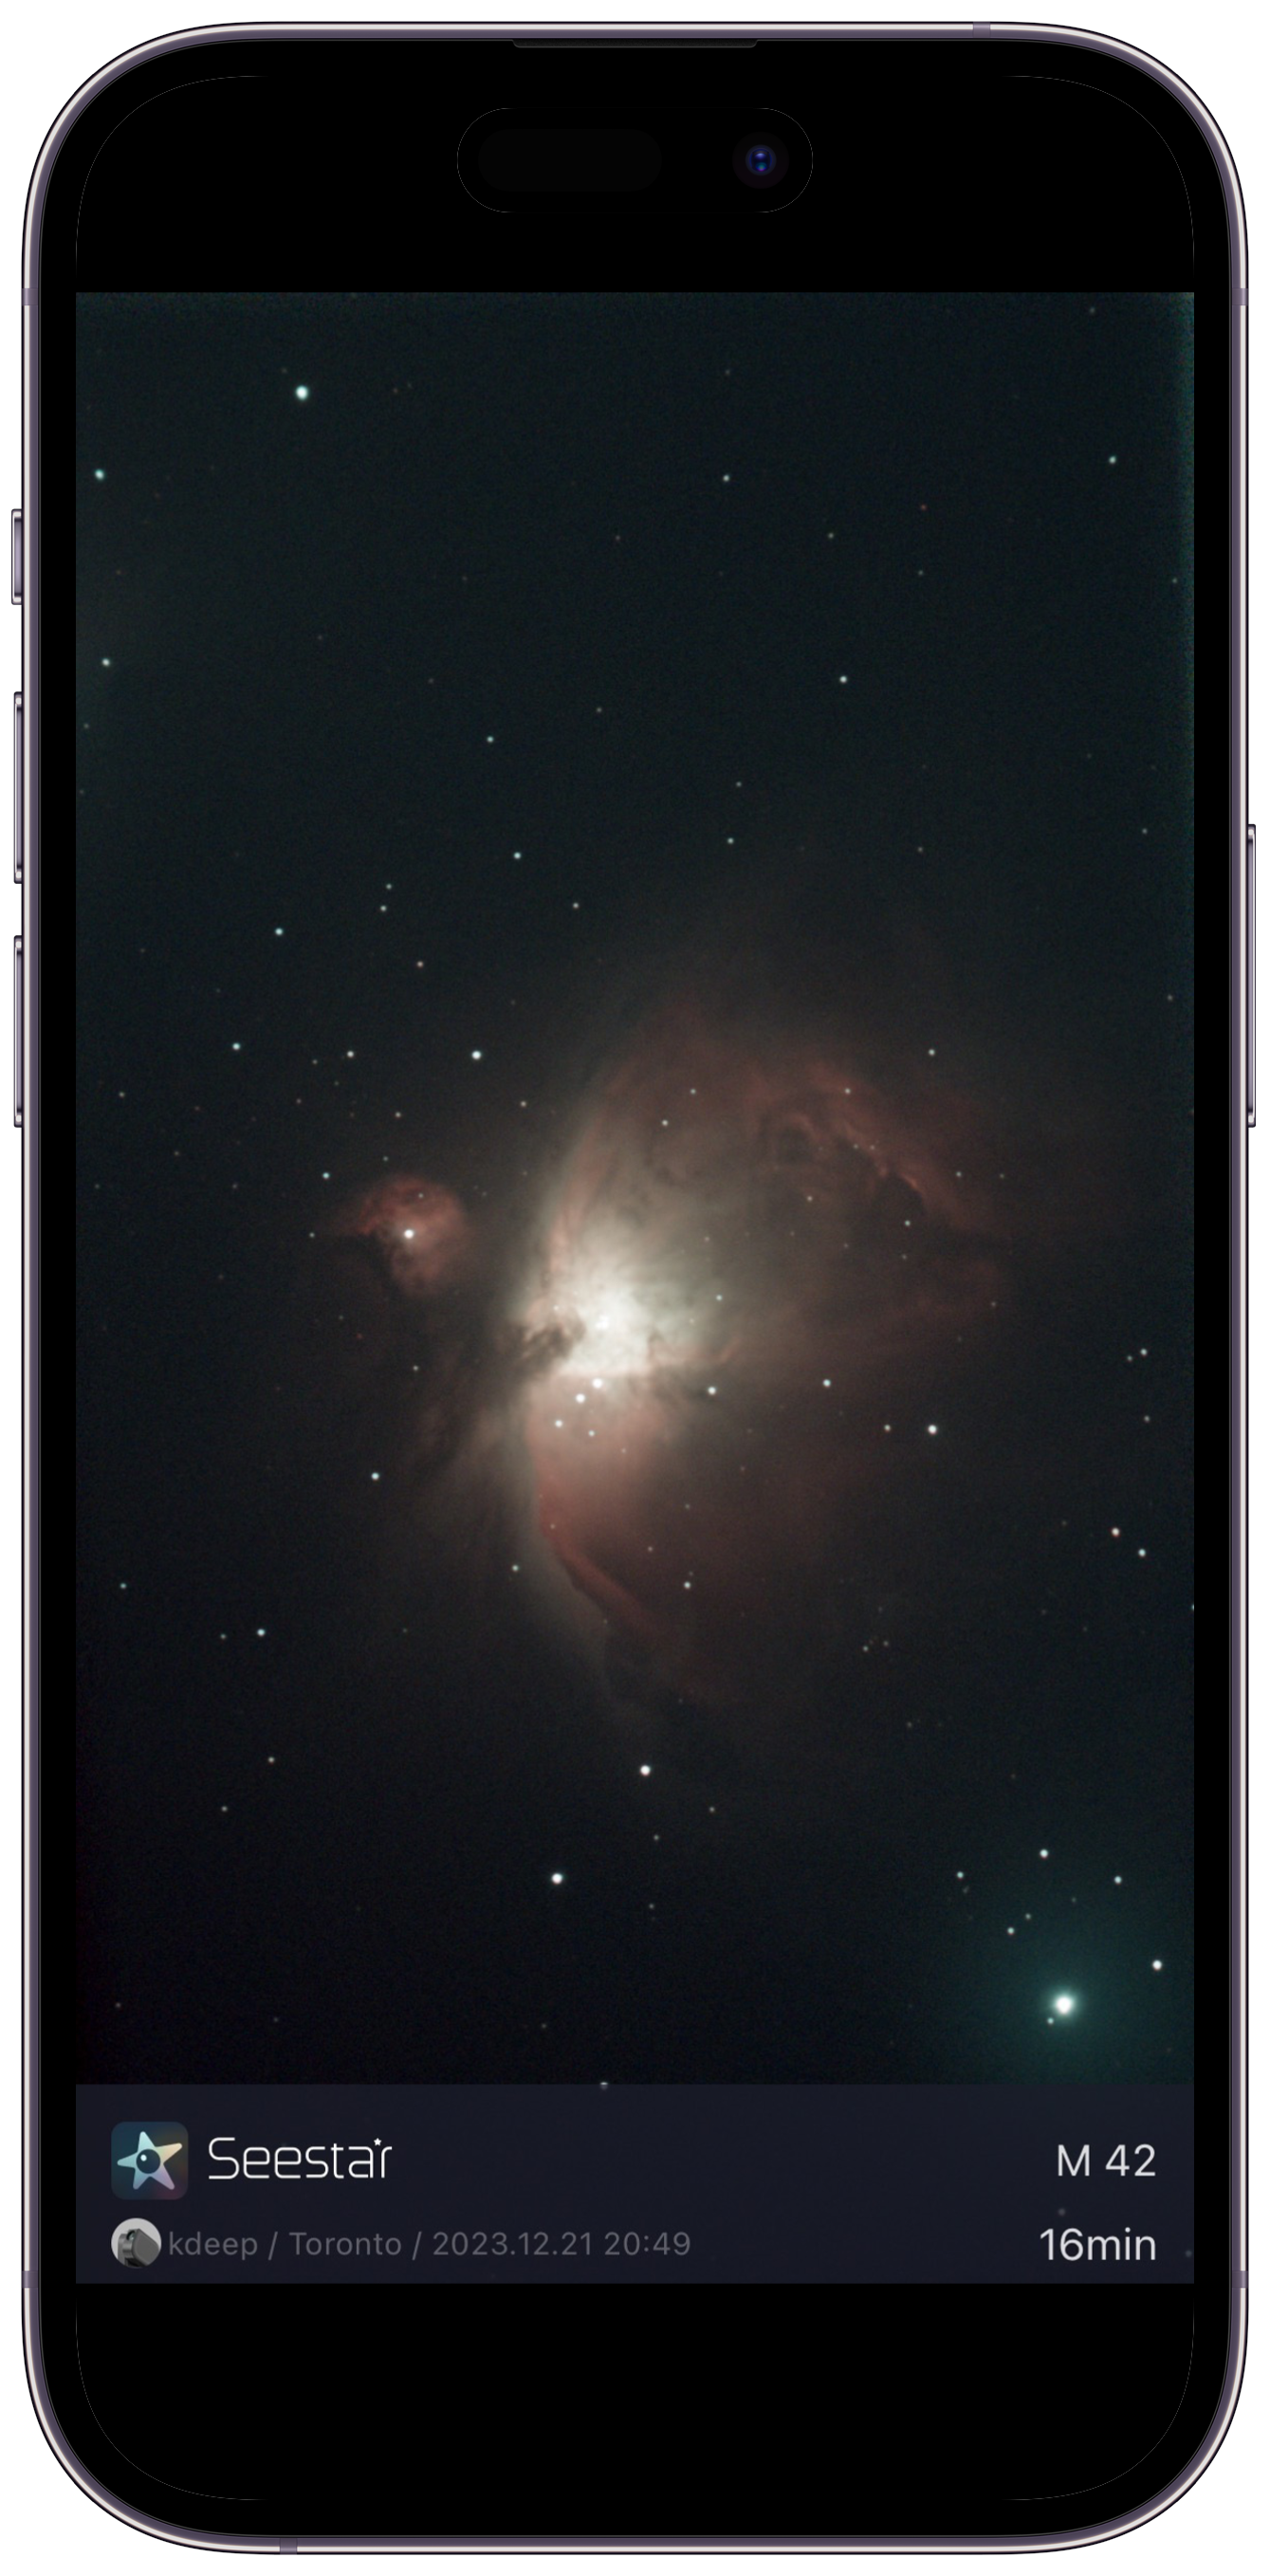
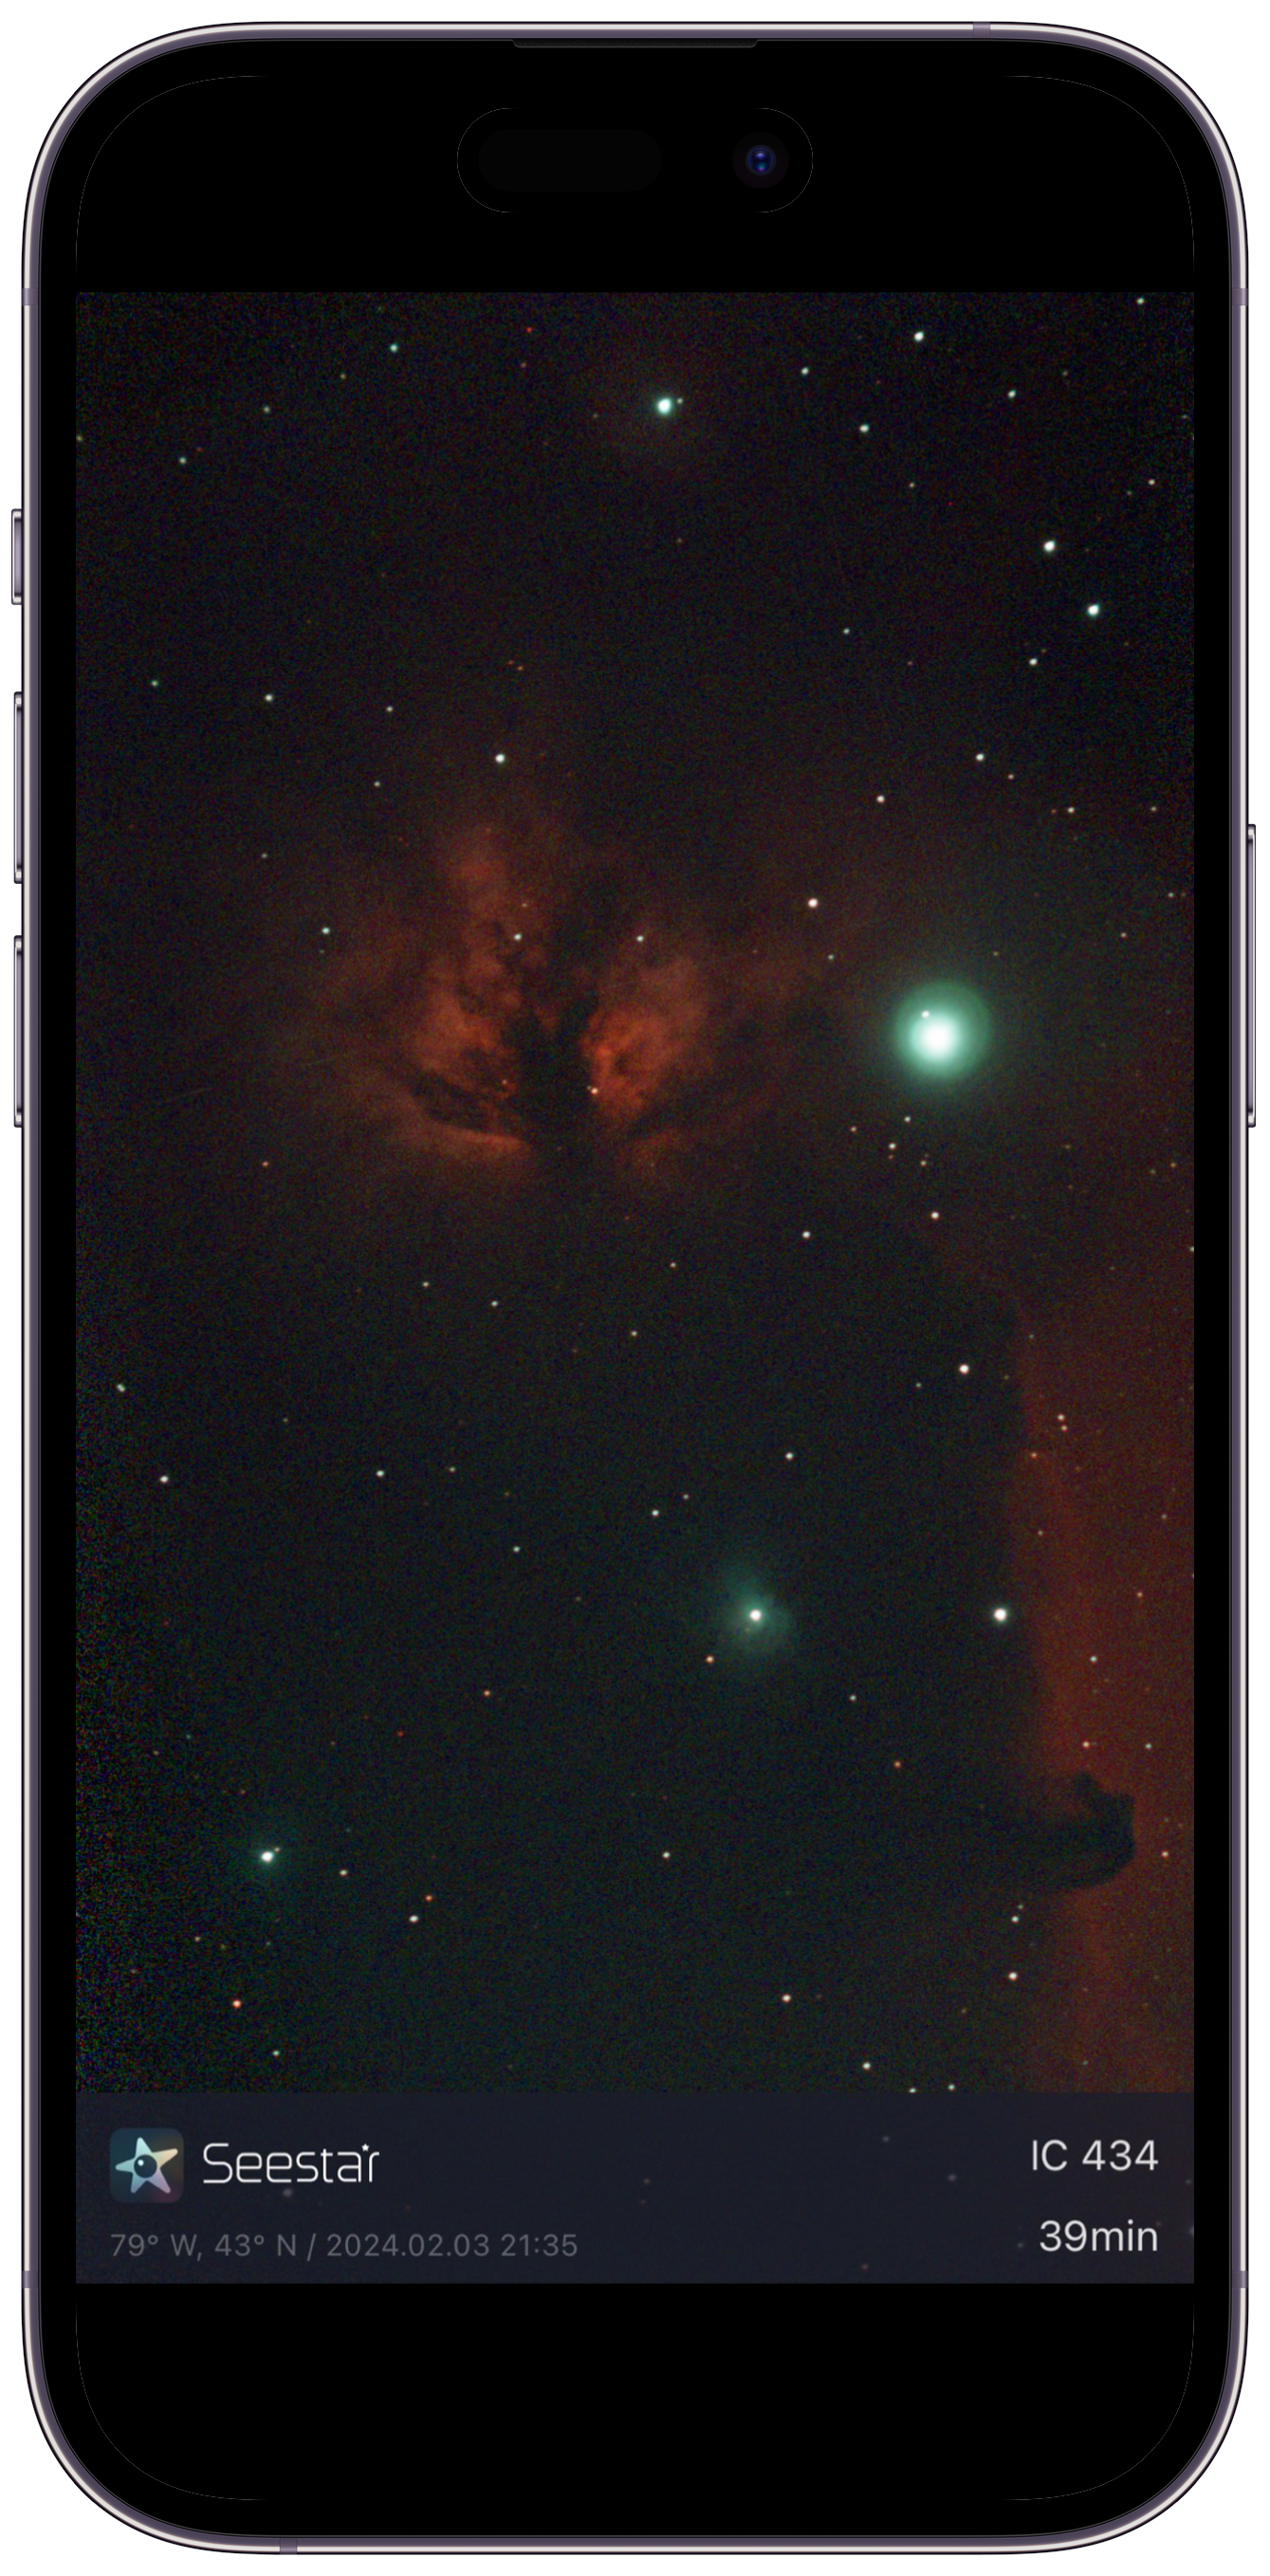
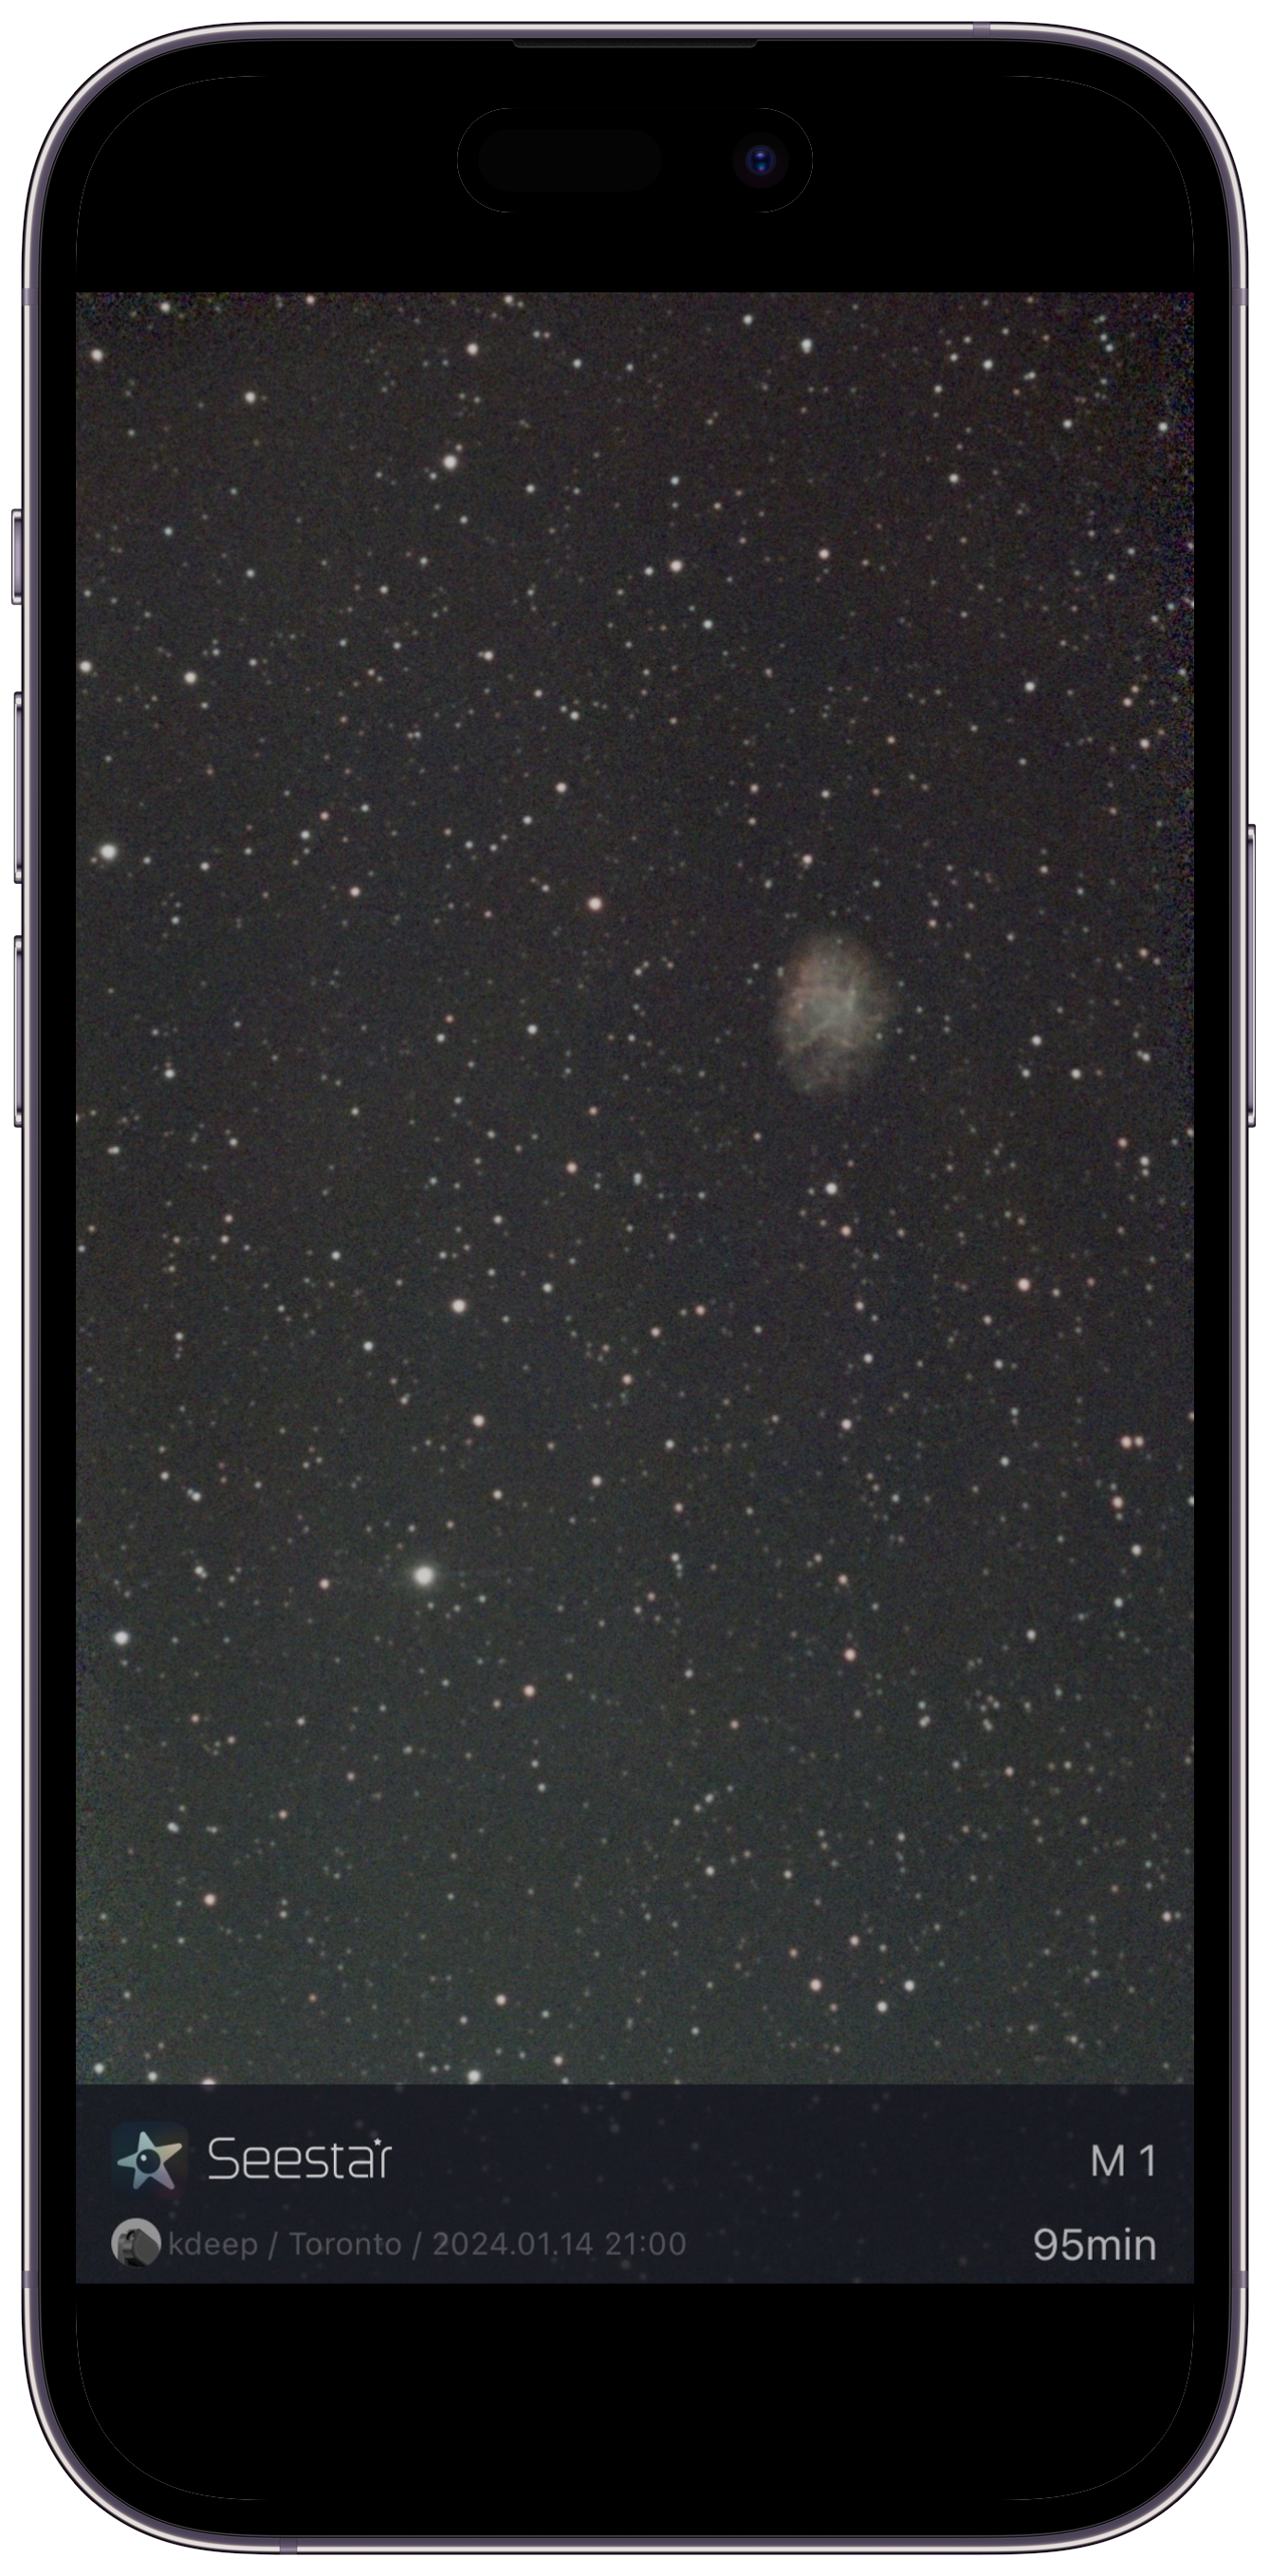
The first target I shot with the SeeStar S50 was the Orion Nebula, located slightly below the belt in the Orion constellation.
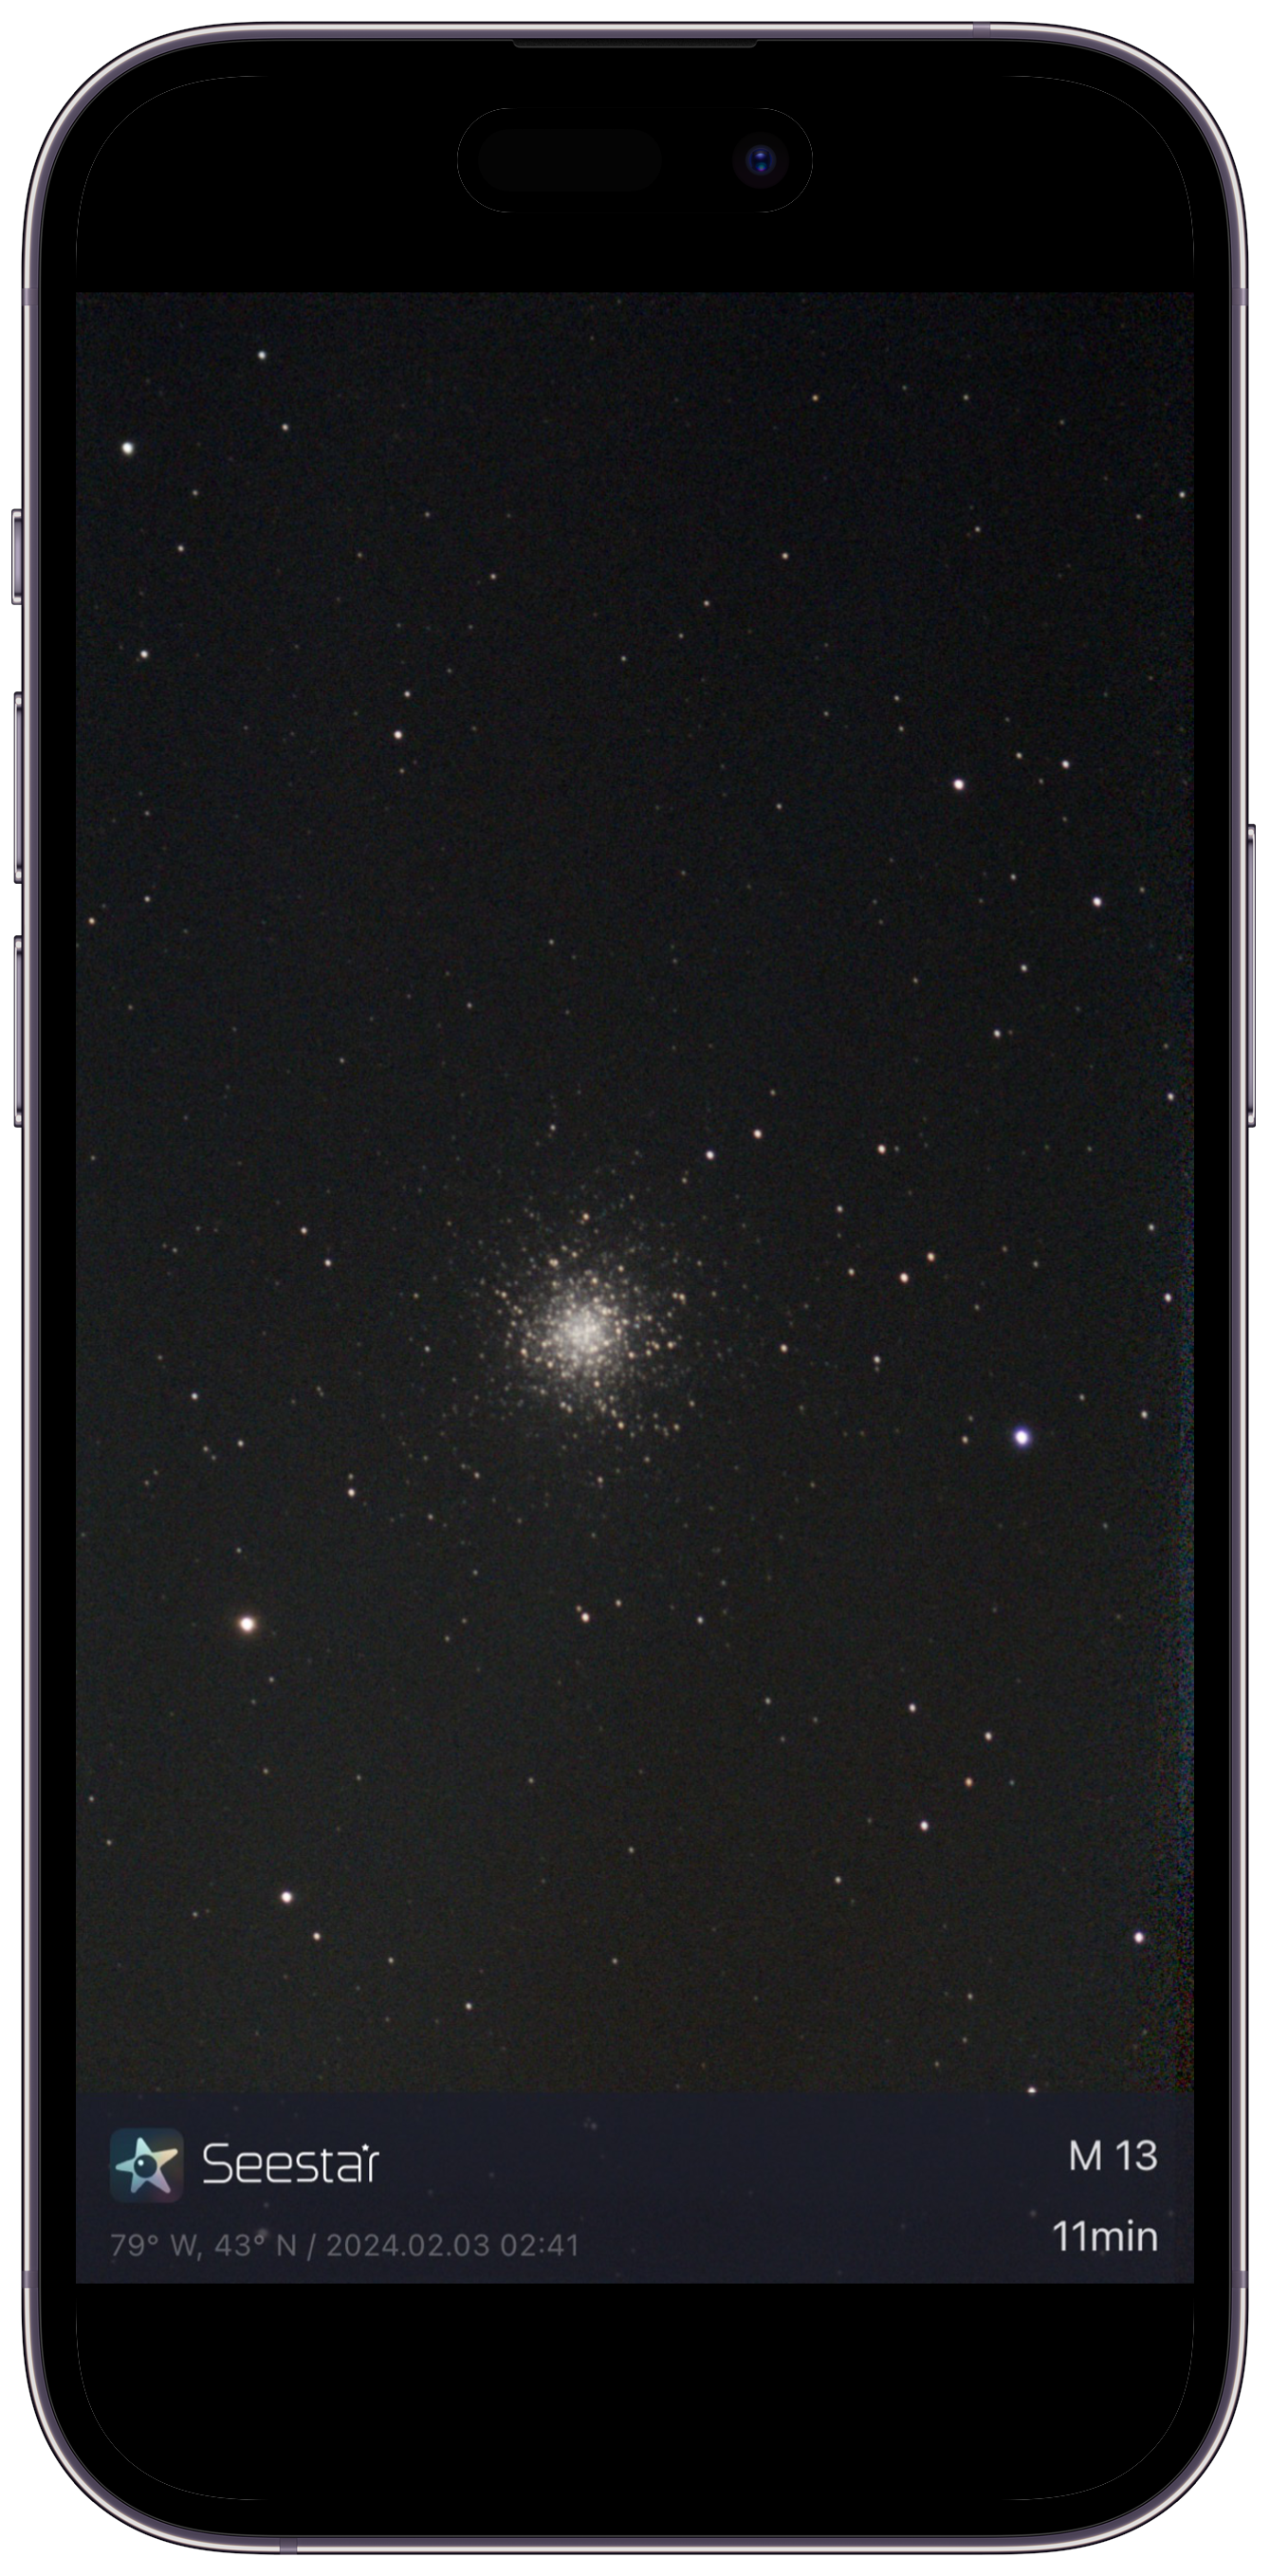
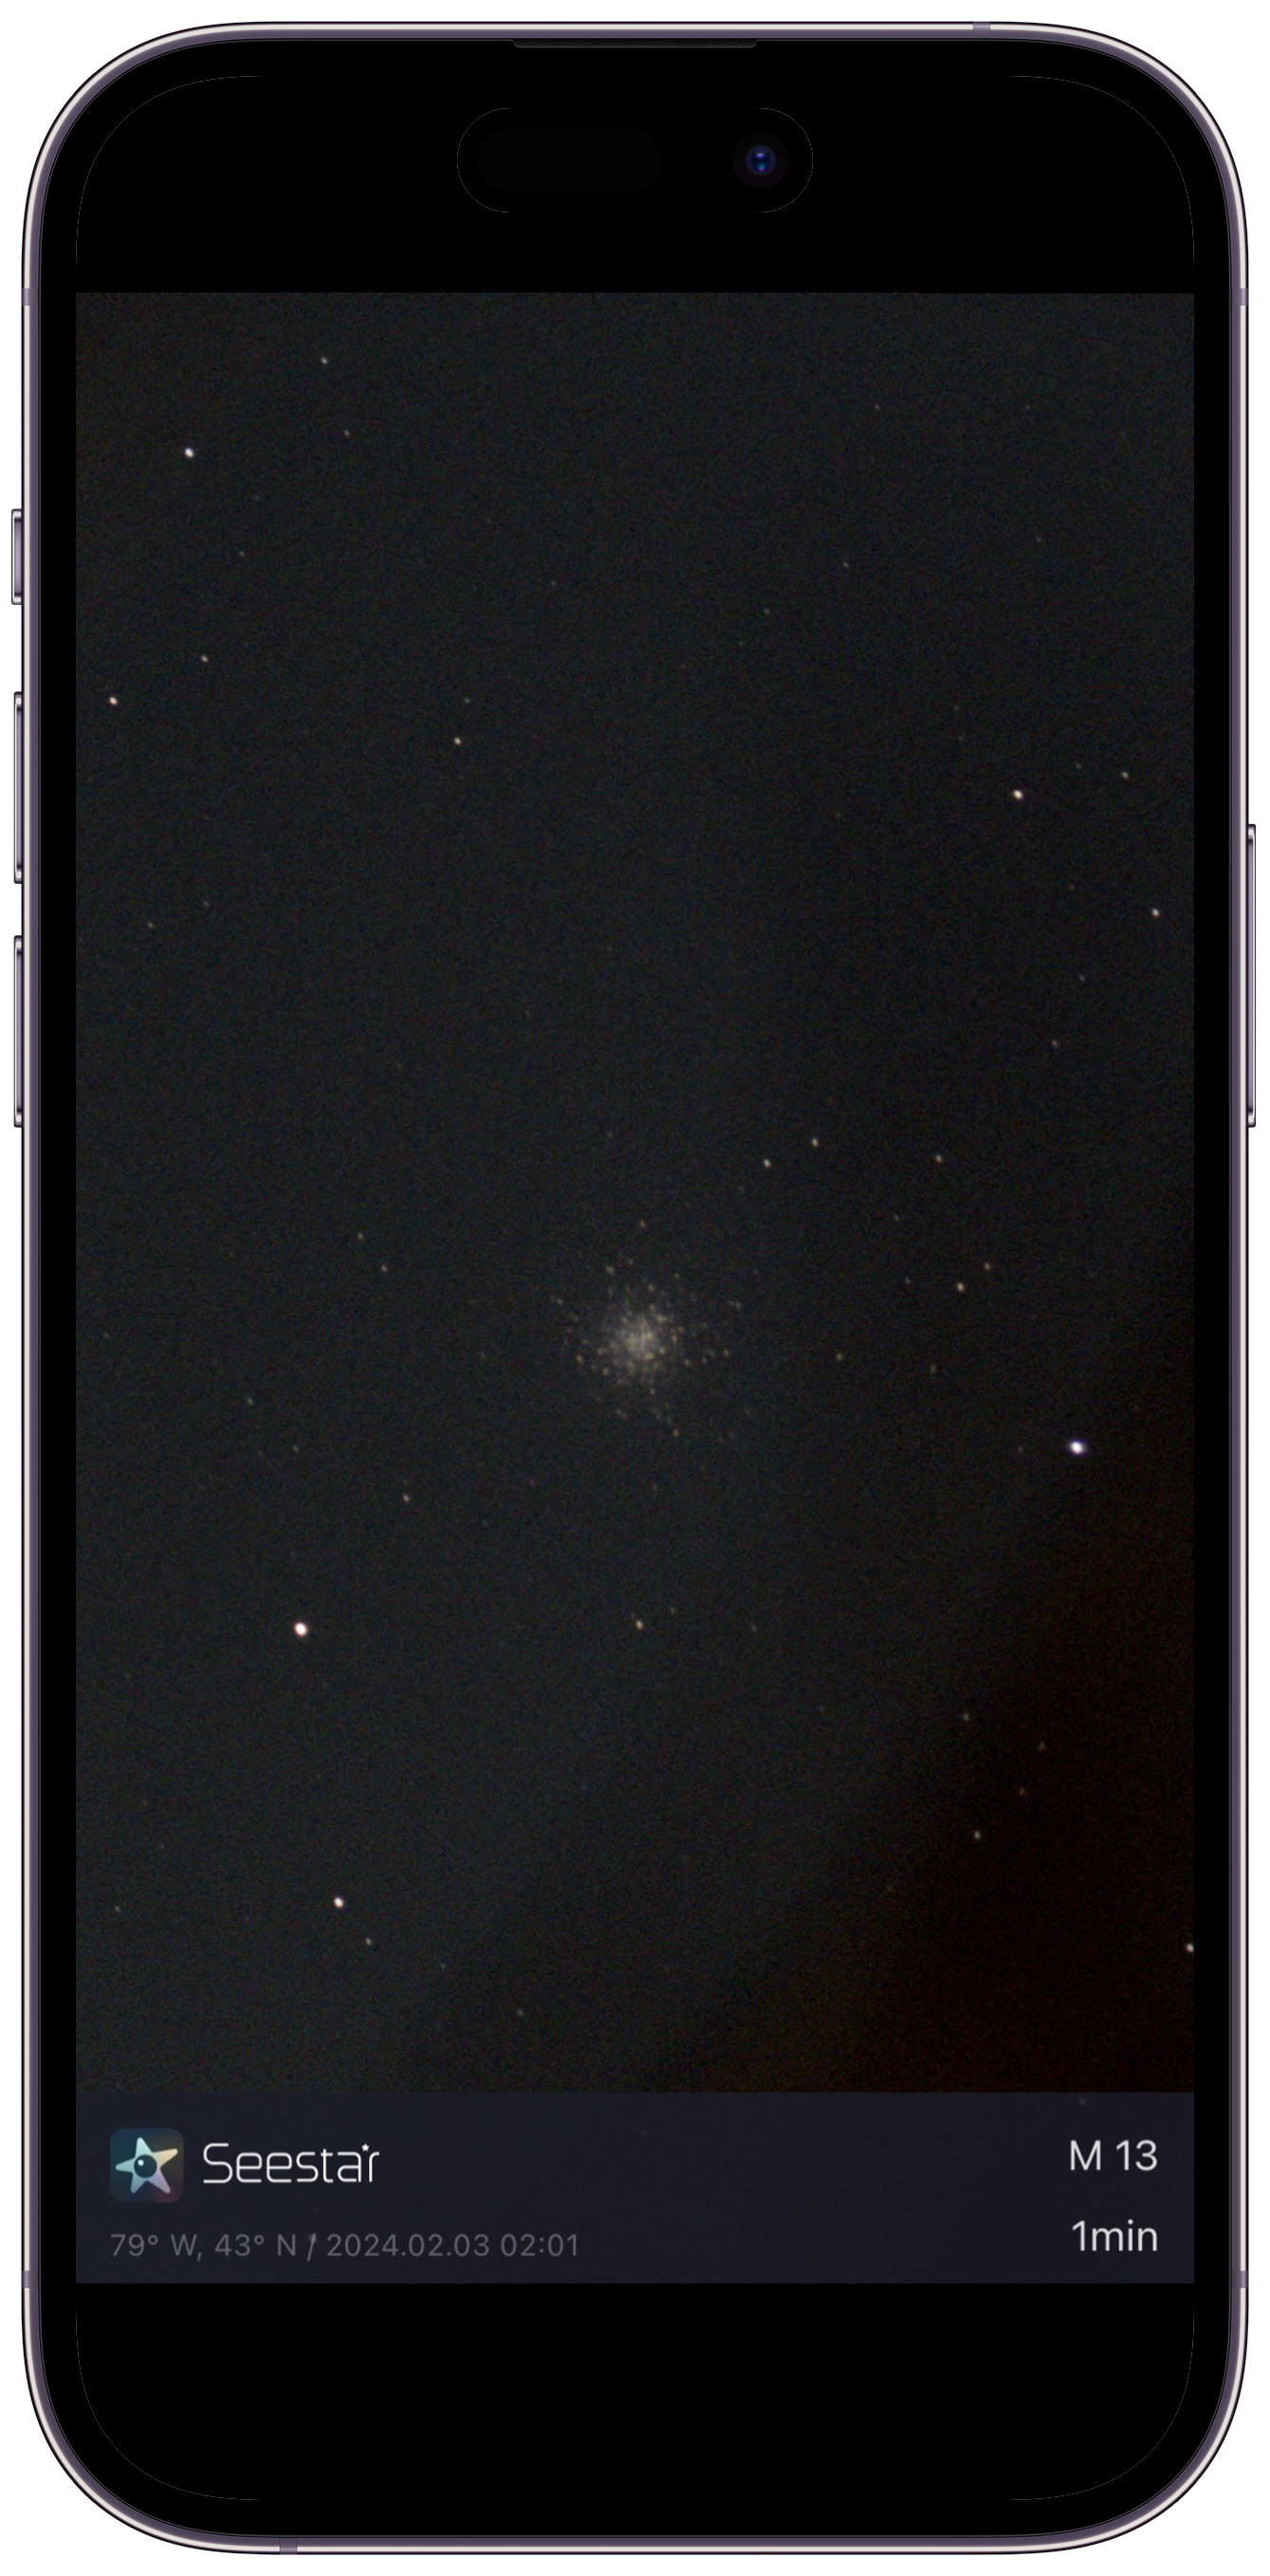
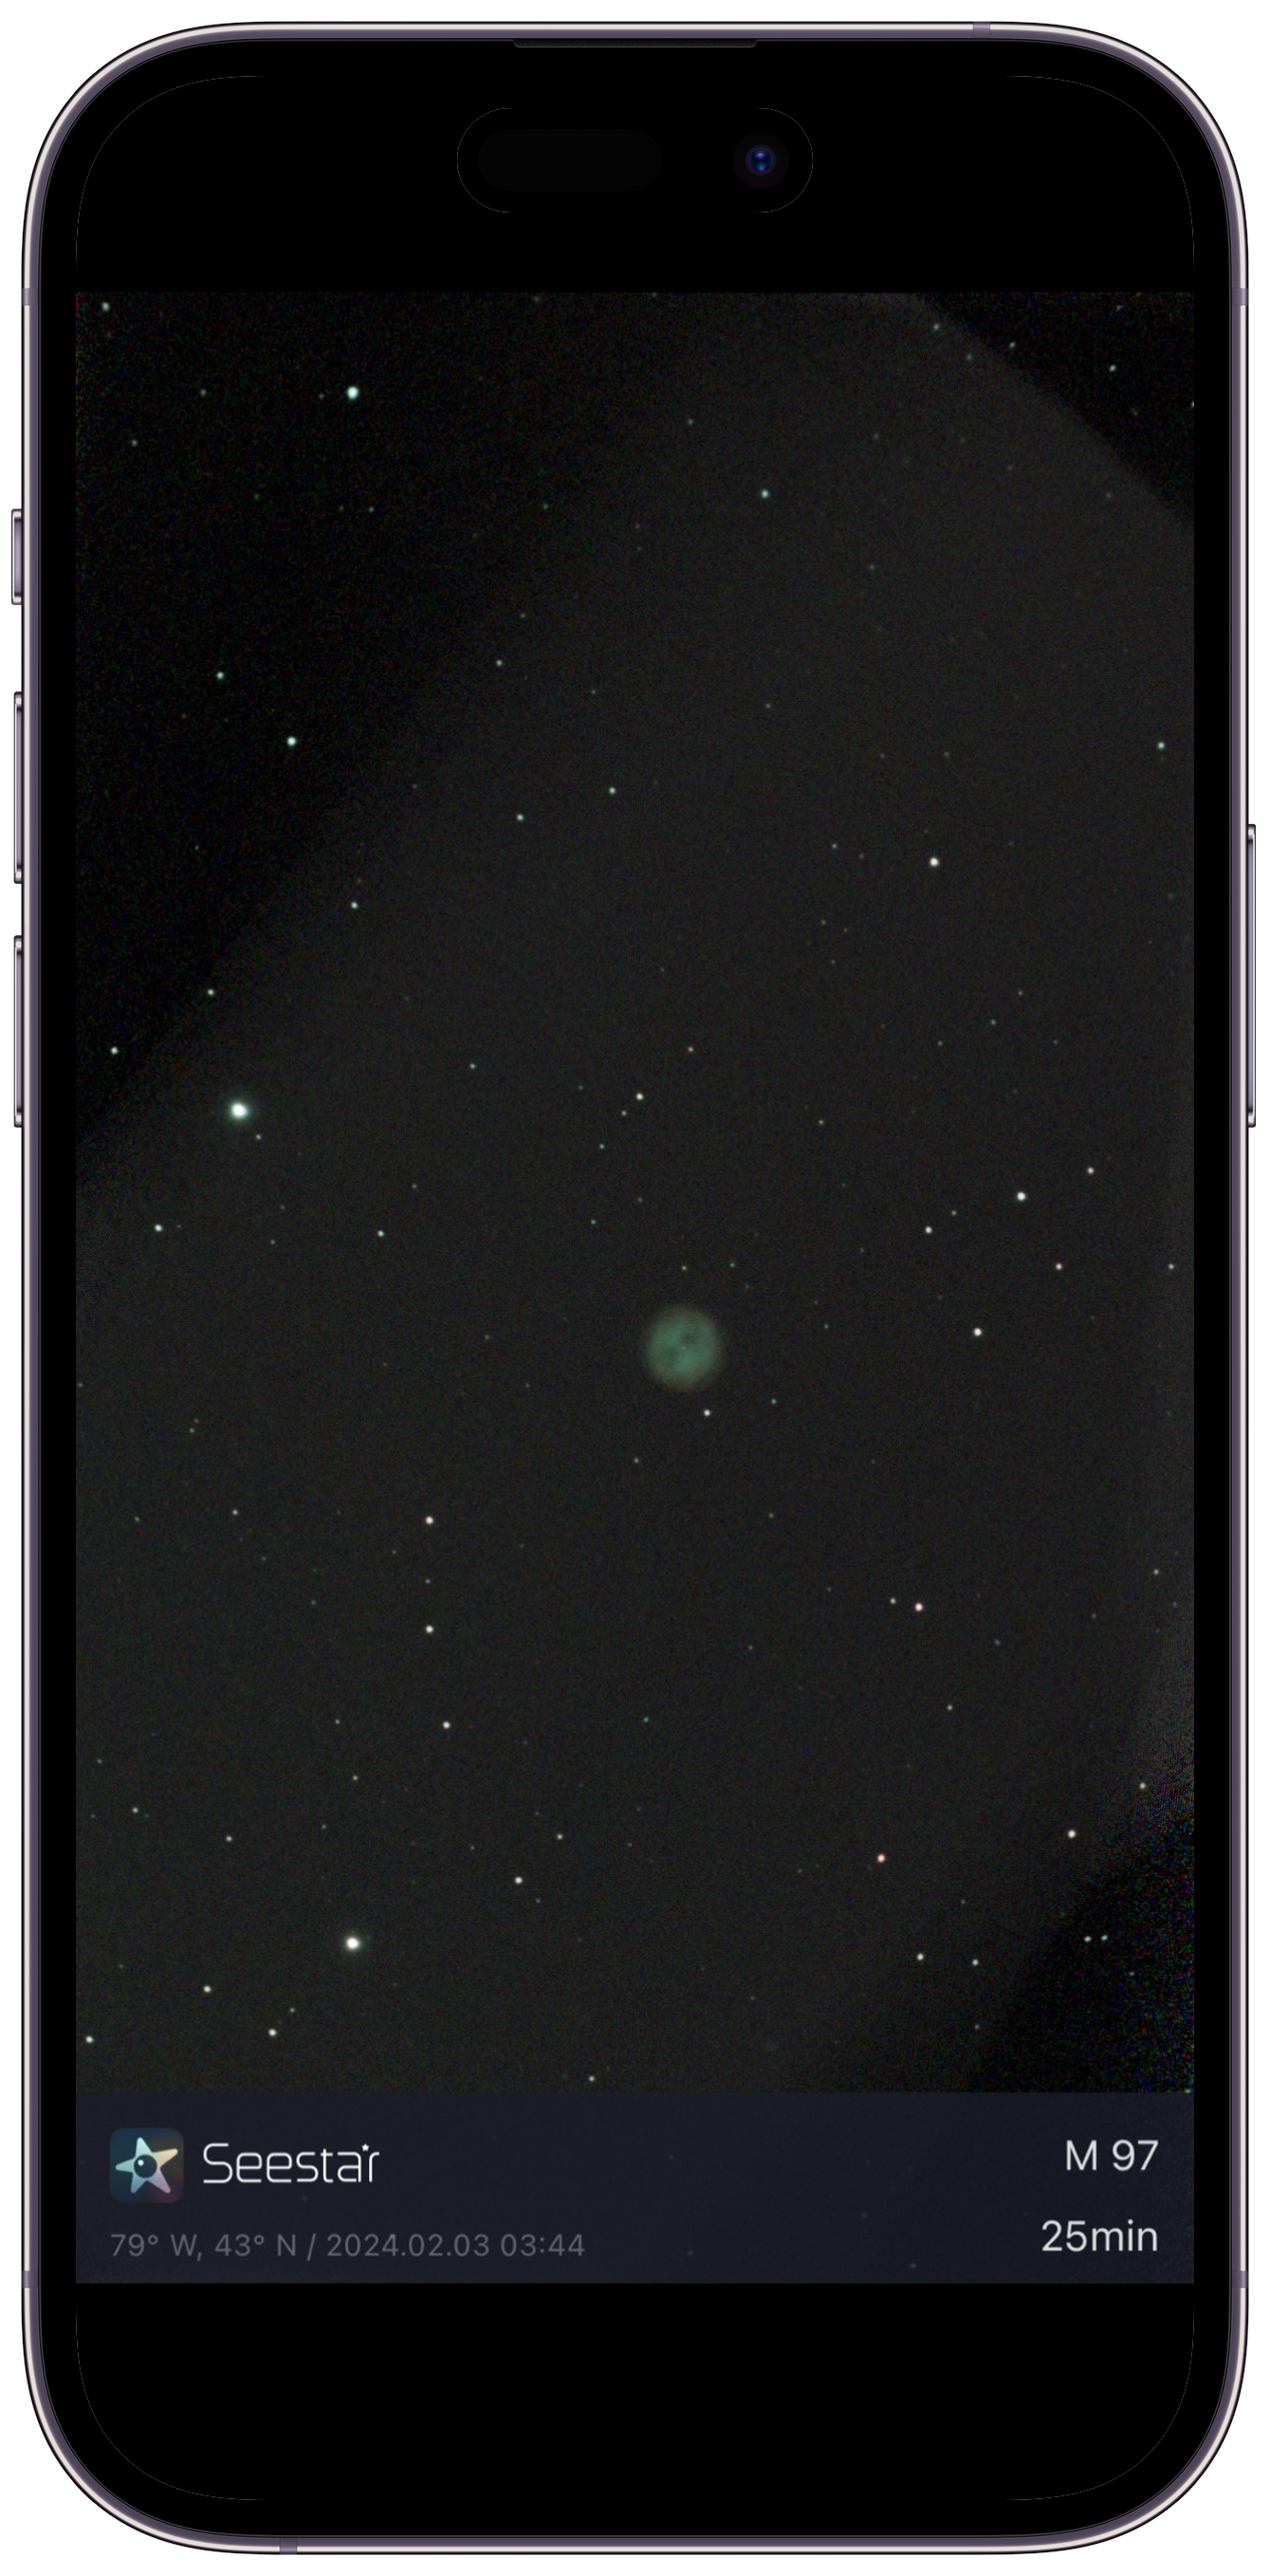
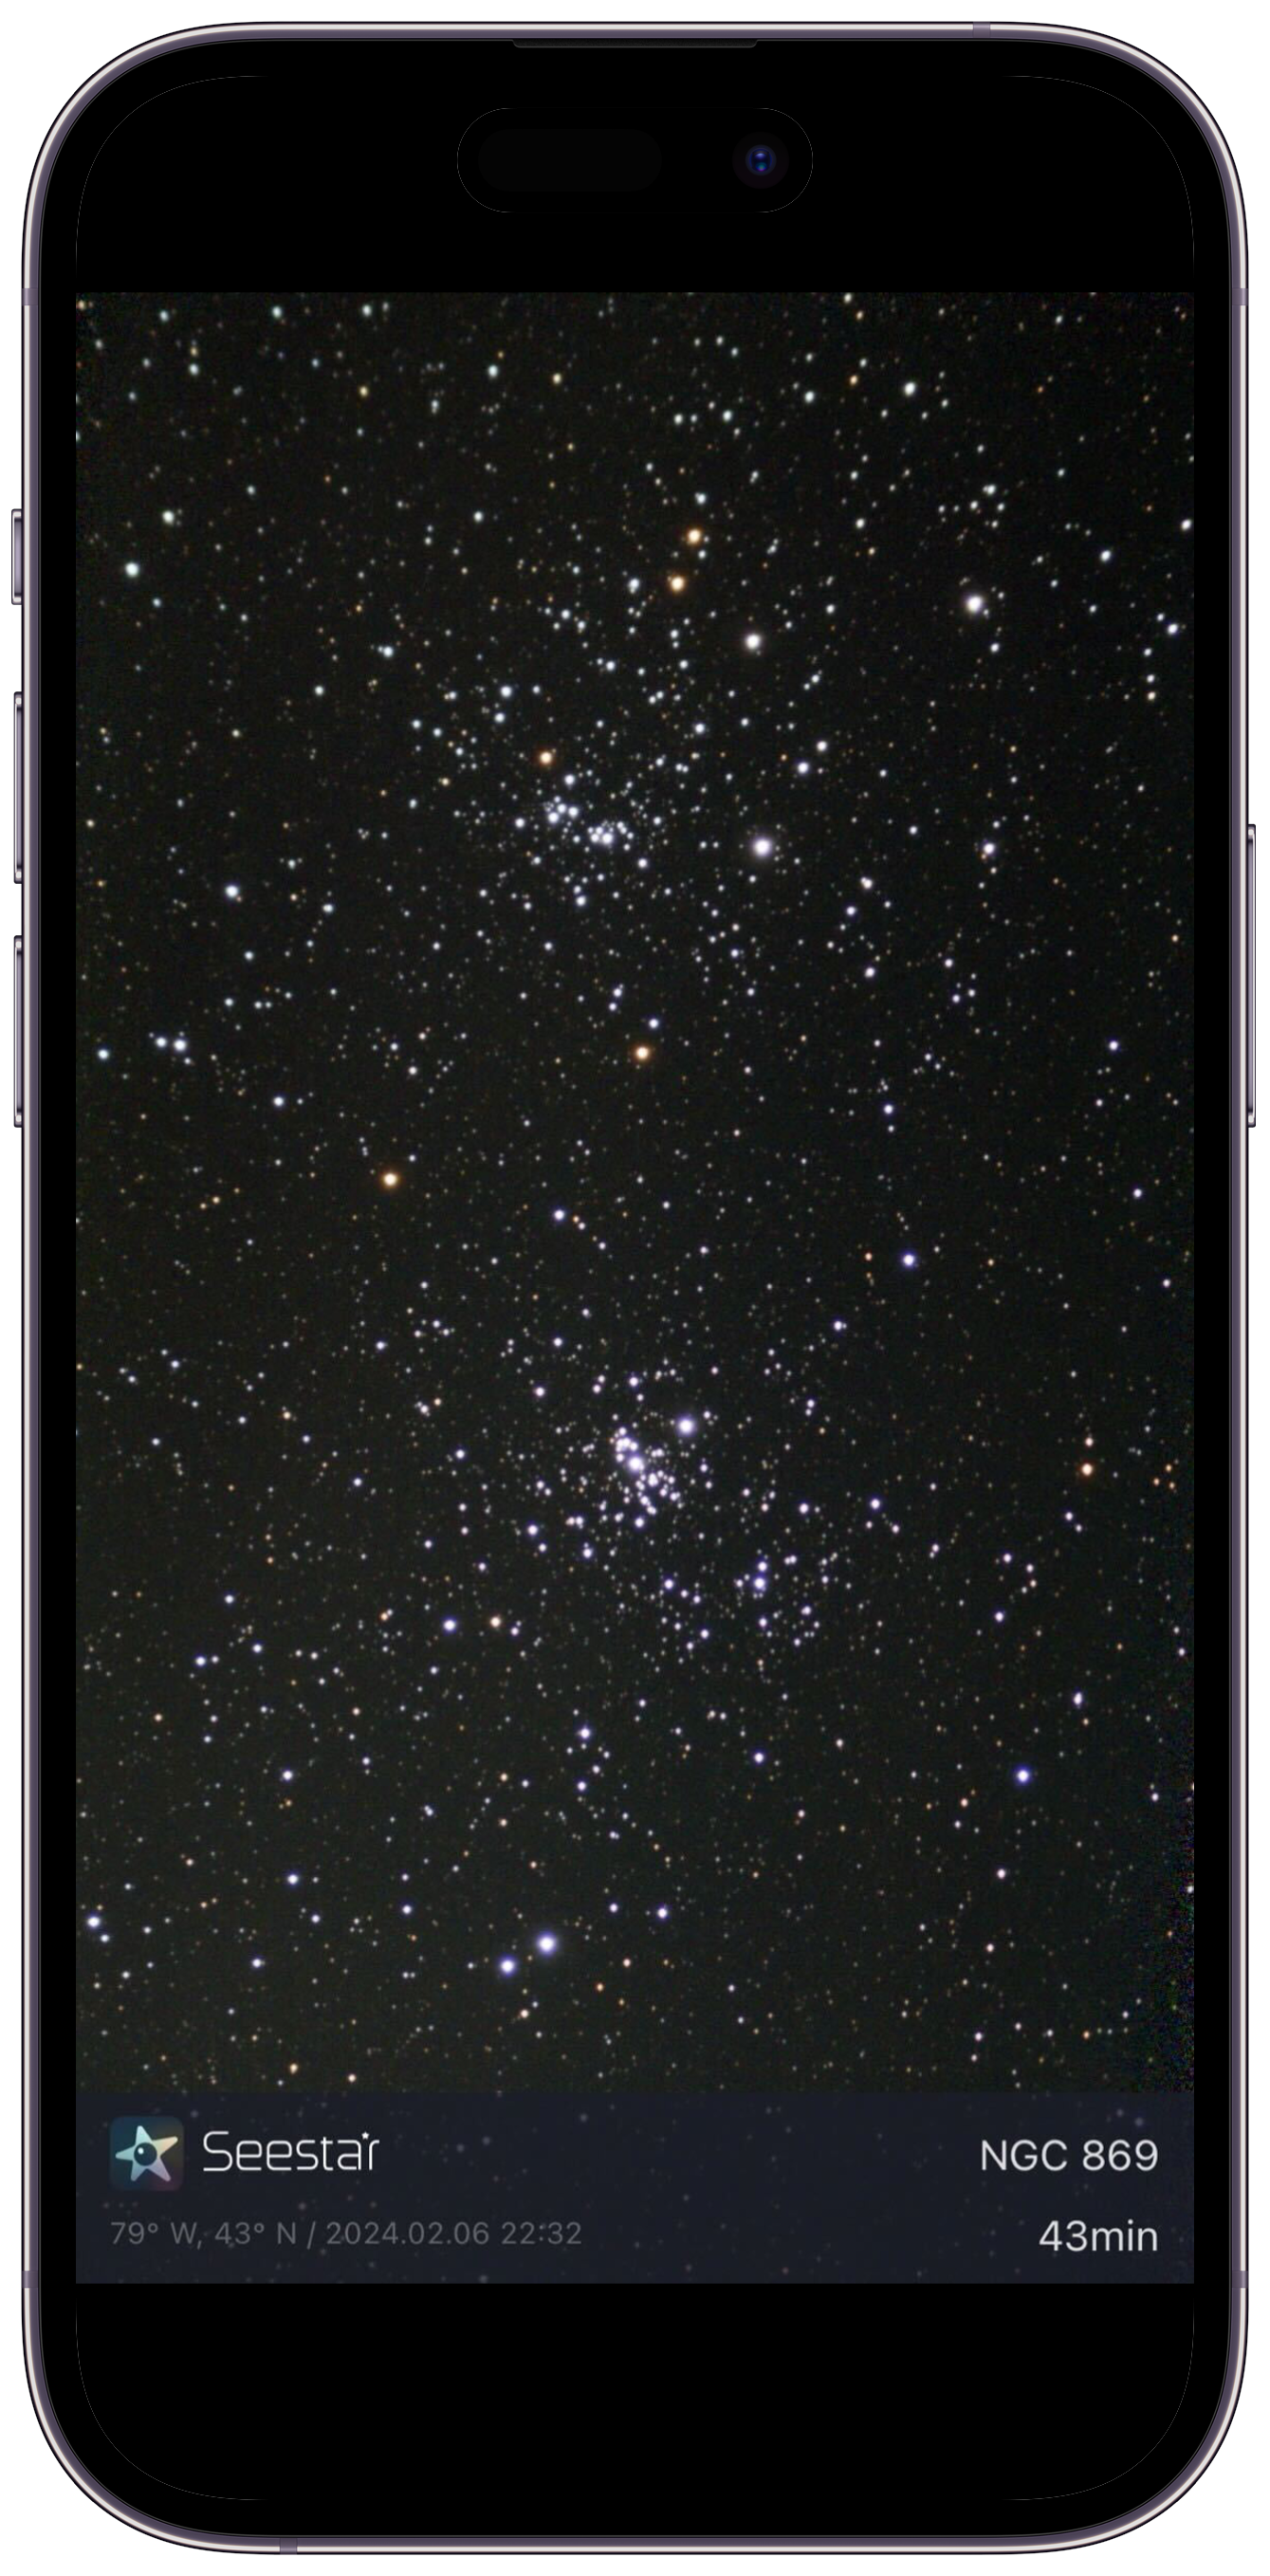
To take detailed images of deep-sky objects, the SeeStar S50 does what’s called stacking. It essentially takes multiple 10-second shots or exposures of the object you’ve centred and automatically stacks them on top of each other. This improves the noise-to-signal ratio in your image, which essentially means that it reduces the noise in the image and enhances its details.
-
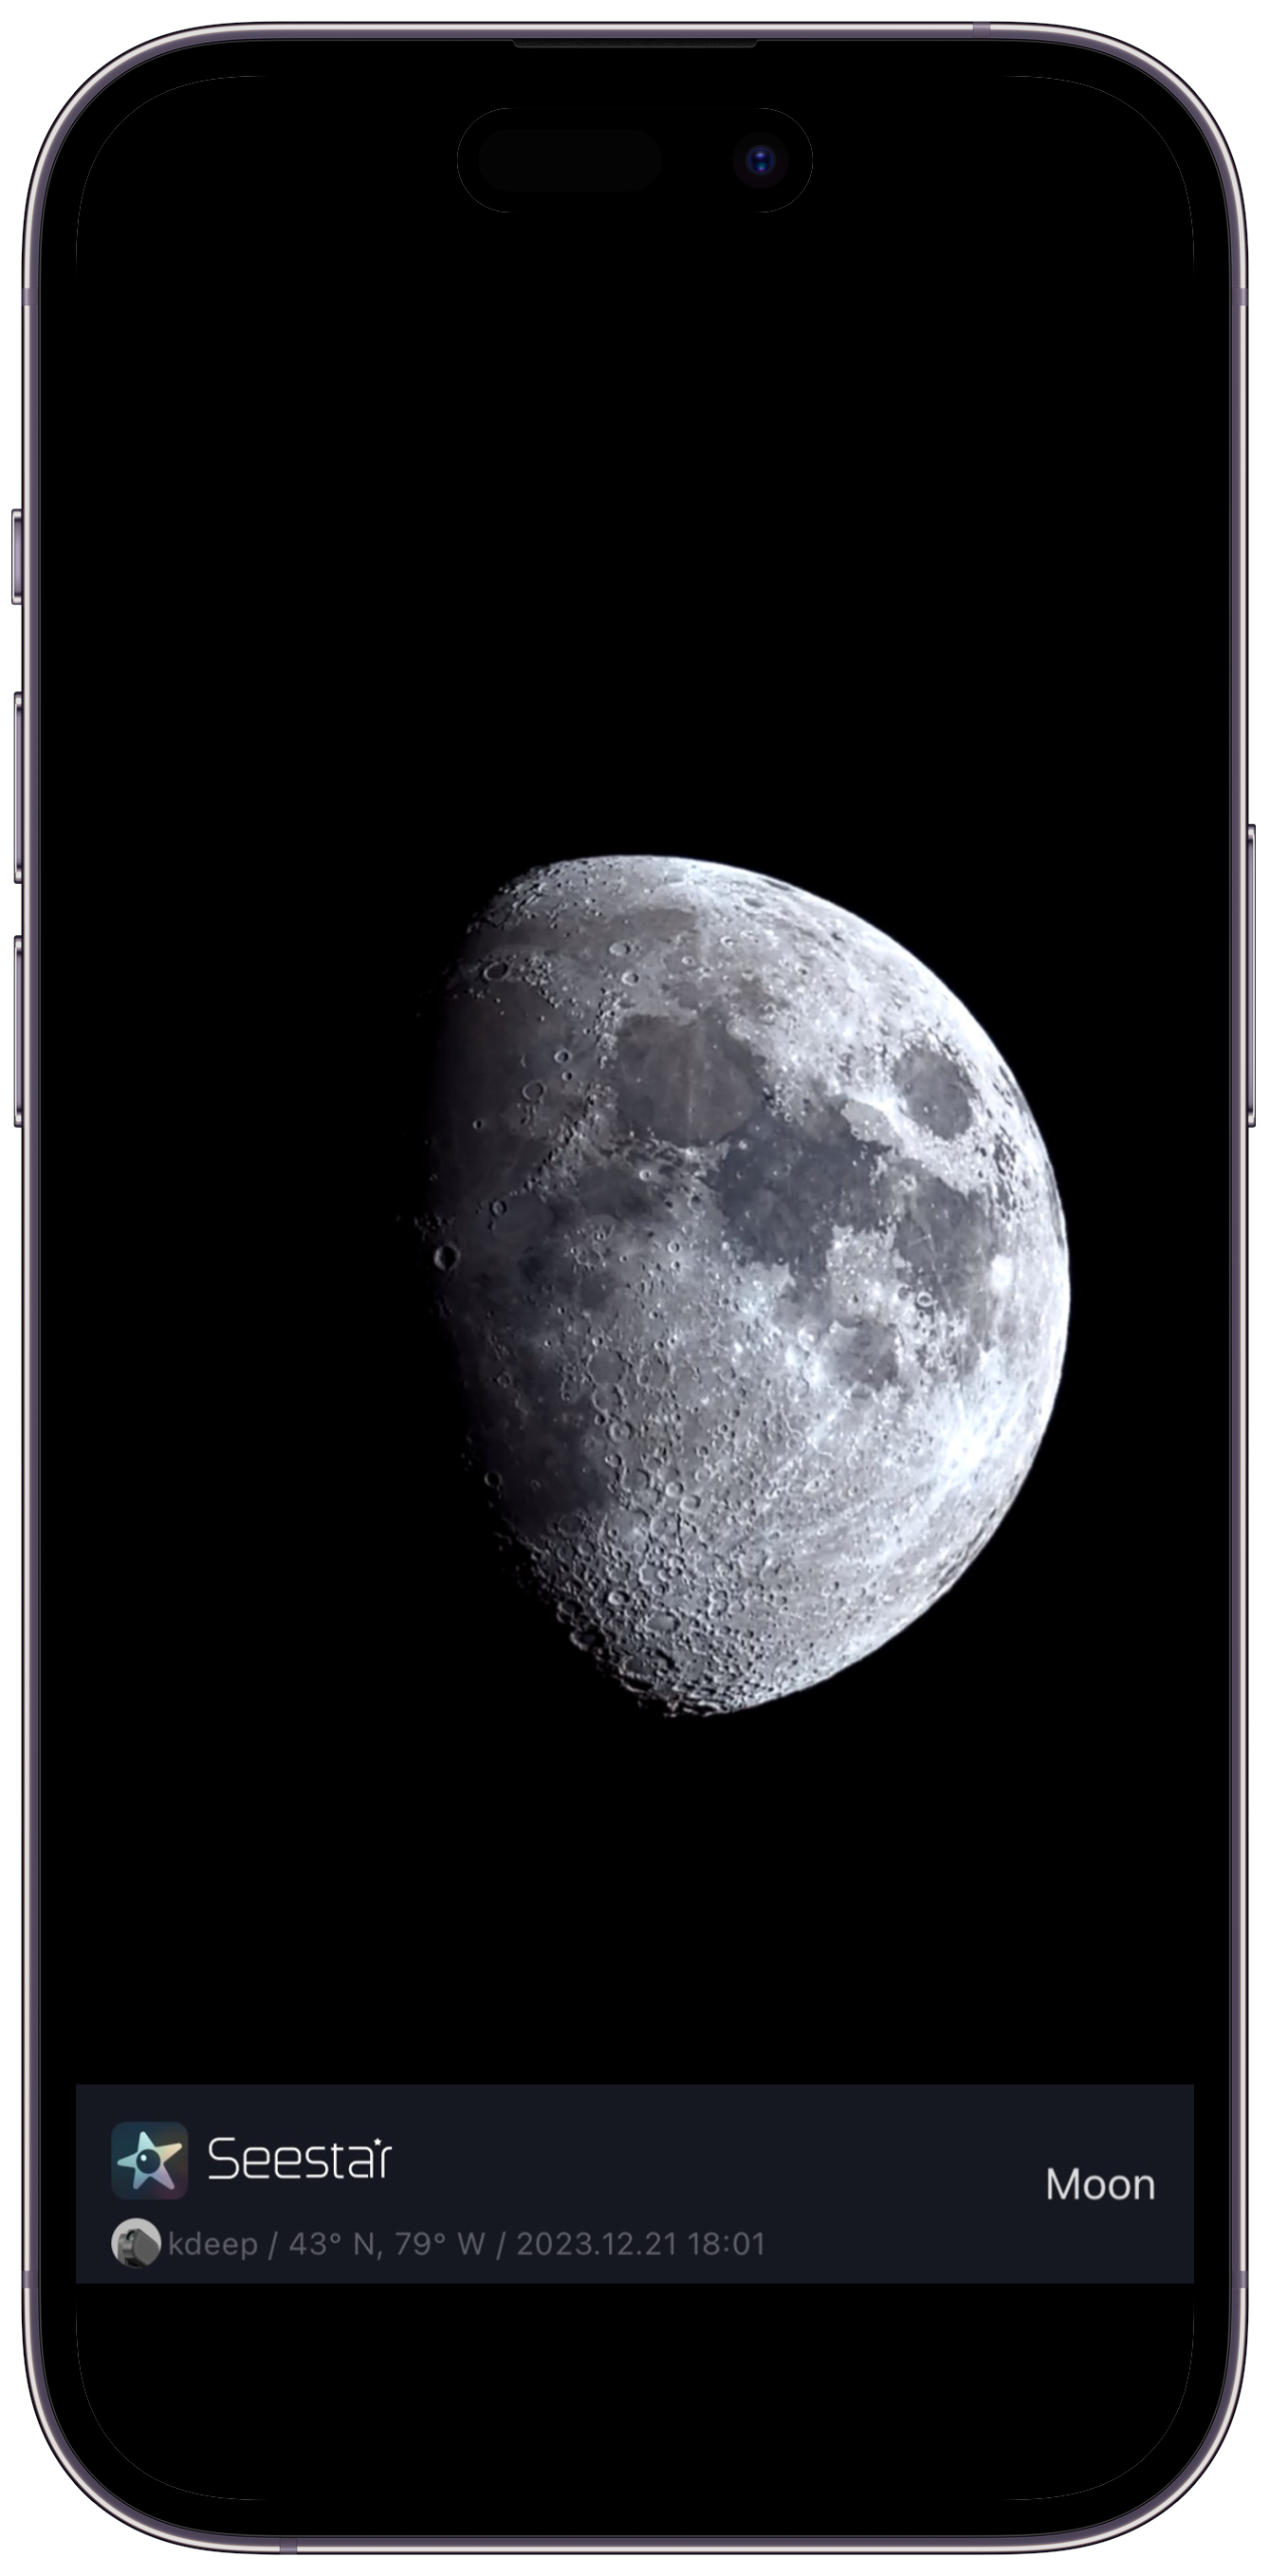
- Moon
-
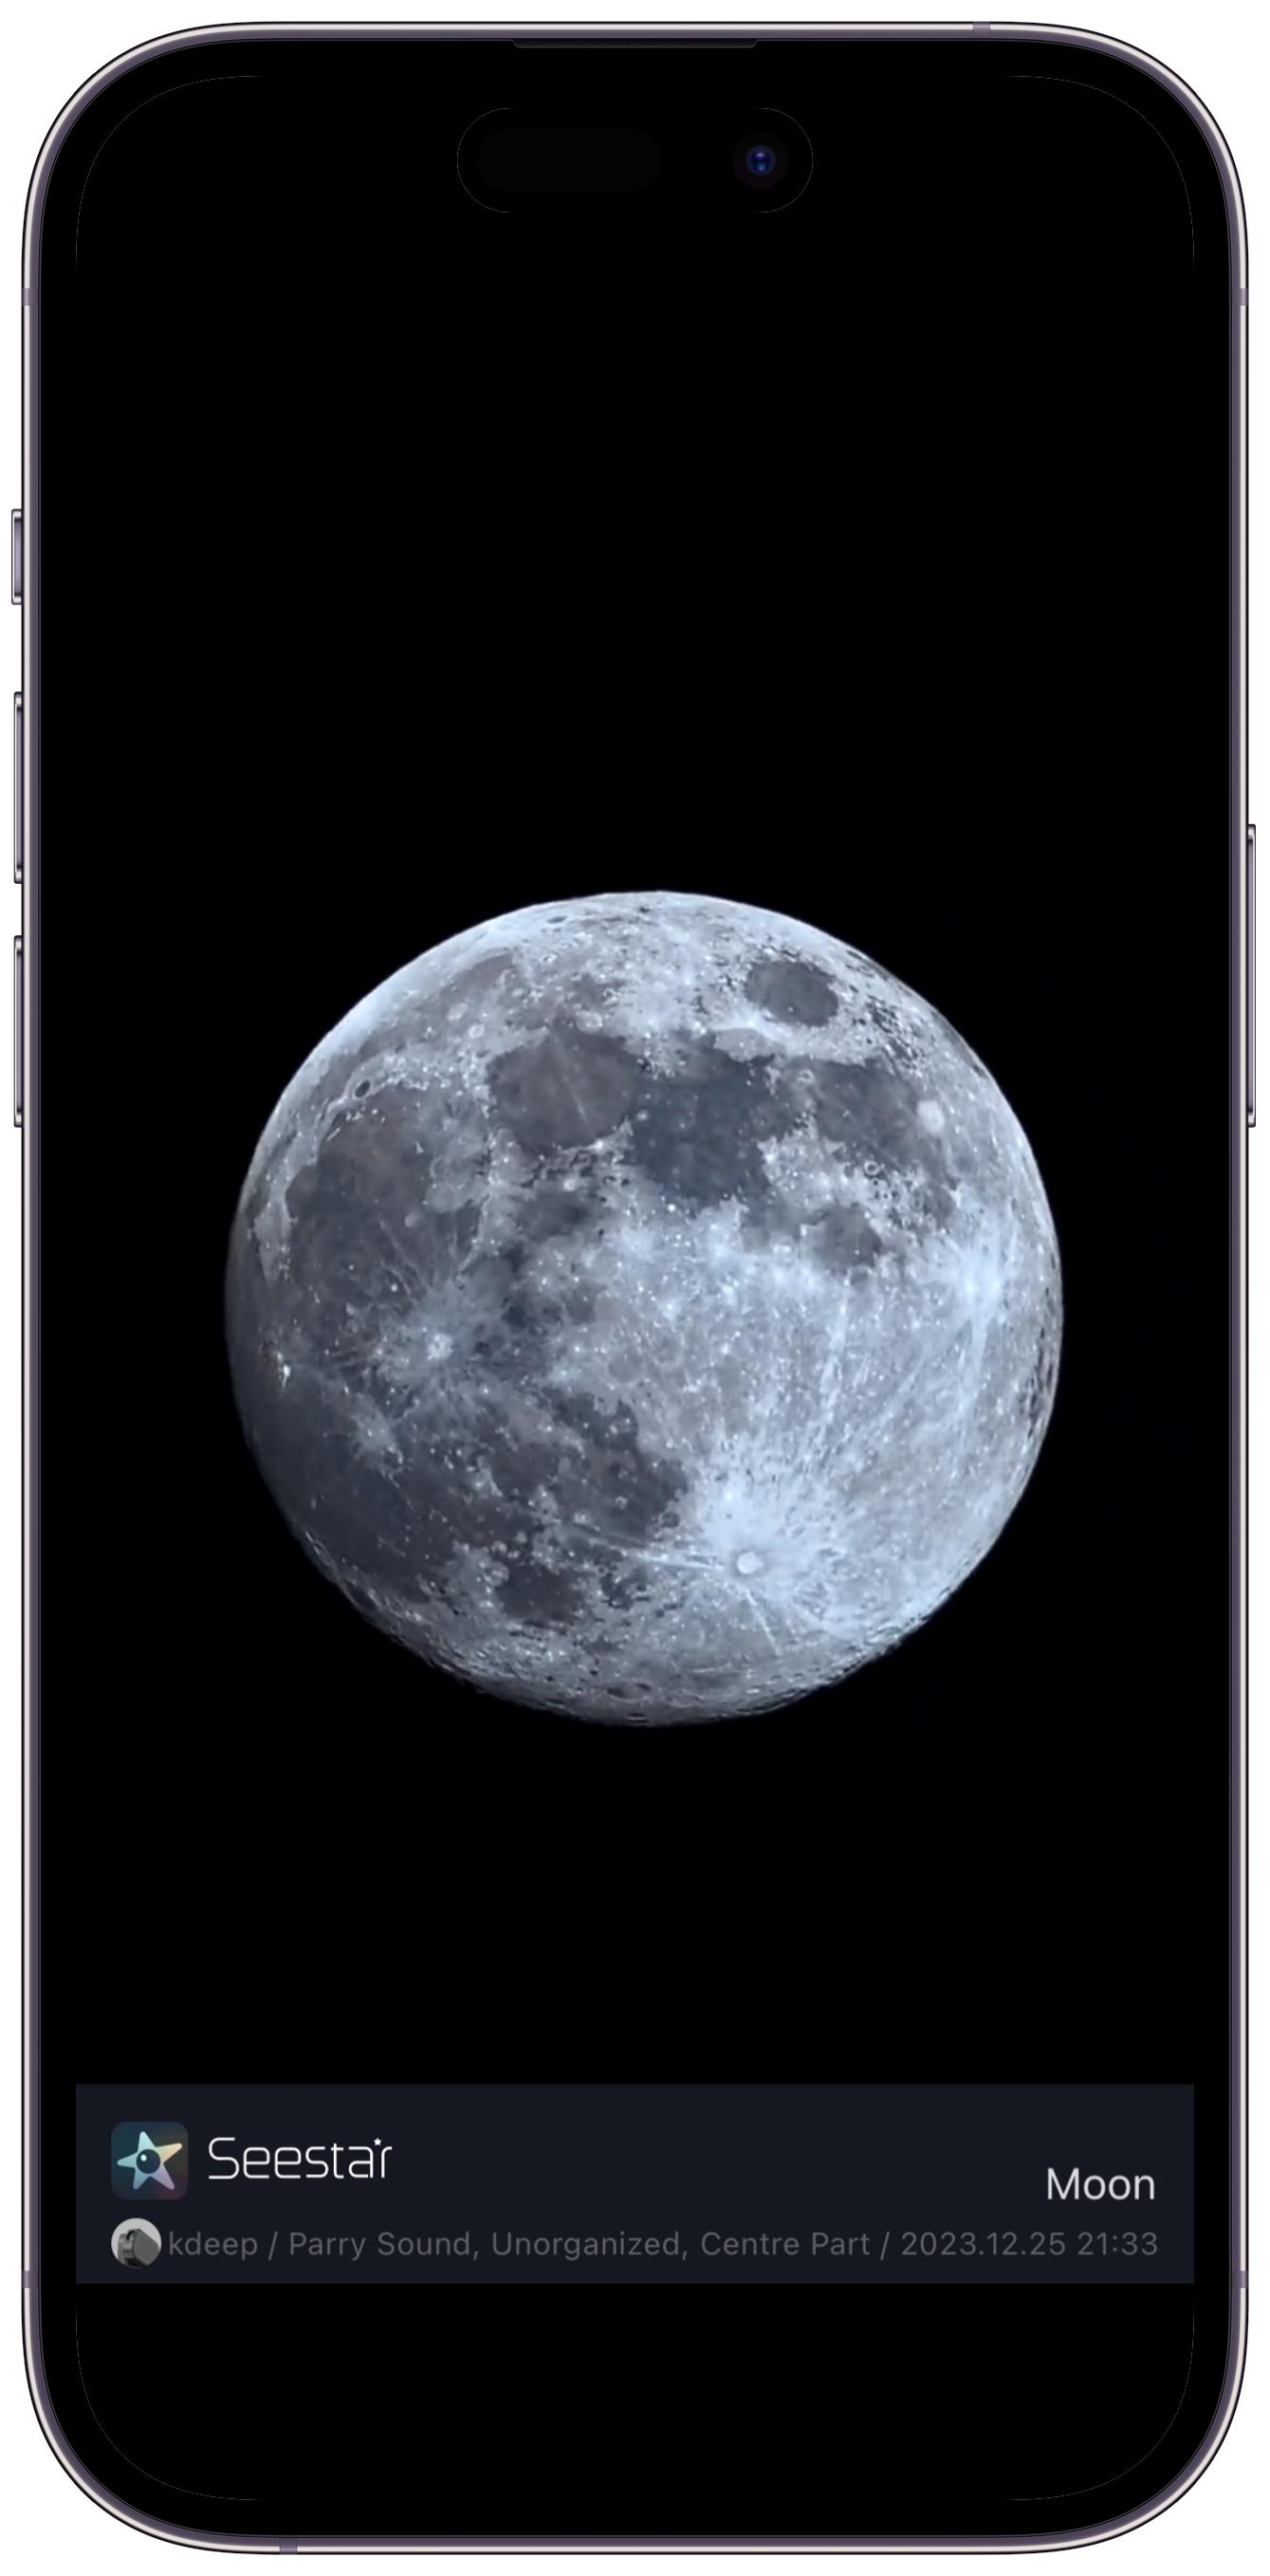
- Moon
-
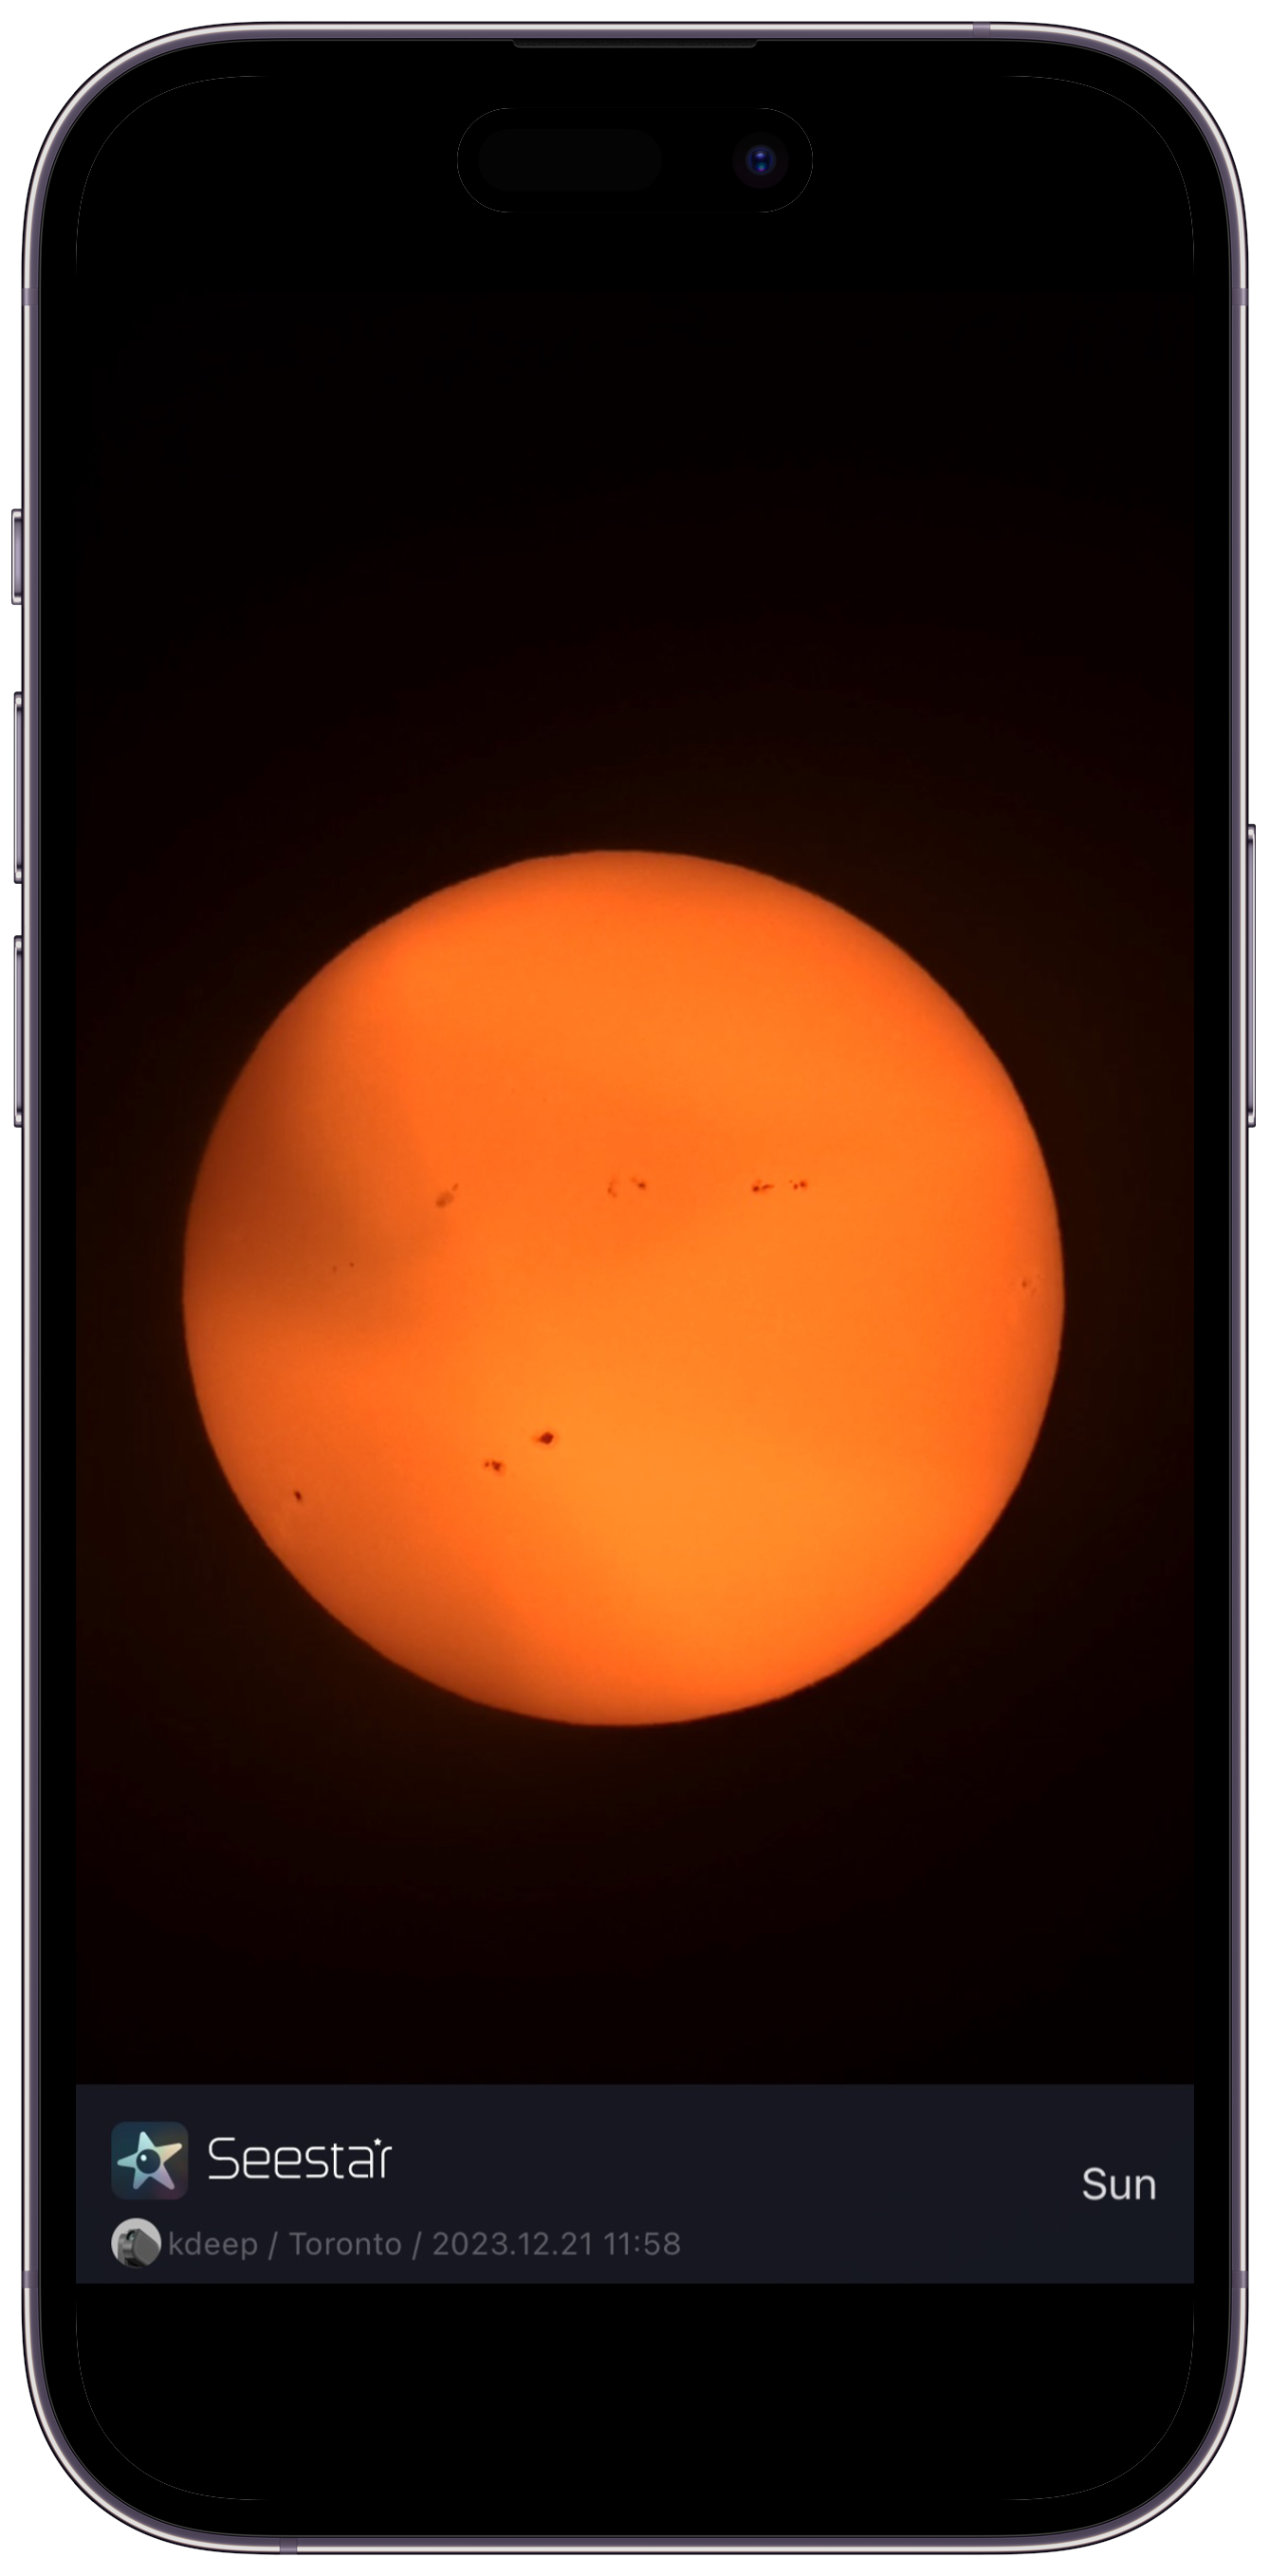
- Sun
-
- Orion Nebula/M42
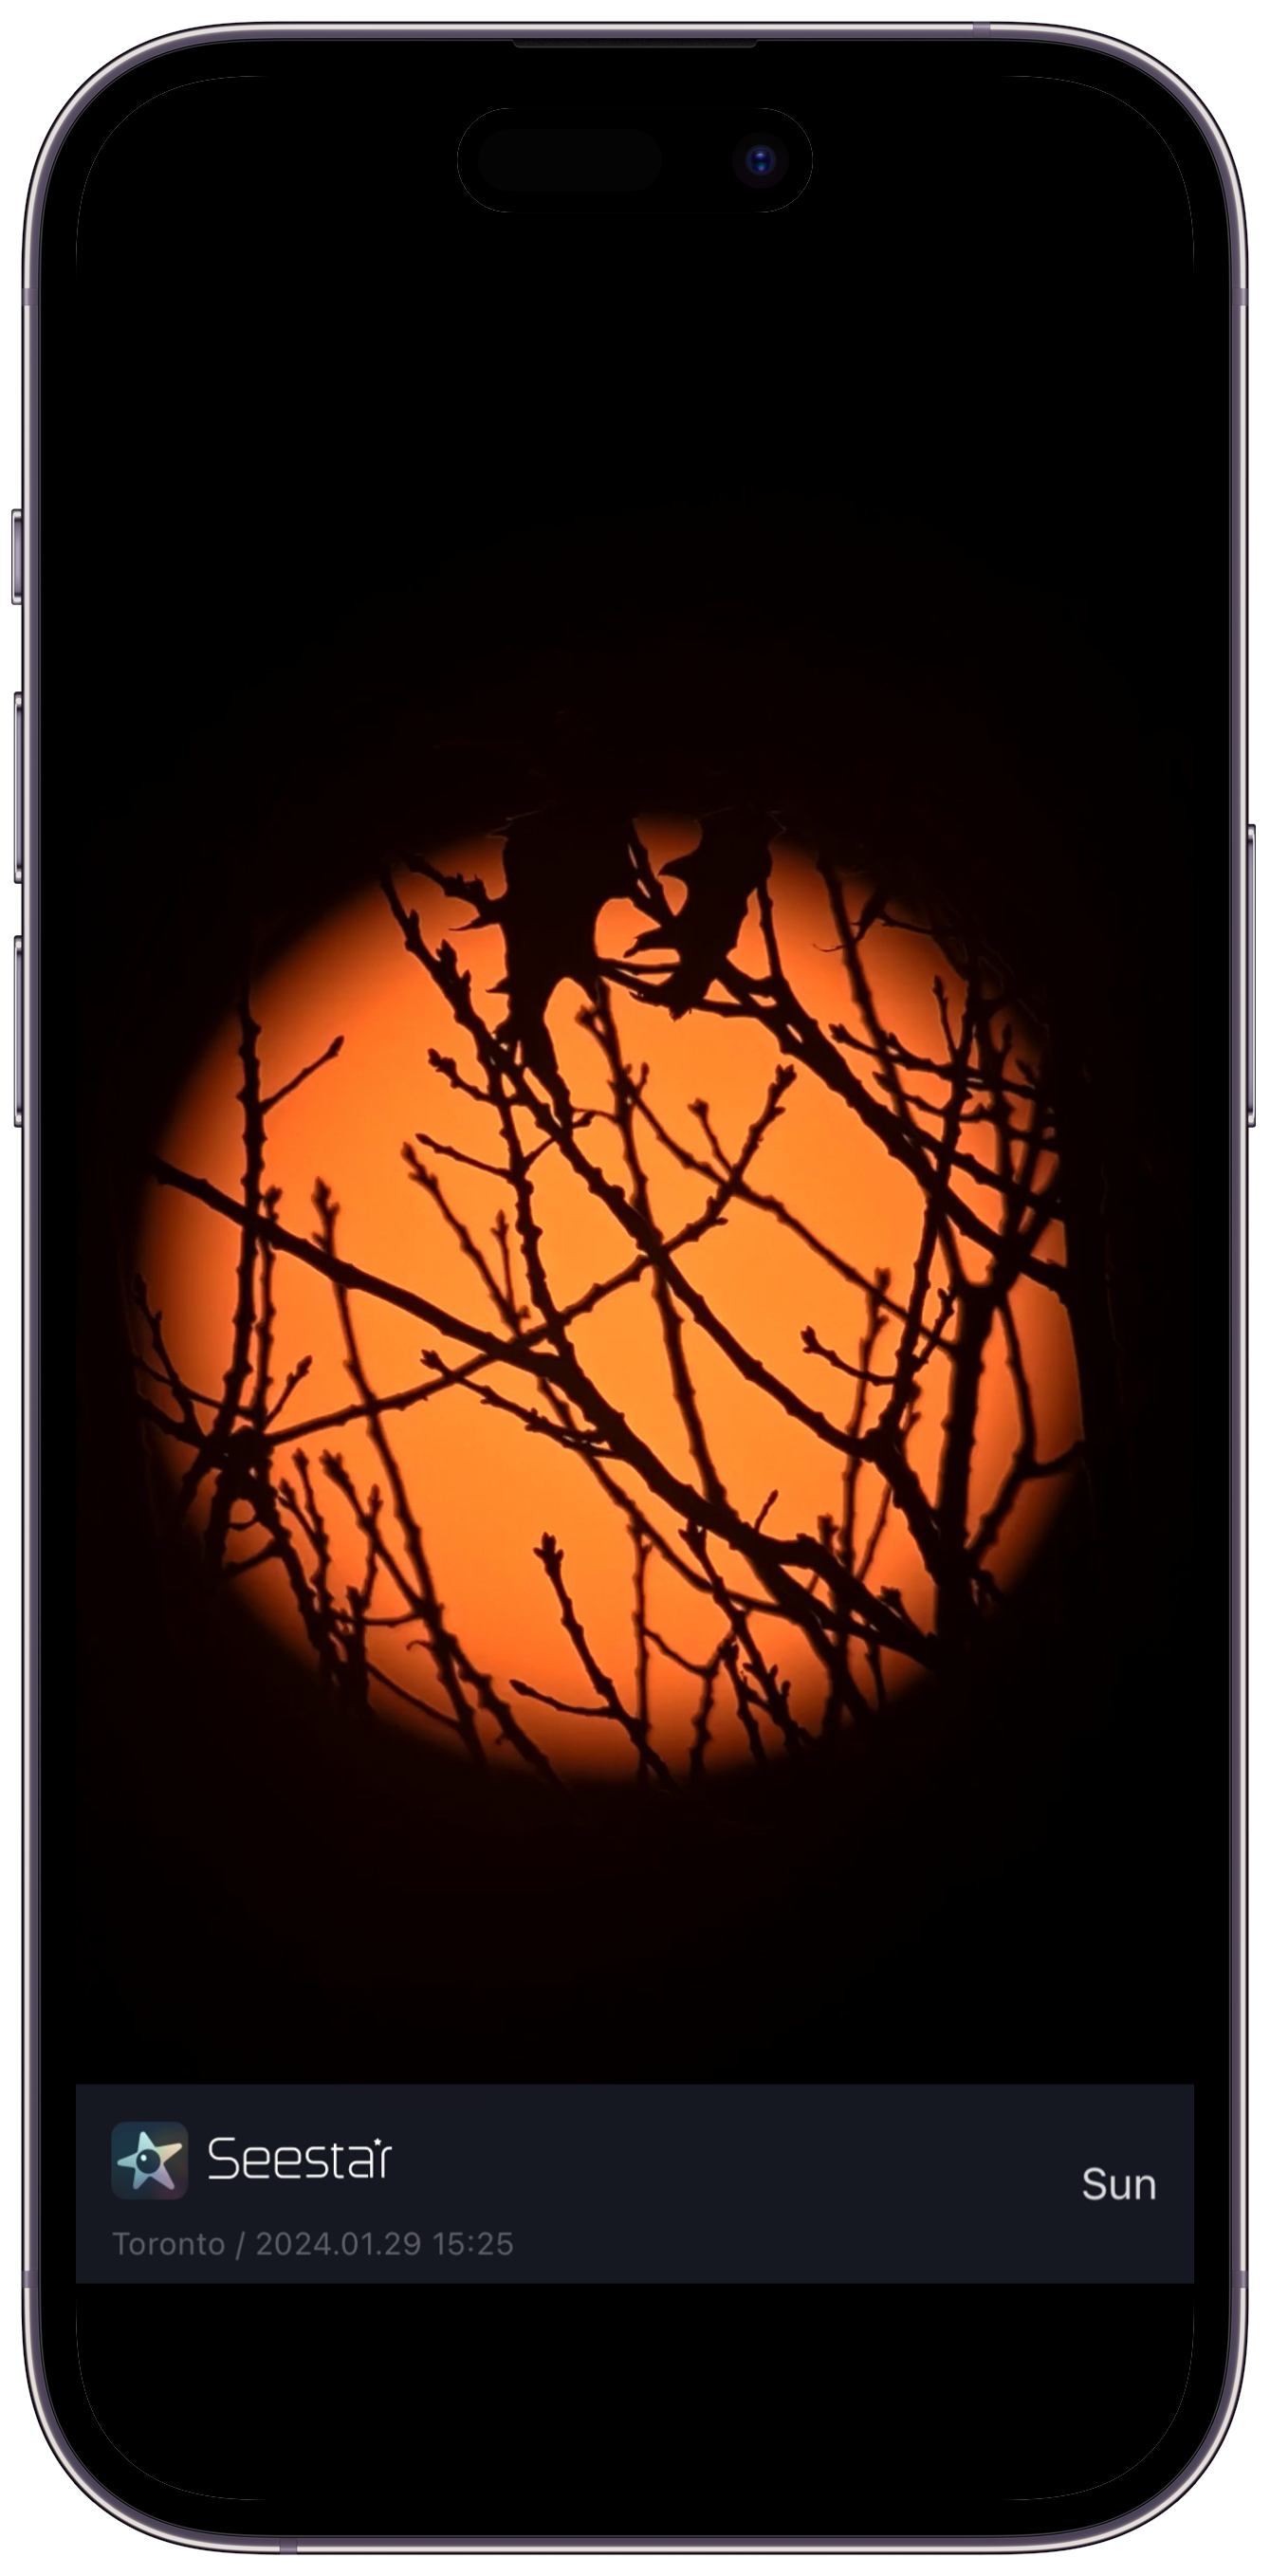
For brighter objects that are closer to home, you don’t need stacking. Take the Moon or the Sun, for example.
I was able to take this beautiful shot of the full Moon simply by slewing the scope towards it with the in-app controls and tapping the shoot button once.
The SeeStar S50 doesn’t come without its flaws, though. For starters, the 2.1-megapixel resolution it offers is lower than most smartphone cameras, which essentially means that the produced images will have fewer pixels and less clarity than regular higher-resolution cameras.
It has an alt-azimuth mount, which means it can only move left and right and up and down while tracking an object. It gets the job done but isn’t as good as an EQ mount, and results in artifacts and field rotation issues when shooting an image for a long duration. See examples below:
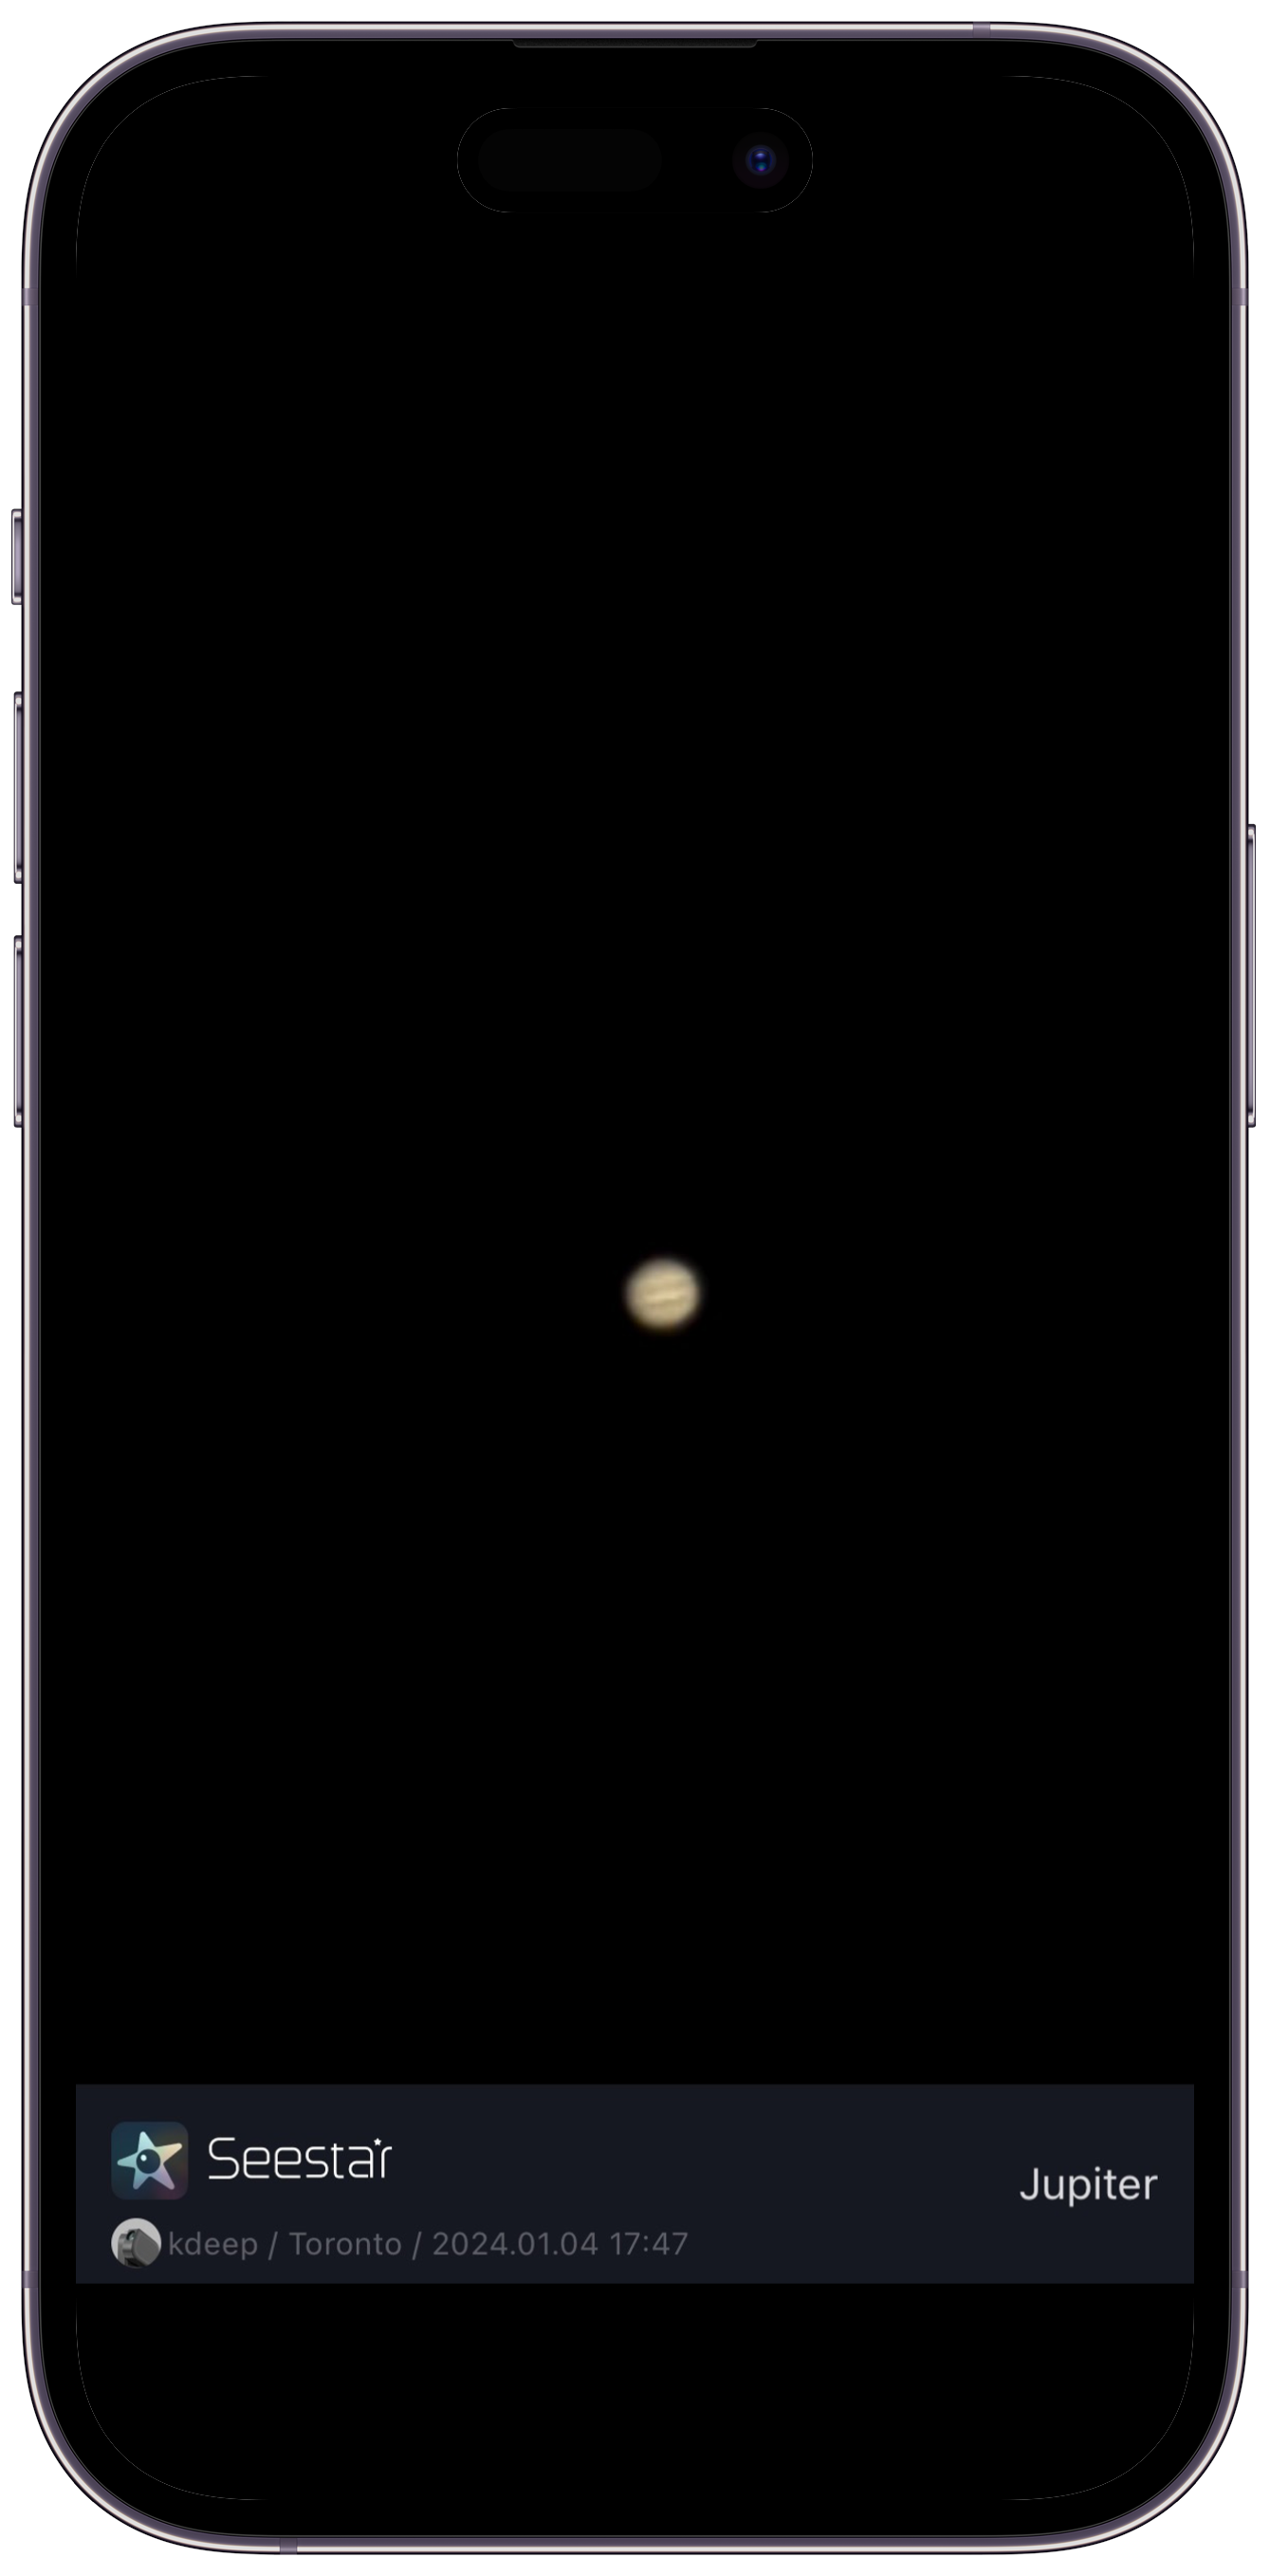
It’s also not great for taking images of planets. It can find and track planets like Jupiter and Saturn automatically, but they look like a blob of light with no reasonable detail. The 250mm focal length is just not enough to bring out details in planets, even though they’re relatively close to us when compared to deep-space objects.
The SeeStar S50 makes astrophotography so easy. But that is also the reason why it faces severe criticism, especially from purists.
For purists, the most rewarding feeling about taking a great image of a nebula, star cluster or faint galaxy comes from the challenges and complexity of traditional astrophotography. They also value the process of learning and mastering the skills and techniques of astrophotography, rather than relying on a smart device that does most of the work for them. To those with this opinion, the SeeStar S50 may seem like a toy, rather than a serious astronomy/astrophotography instrument, and that’s fine.
However, for people looking to experiment with the hobby without having to spend too much money, for those pressed for time, or for anyone looking to introduce someone to the amazing hobby, the SeeStar S50 is a great buy that would allow you to capture stunning images of the night sky and learn about objects in space with just a few taps on your smartphone.

The SeeStar S50 is not designed to replace traditional astrophotography, but to complement it, and after using it, I now understand why it has been flying off the shelves.
The SeeStar S50 is available for $674 directly via ZWO or Seestar, or through Canadian retailers like Telescopes Canada, AllStar Telescope and more.
MobileSyrup may earn a commission from purchases made via our links, which helps fund the journalism we provide free on our website. These links do not influence our editorial content. Support us here.
