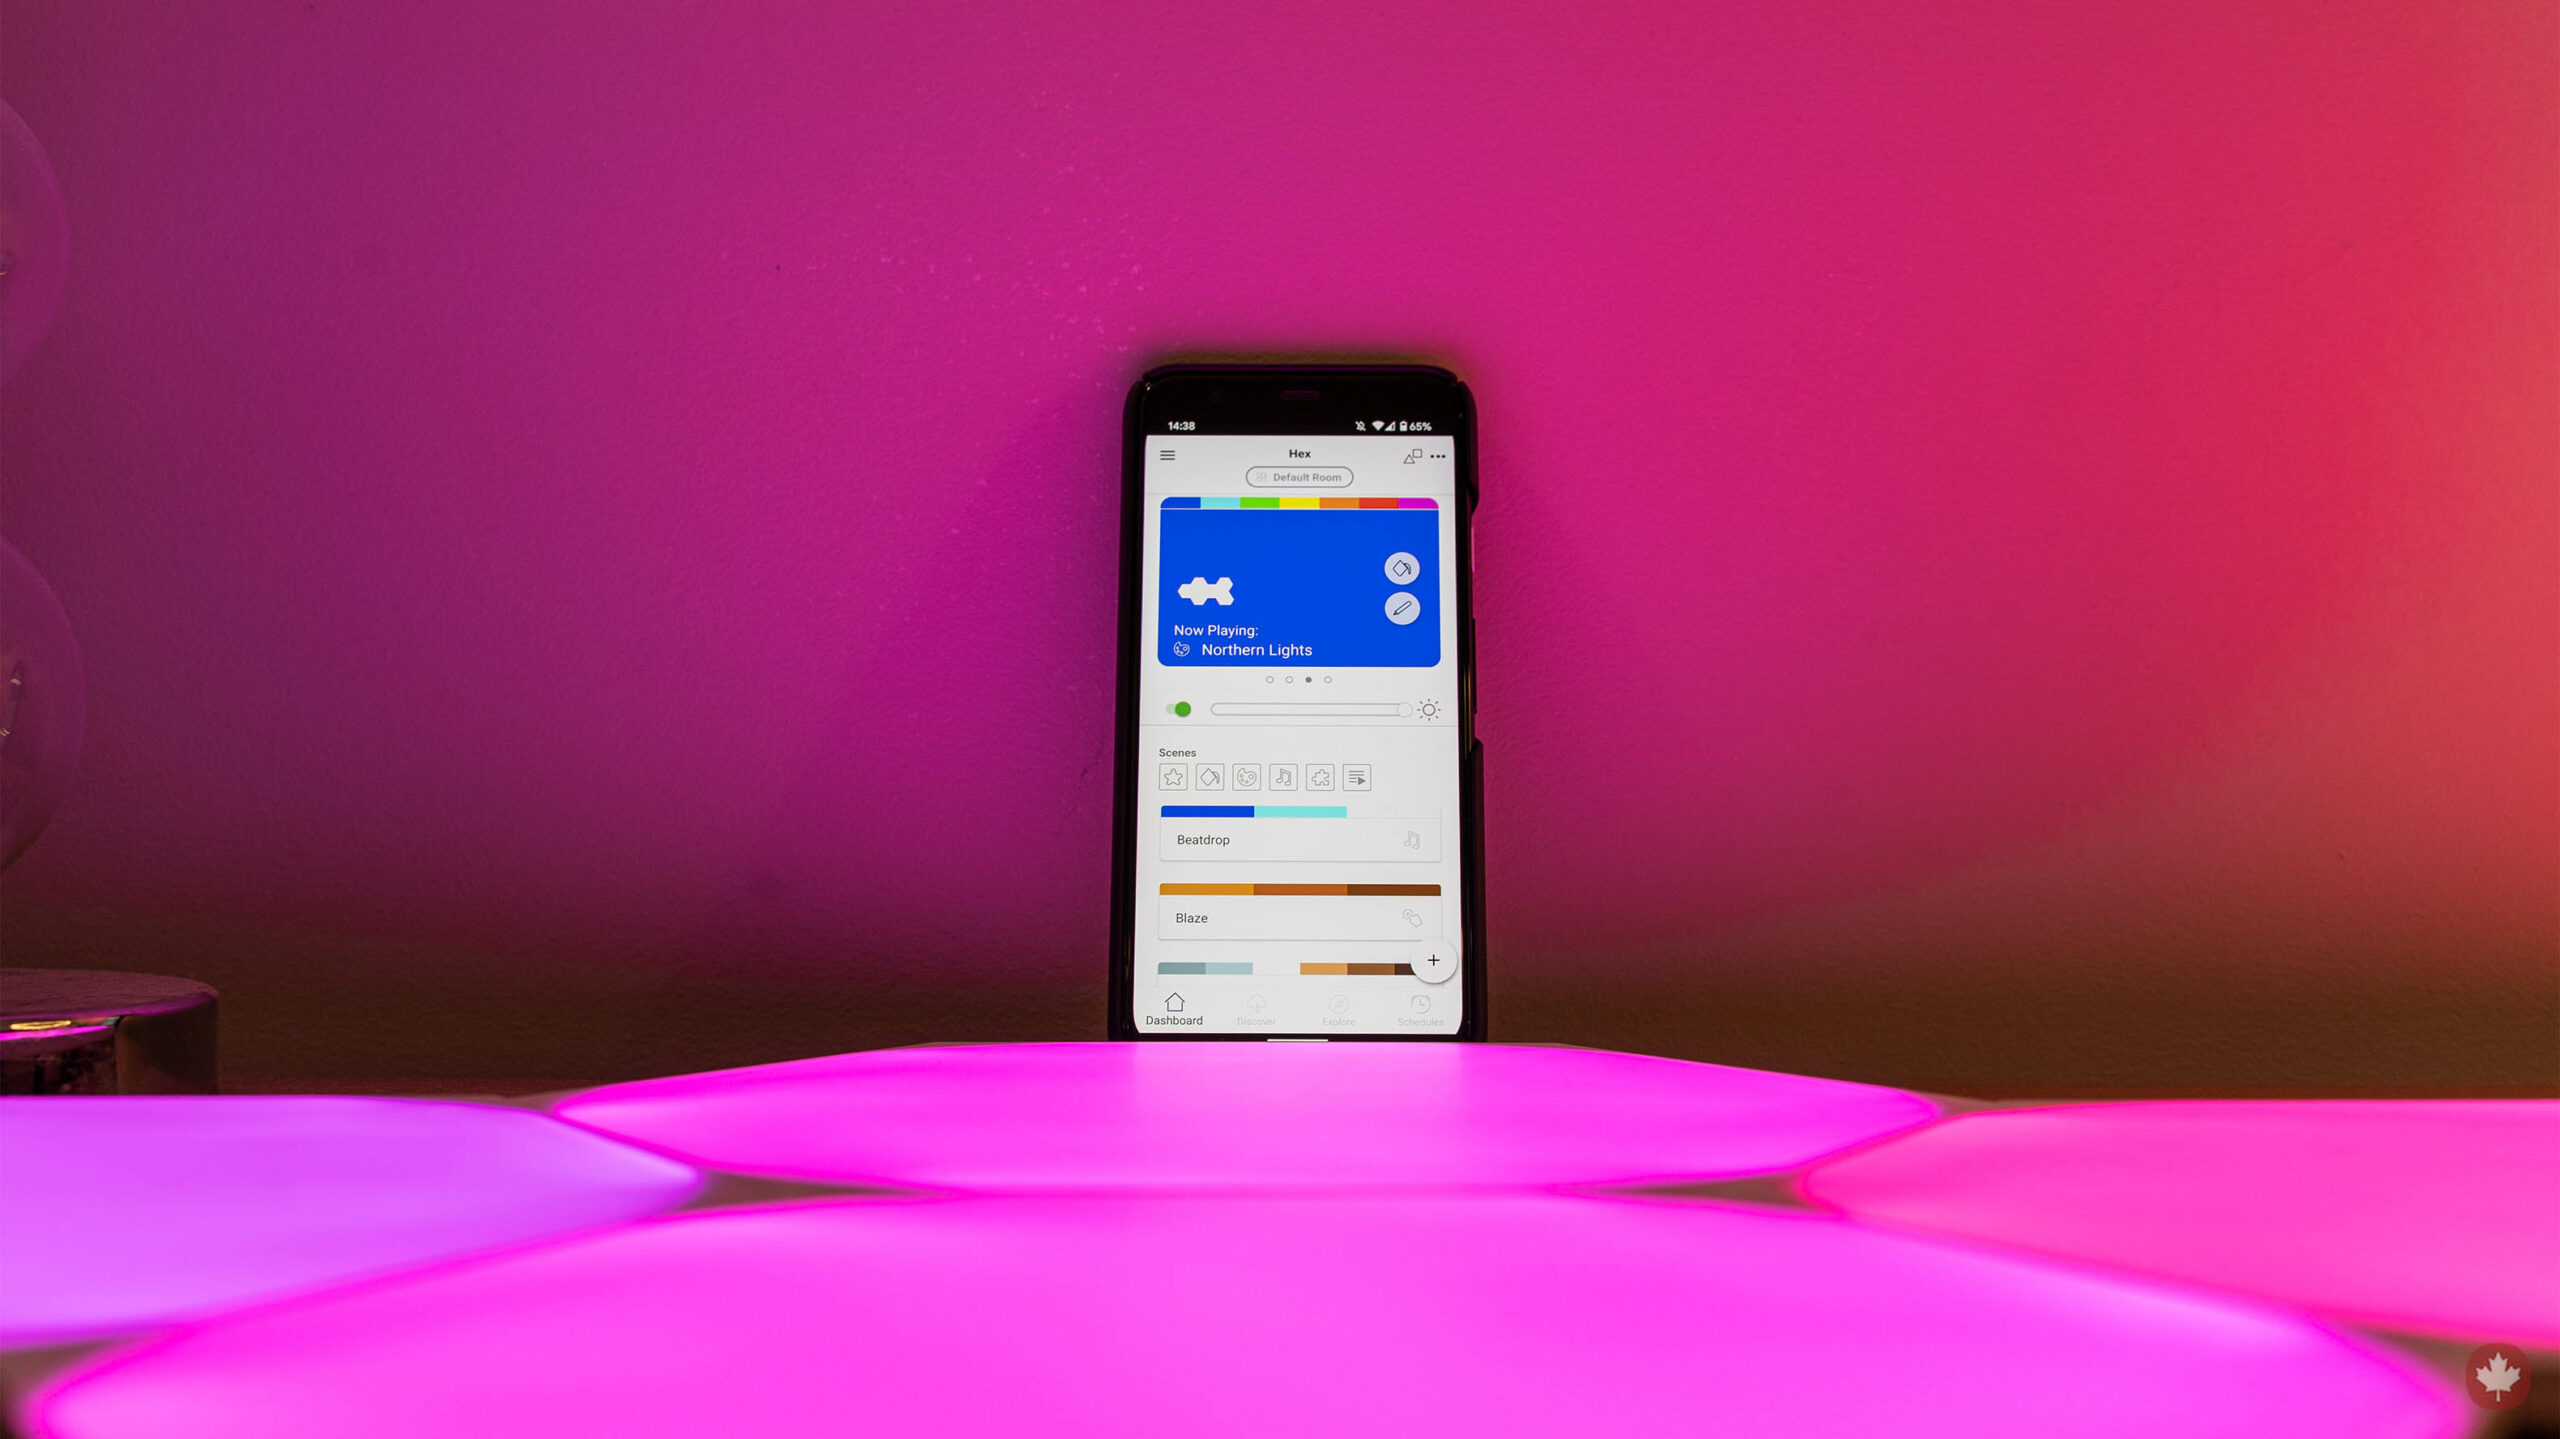
So, you just got some of Nanoleaf’s fancy new smart light panels to deck out a room in your house, and you want to connect it with your smart home set-up? No problem, we’ve got the rundown on how to do that for you here.
The Toronto-based company launched two new ‘Shapes’-based lighting options, the new Shapes Triangles and Mini Triangles. But whether you’re rocking those, the Shapes Hexagons (which are interoperable with the other Shapes options) or the older Canvas or Light Panels, the process of integrating them with your smart home should look the same.
First, you’ll need to download the Nanoleaf app and follow the steps to set up and connect your lights to the app. Without that step, the rest won’t work. Once that’s done, you’re able to integrate Google Assistant, Amazon Alexa or Homekit to control the lights with your smart speaker of choice. There are some other services you can integrate Nanoleaf lights with, but we’re going to focus on the main three smart speaker lines for this article. You can check out a full list of supported integrations on Nanoleaf’s website.
Google Assistant
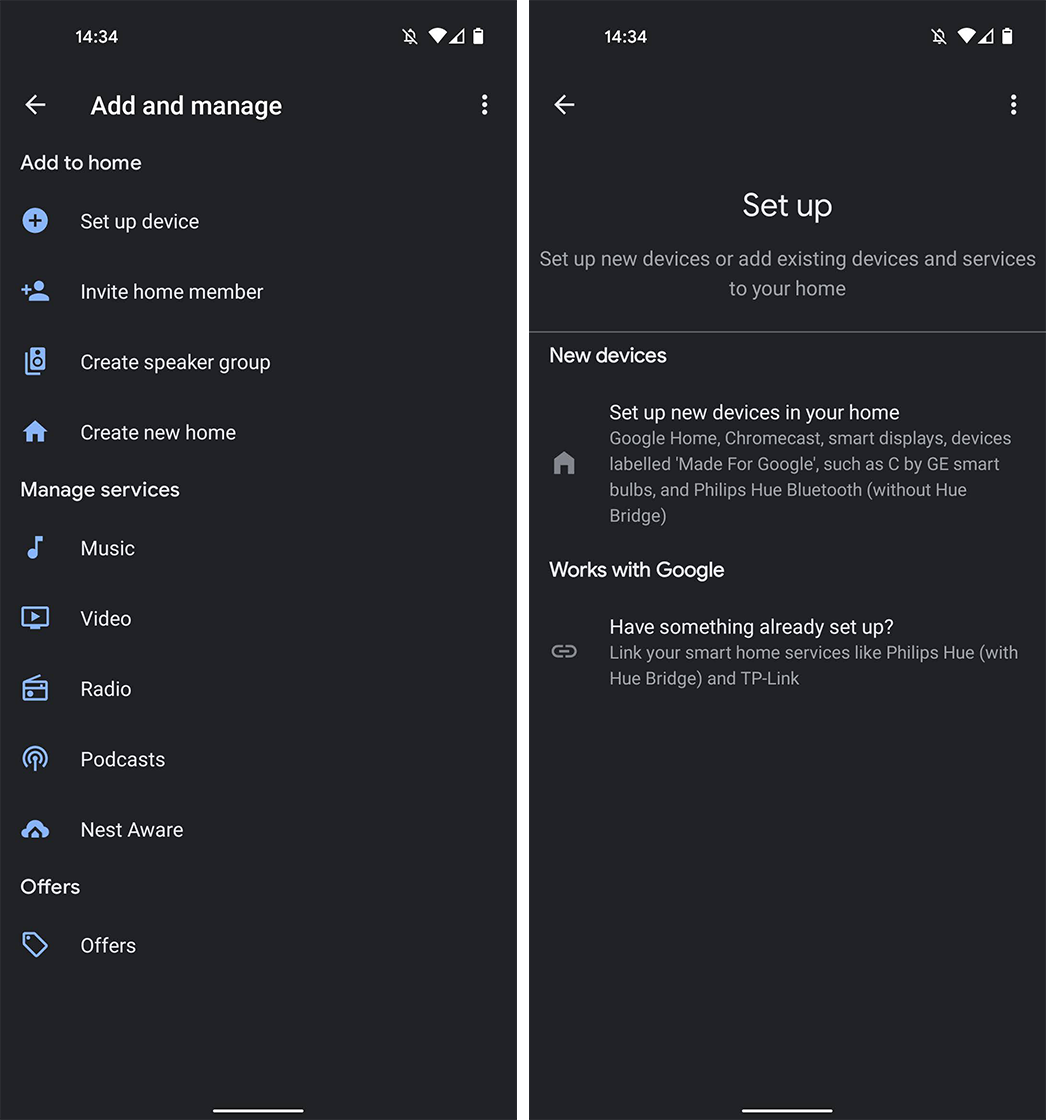
In my experience, the best way to set up a Nanoleaf light with Google Assistant is through the Google Home app — which you should have if you use any Assistant-powered smart home devices.
Whether on iOS or Android, open the Home app and tap the ‘+’ button in the top-left corner. Then, tap Set up > Have something already set up? > Search for / select Nanoleaf from the list. Then, follow the steps to sign in and connect your Nanoleaf and Google accounts.
Once that’s done, Google Home will prompt you to add any lights it found connected to your Nanoleaf account to a room in your home. From there, you should be able to control the Nanoleaf lights both with Google Assistant on smart speakers and phones as well as with the Home app.
You can learn more about Nanoleaf and the Google Assistant integration here.
Amazon Alexa
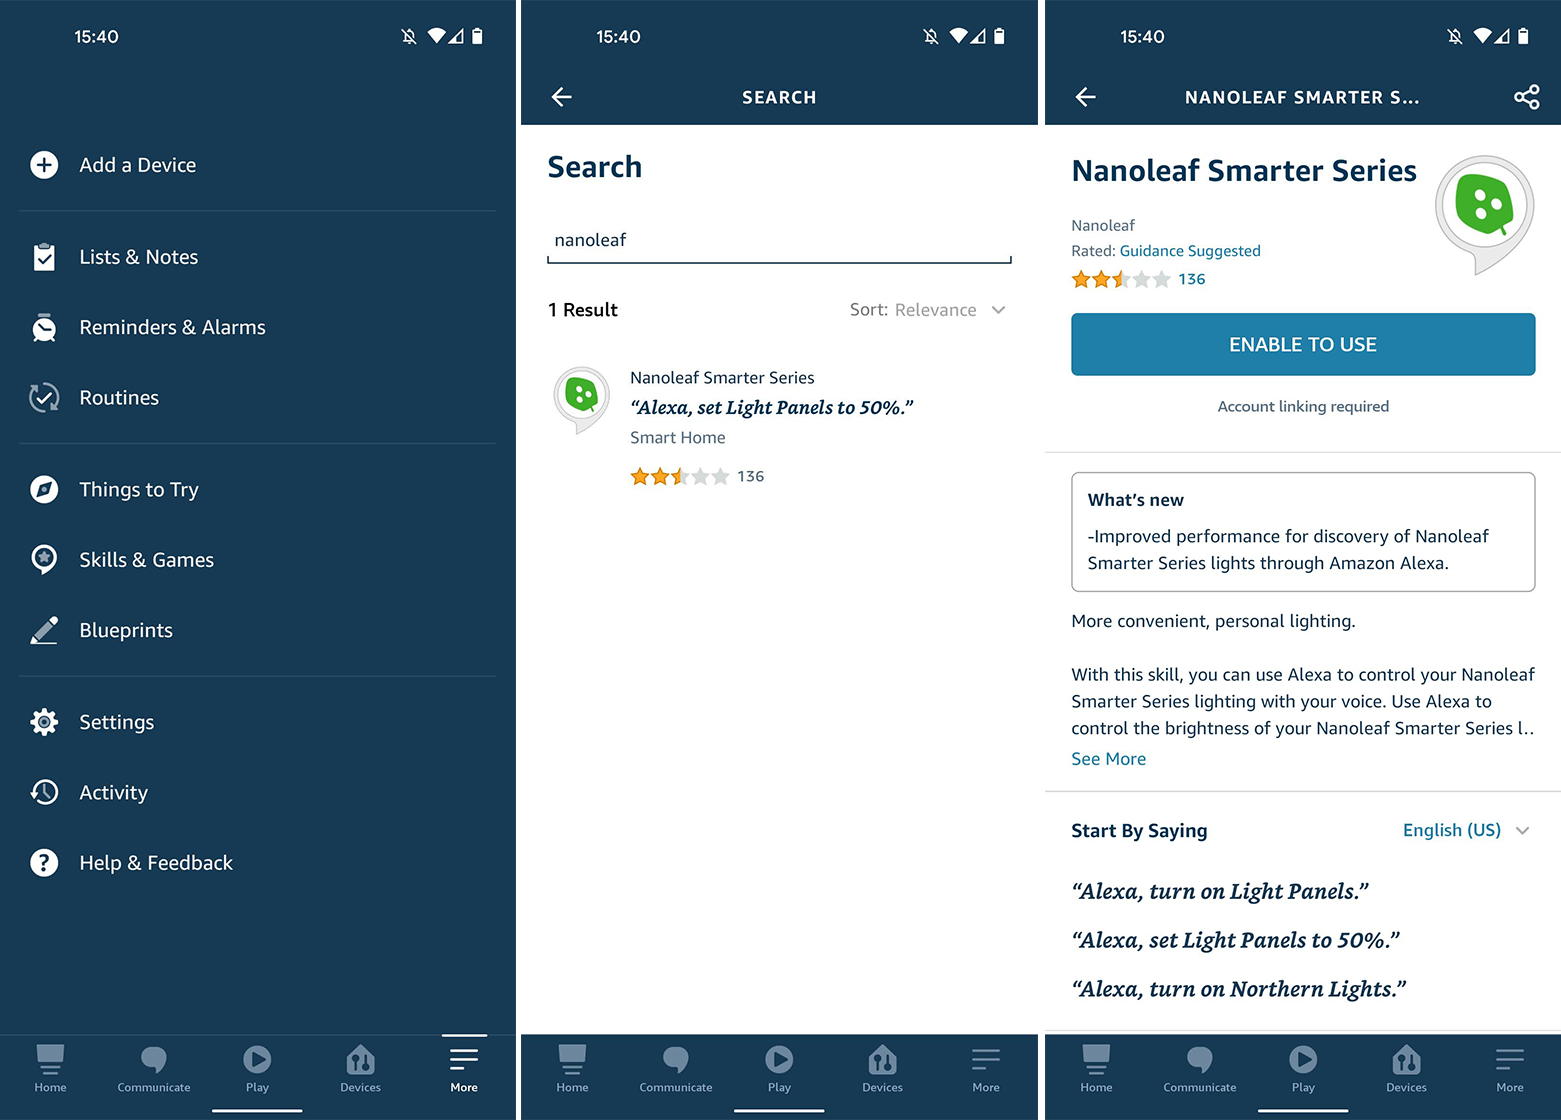
The Alexa set up process is also relatively simple. Head to the Alexa app on either your iPhone or Android phone. Tap the ‘More’ button in the bottom left > Skills > search and select Nanoleaf > ‘Enable to use.’
When you press the Enable to use button, the Alexa app will take you through the process of signing in with your Nanoleaf account and connecting the services. Alexa should automatically detect any connected Nanoleaf devices. If not, you can find them by asking Alexa to ‘discover my devices’ or by heading to the ‘Devices’ tab.
You can learn more about Nanoleaf and Alexa’s integration here.
Homekit
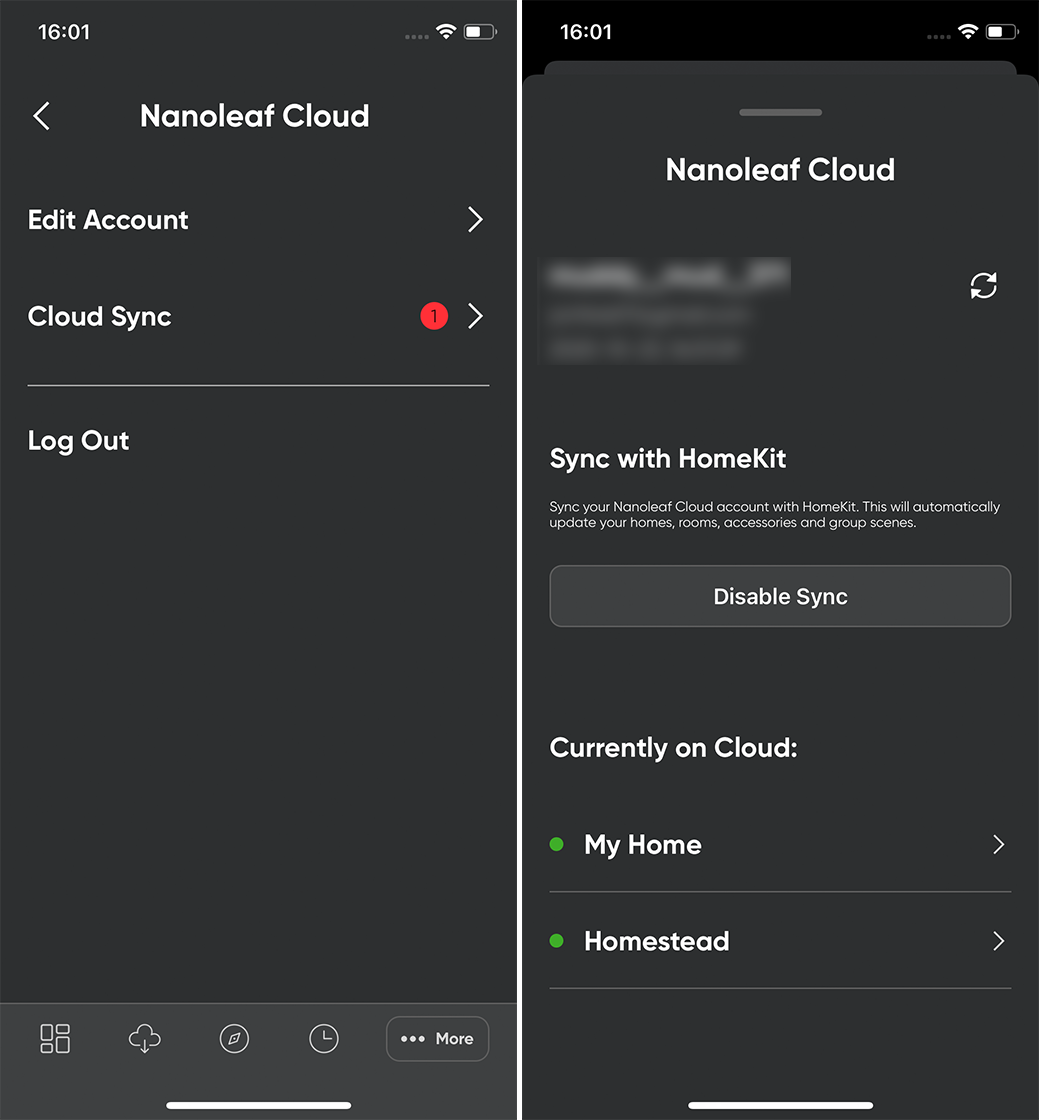
Homekit may actually be the easiest of the three to set up. When you sign in to the Nanoleaf app on an iOS device, it’ll ask you if you want to enable Homekit sync. If you tap yes here, that’s all you need to do.
For those who signed in to the Nanoleaf and didn’t enable Homekit sync — or just don’t remember — can double-check their sync status. To do so, tap More > Your account at the top > Cloud Sync > Sync with Homekit. If that option is enabled, you’re good to go.
Once all that’s done, just head to the Home app on your iOS device, and you should see the lights there.
You can learn more about Nanoleaf and Homekit’s integration here.
MobileSyrup may earn a commission from purchases made via our links, which helps fund the journalism we provide free on our website. These links do not influence our editorial content. Support us here.
