Losing things really sucks.
What’s the worst thing for you to lose? Your keys? Your wallet? I’d argue it’s your phone, tablet, or computer. Not because they’re expensive but because your keys and wallet don’t know everything about you. Only our personal electronic devices know everyone you’ve ever talked to, every place you have been, and likely more information about you than what we know about yourself.
If you’re lucky, you’ll never lose one of your Apple devices. However, if you do, it’ll be a stressful situation. So if you lose an iPhone, iPad, or MacBook, I’ve put together a helpful five-step guide to help reduce your stress in this lousy situation. Each step is meant to provide an explanation and resources to help you recover your device and protect your personal data.
Step 1: Check ‘Find My’
‘Find My’ is Apple’s device tracking solution. iPhones, iPads, Macs, and iPod Touches (may they rest in peace) use Wi-Fi or cellular data to mark their location. In addition, many of Apple’s devices will continue to ping their approximate location via low-powered Bluetooth signals with other Apple devices after their battery dies.
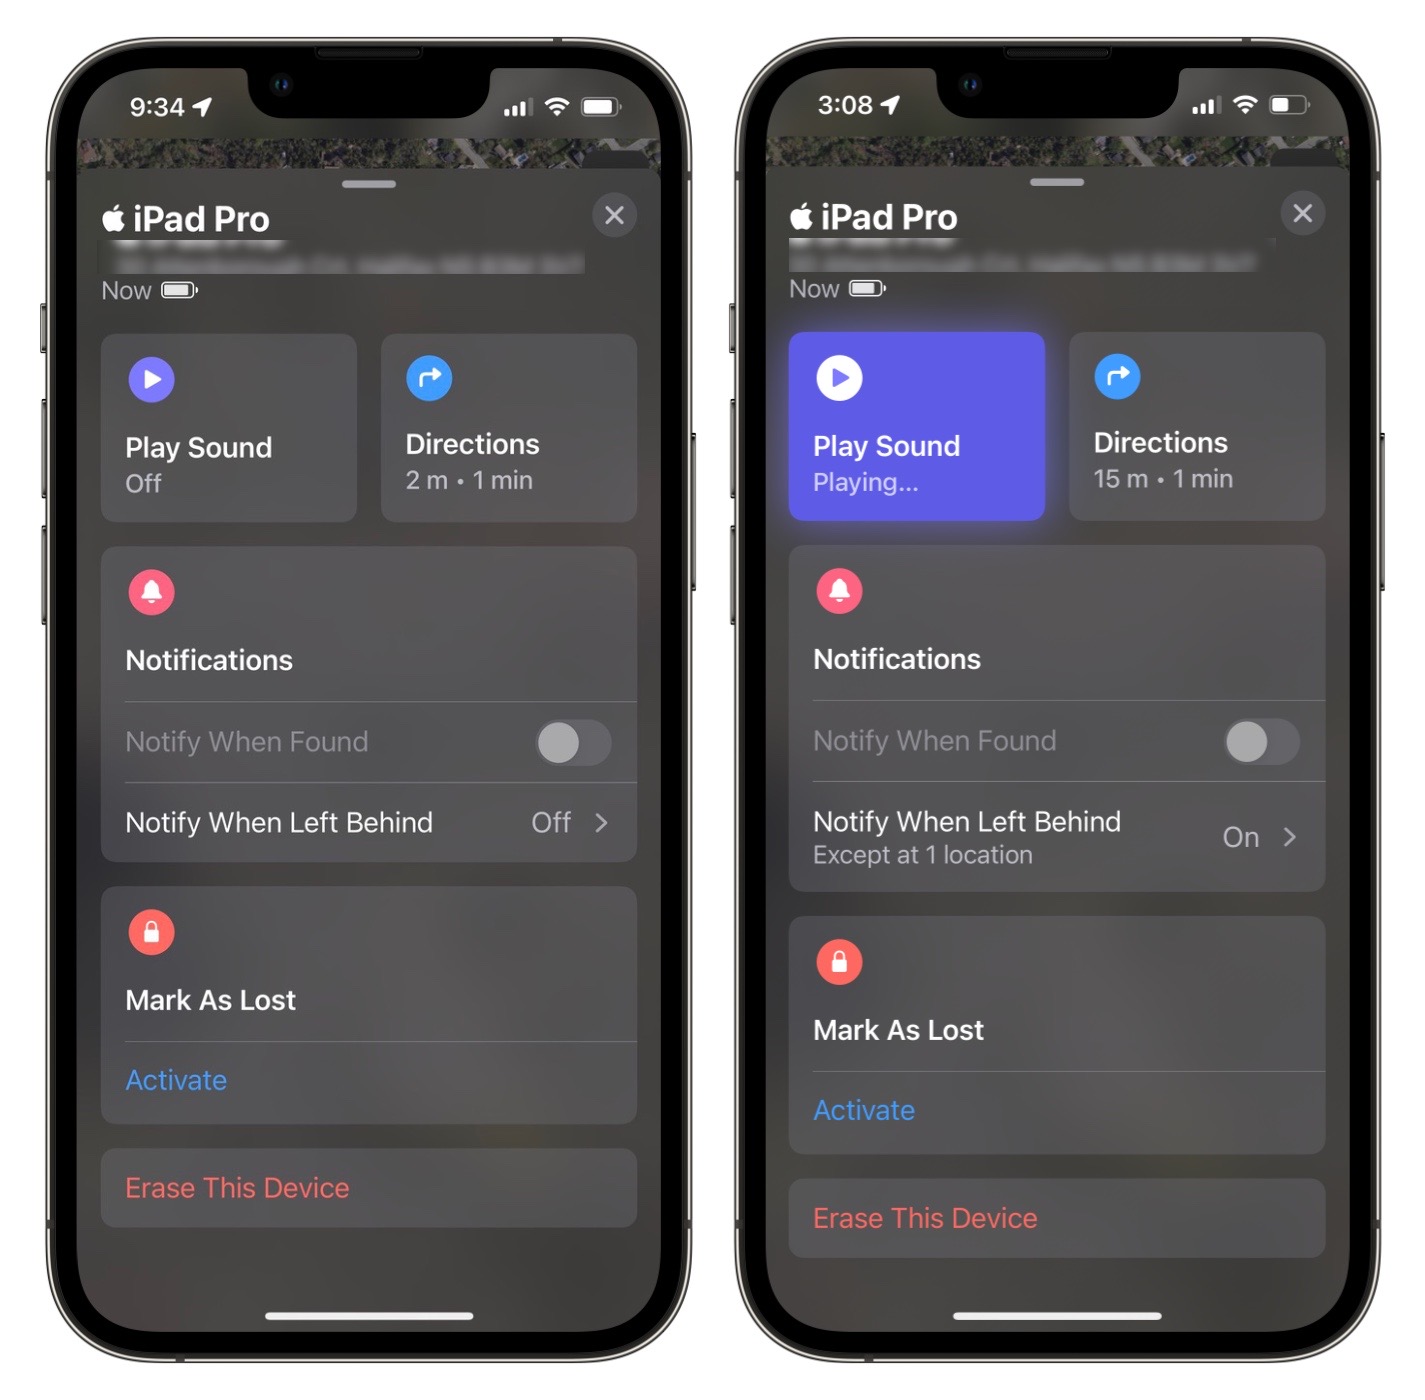
When you misplace one of your devices, the first thing you should do is to check the Find My app on another Apple device or visit iCloud.com/find. If prompted, sign in with your Apple ID. If using the iOS or Mac app, tap ‘Devices,’ and you’ll see a map of where your devices are. If they aren’t currently reporting their location, you may see the device’s last known location (pending that setting was enabled).
Ideally, you’ll see your missing device. Tap on the device’s name and tap ‘Play Sound’ or tap ‘Directions’ to hear it play a sound or get turn-by-turn directions. If the device isn’t reporting a location or seems unretrievable, move on to step 2.
To enable Find My on an iOS device:
1. Launch Settings
2. Tap your name at the very top
3. Tap Find My
4. Tap Find My iPhone
5. Toggle Find My iPhone, Find My network, and Send Last Location to on (green)
To enable Find My on macOS:
1. Launch System Preferences
2. Click Security & Privacy
3. Click the Privacy tab
4. Click the lock icon in the lower left-hand corner
5. Enter your password
6. Click Unlock
7. Click Location Services
8. Check ‘Enable Location Services’ to on
9. Check ‘Find My’ to on
10. Click the back arrow in the top left corner
11. Click Apple ID
12. Click iCloud
13. Check ‘Find My Mac’ to on
Step 2: Mark as Lost
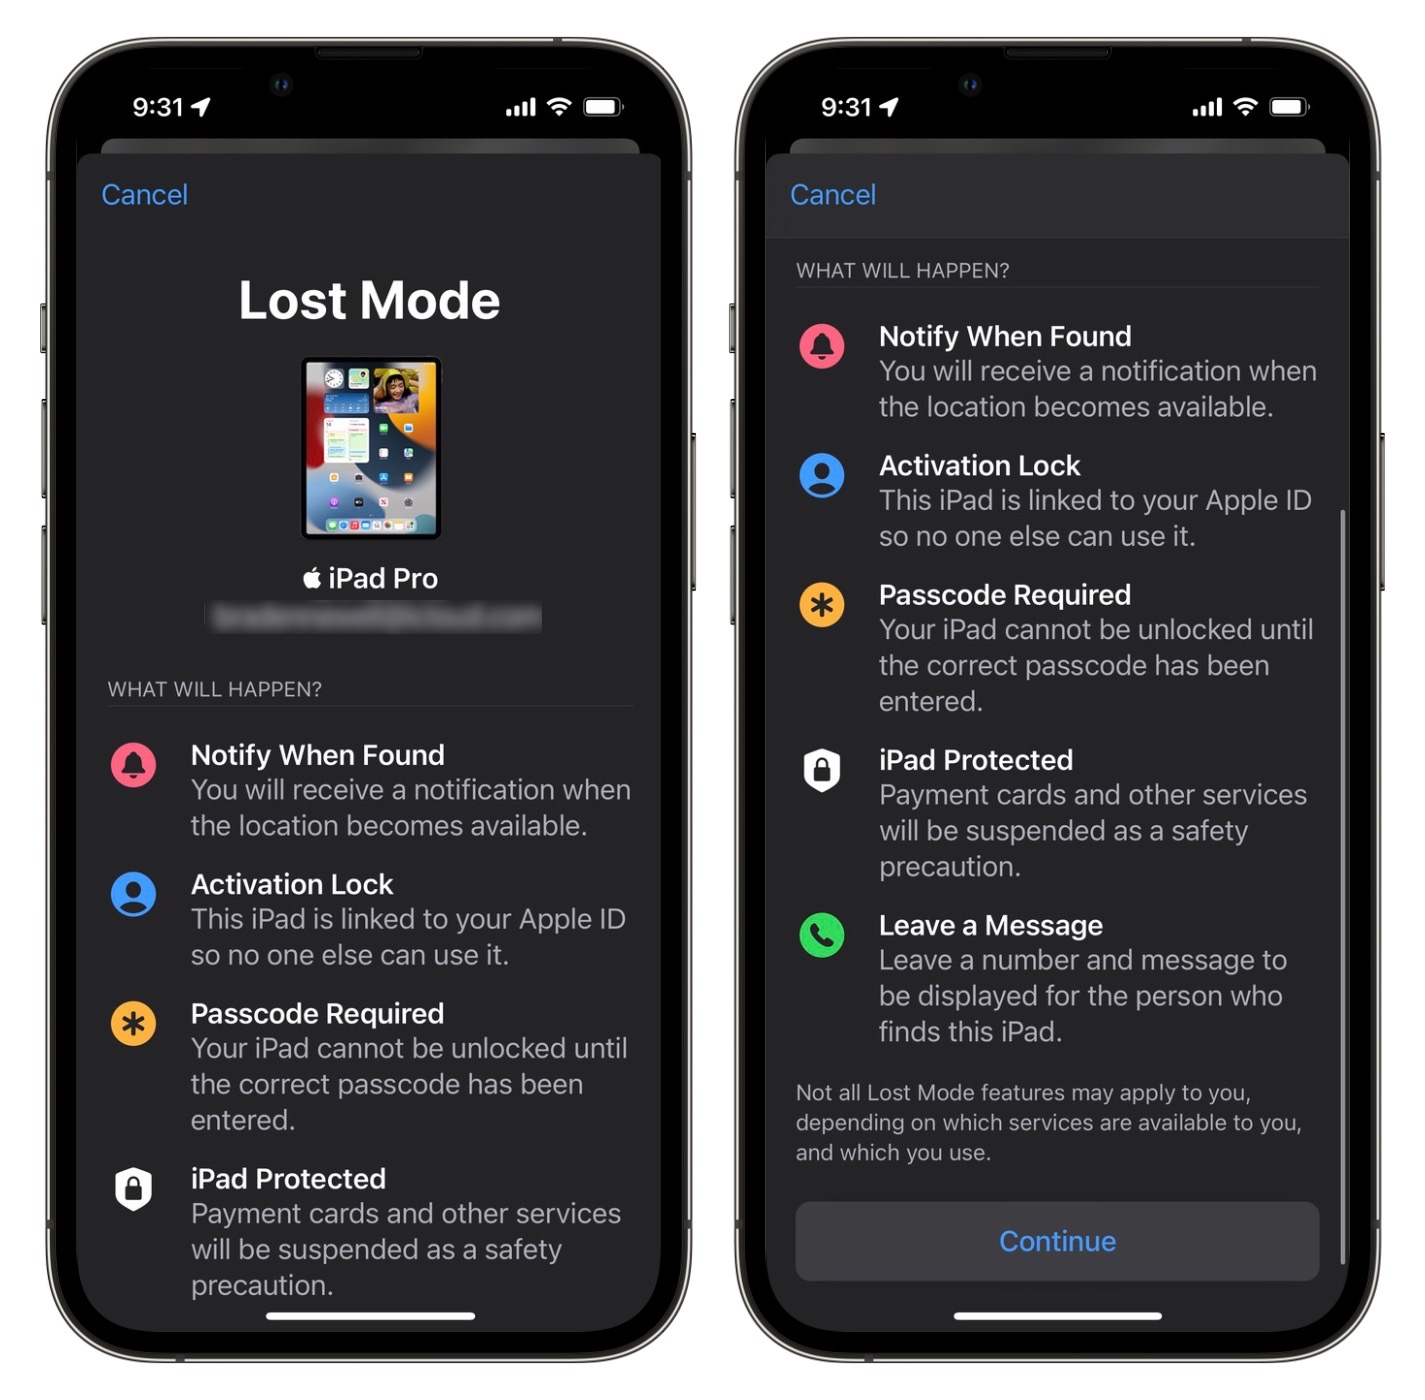
Once we’ve verified that our device seems immediately unrecoverable, we should mark it as lost within the Find My app. Marking your Apple device as lost has several benefits. First, when the device reconnects to a network, it will present a special message on the lock screen and stop showing your personal notifications.
Additionally, lost mode disables Apple Pay. Finally, if the device gets erased, it will require your Apple ID to be usable. Not to worry, if you find your device again, you can turn lost mode off by either entering your device’s passcode or turning it off via the Find My app.
To mark a device as lost:
1. Open the ‘Find My’ app
2. Tap Devices
3. Select the missing device
4. Tap Activate under ‘Mark As Lost’
5. Tap Continue
6. If prompted, enter a phone number
7. Tap Next
8. Enter in a message that will come up on your lost device
9. Tap Activate
Step 3: Contact your Carrier
Now that we’ve disabled your Apple hardware, we need to contact your carrier to disable your SIM card if it’s an iPhone or cellular iPad. If your SIM doesn’t have a passcode, someone could remove it from your missing device and put it in their own. That would allow the thief to receive all of your text messages and two-factor SMS codes. You can learn more about placing a PIN on your SIM card in our 10 best ways to secure your iPhone article.
Additionally, your carrier can have your iPhone or cellular iPad marked as blocklisted on a national database shared by all Canadian cellular providers. This shared blocklist ensures that a lost or stolen device cannot be activated on another cellular network. If you have your carrier add your device to the shared blocklist and recover your missing device, you’ll have to contact your carrier again to get the device removed. You can read more about the shared blocklist or check the IMEI of a device here.
Lastly, if you pay for a lost and stolen warranty through your cellphone provider, this would be the time to begin the claims process. Ask your provider what they need from you to be able to file a claim. Optionally, contact your credit card company, or whomever else may provide you with lost and stolen warranty coverage. The customer service numbers for most major Canadian cellphone providers are below.
- Bell: 1-888-214-7896
- Telus: 1-866-558-2273
- Rogers: 1-877-559-5202
- Virgin Plus: 1-888-999-2321
- Fido: 1-888-481-3436
- Freedom Mobile: 1-877-946-3184
- Sasktel: 1-800-727-5835
- Eastlink: 1-888-345-1111
- Vidéotron: 1-877-512-0911
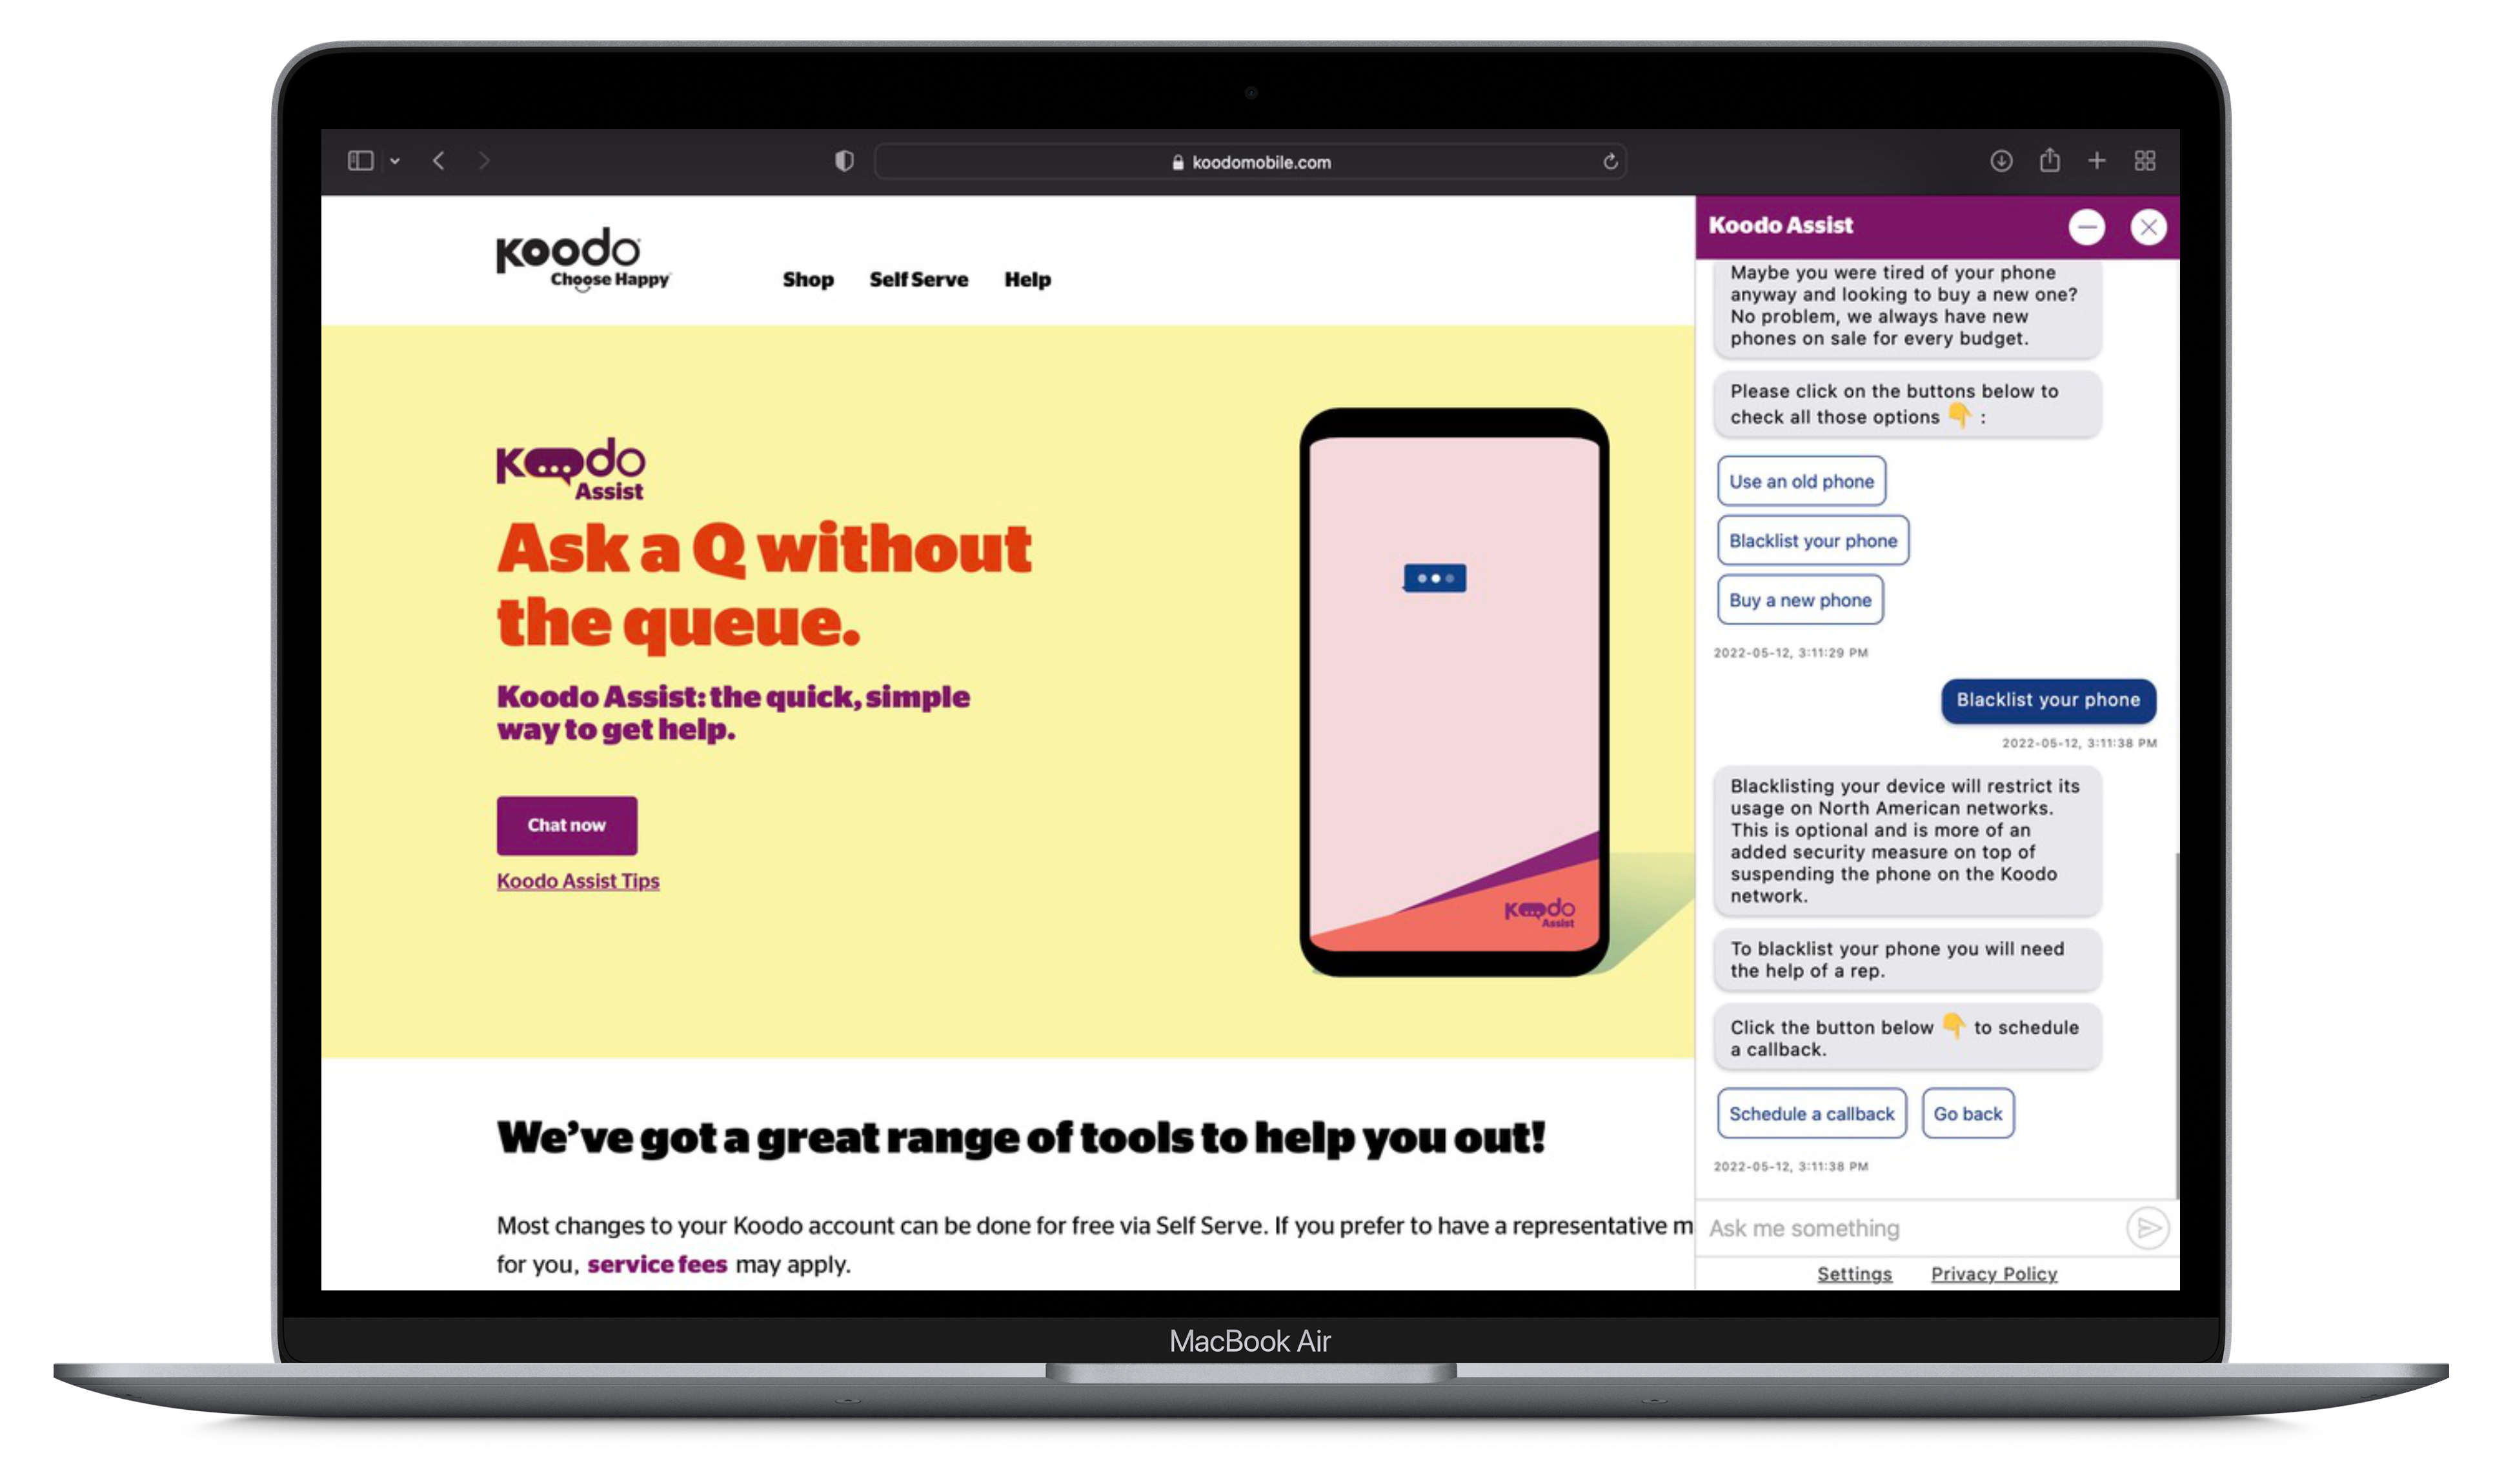
- Koodo: No public phone number, it’s recommended you start with Koodo’s chat on their website to schedule a callback with its customer service.
Step 4: File a theft report
When you first lose your device, it’s important to lock it via the Find My app and disable your SIM card with your carrier. Those two steps remove the likelihood that someone may gain access to your data or receive your personal text messages.
Assuming no one has contacted you using the phone number you provided when locking the device via Find My, it’s likely time to file a report with your local police department. In addition, filing a theft report may be needed to receive a replacement device from your warranty provider. Theft reports can also allow police to return your device should they somehow recover it.
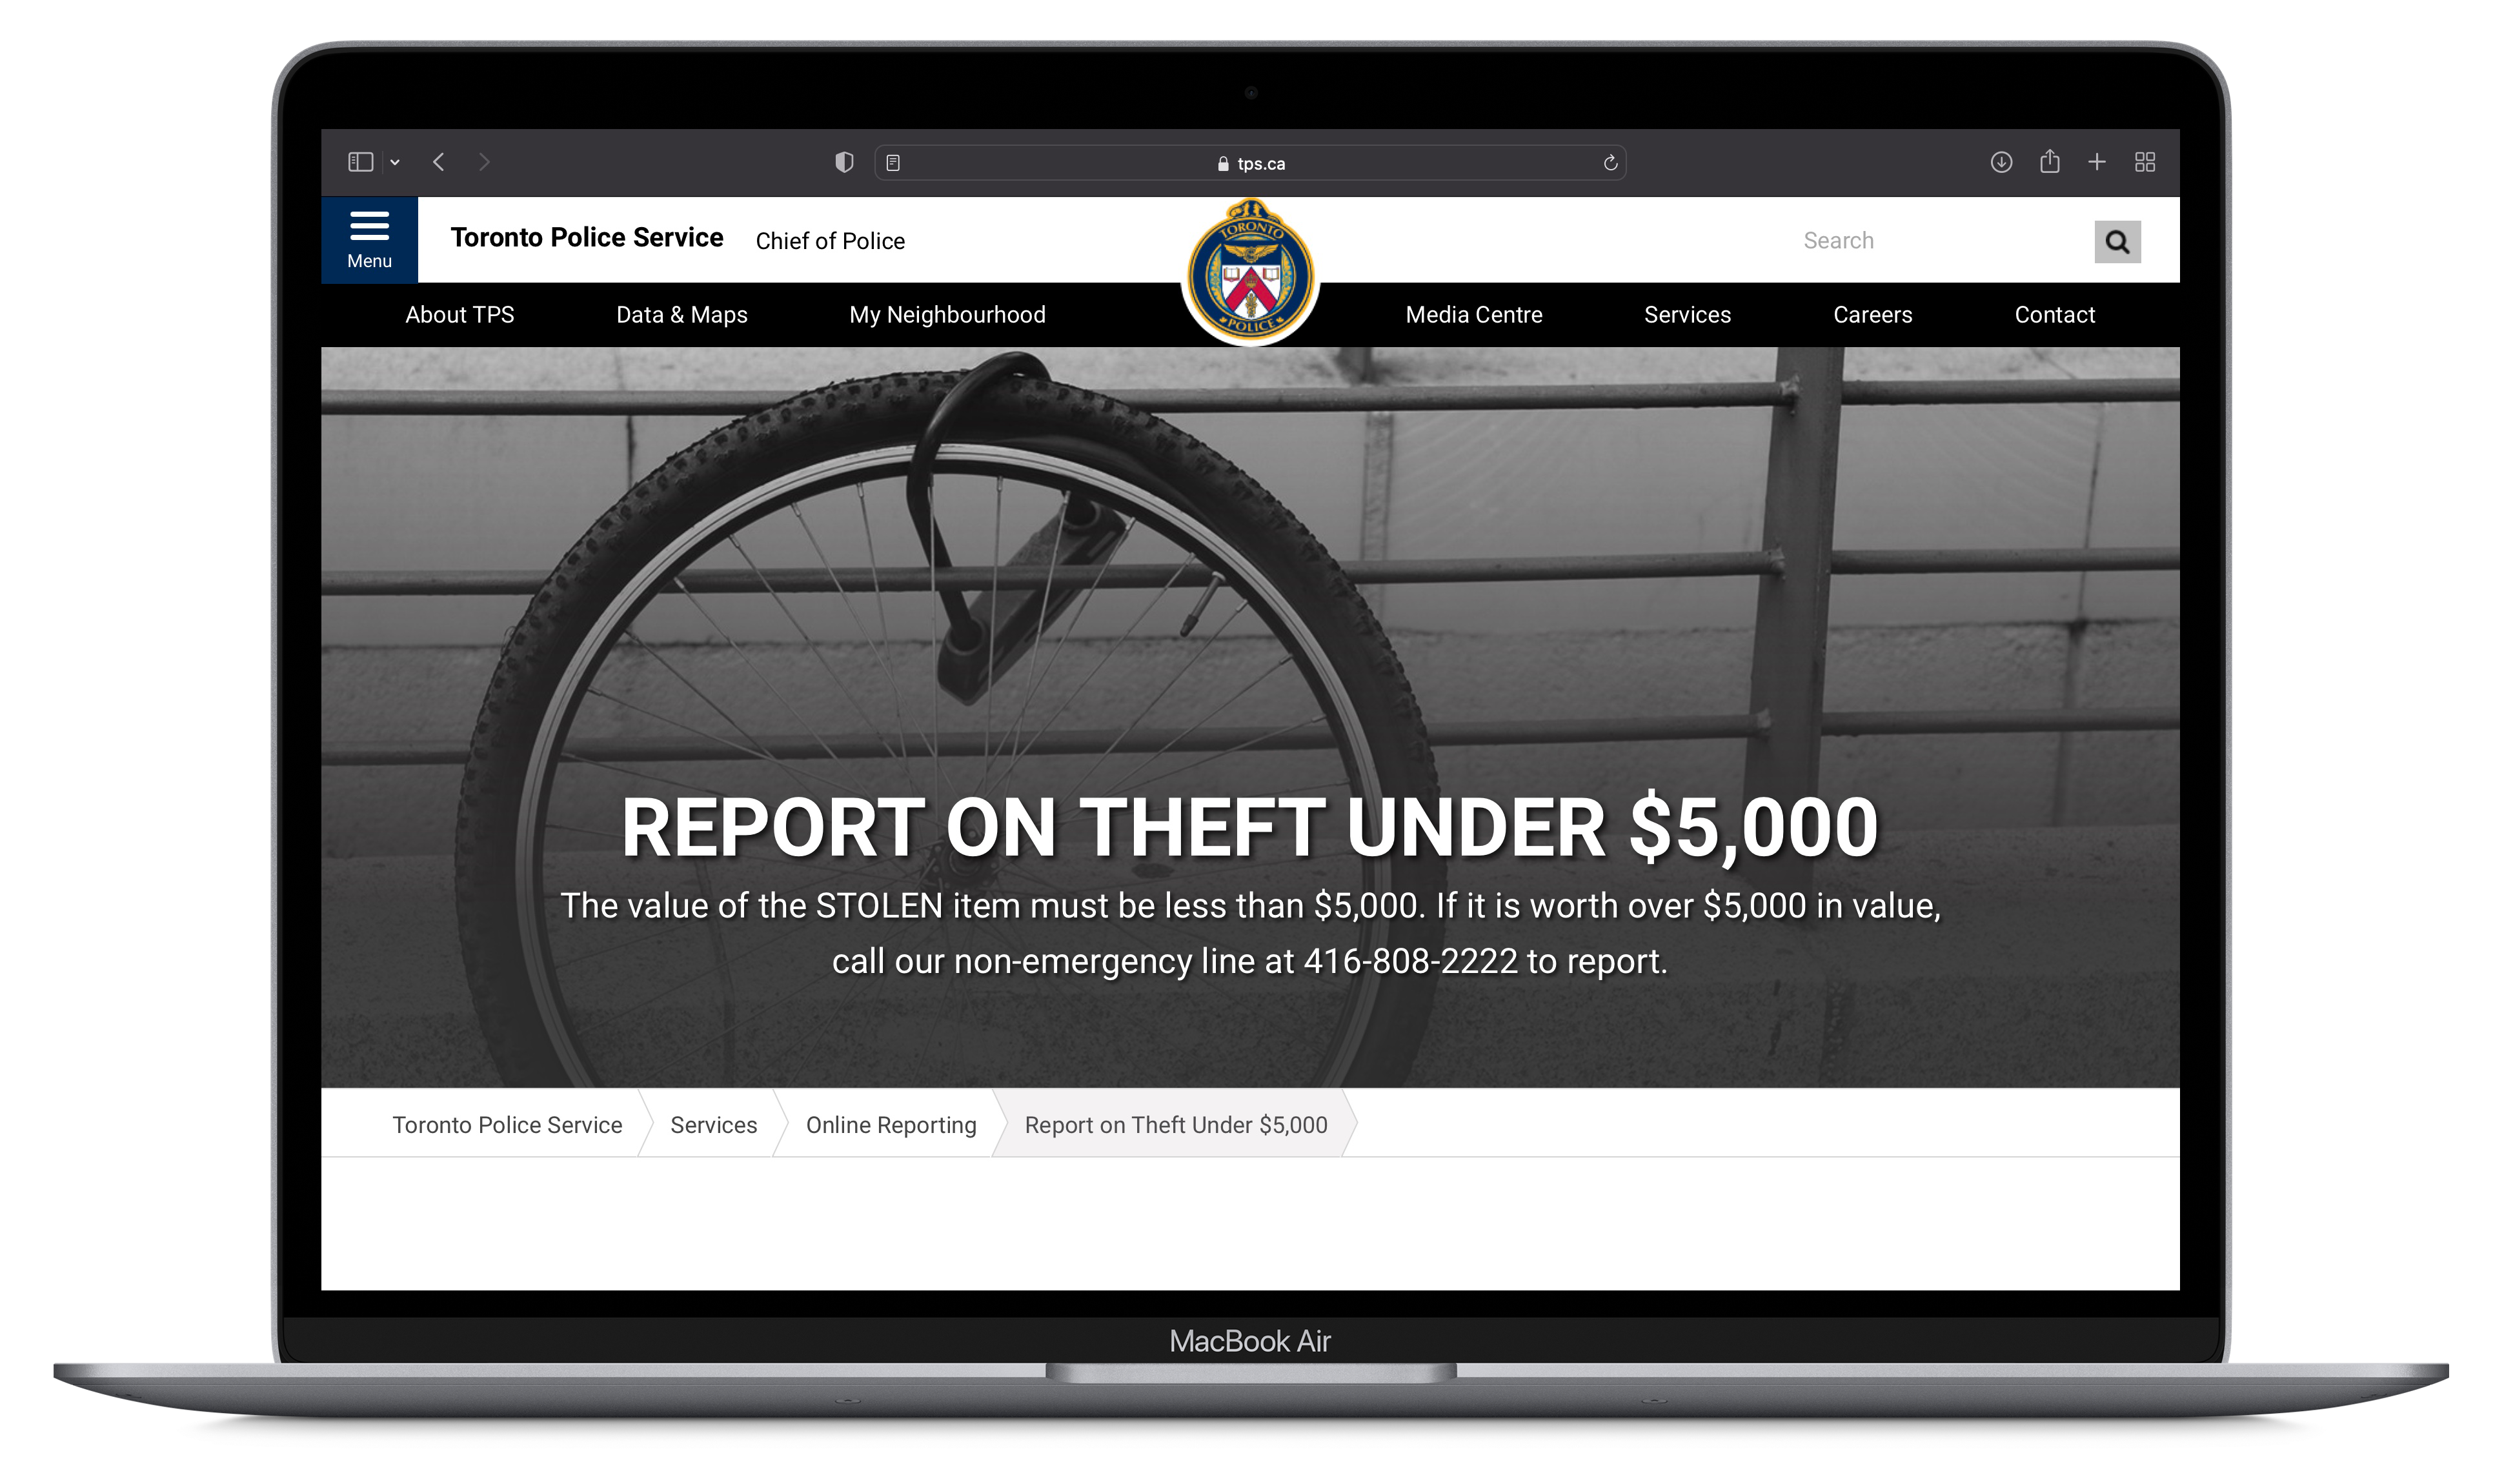
When contacting law enforcement to file a theft report, do not call 911. Instead, find your local law police department’s non-emergency number. For example, the Halifax Regional Police’s non-emergency number is 902-490-5020. The Toronto Police Service’s number is 416-808-2222, and they offer an online reporting option at tps.ca/report.
Step 5: Erase Device
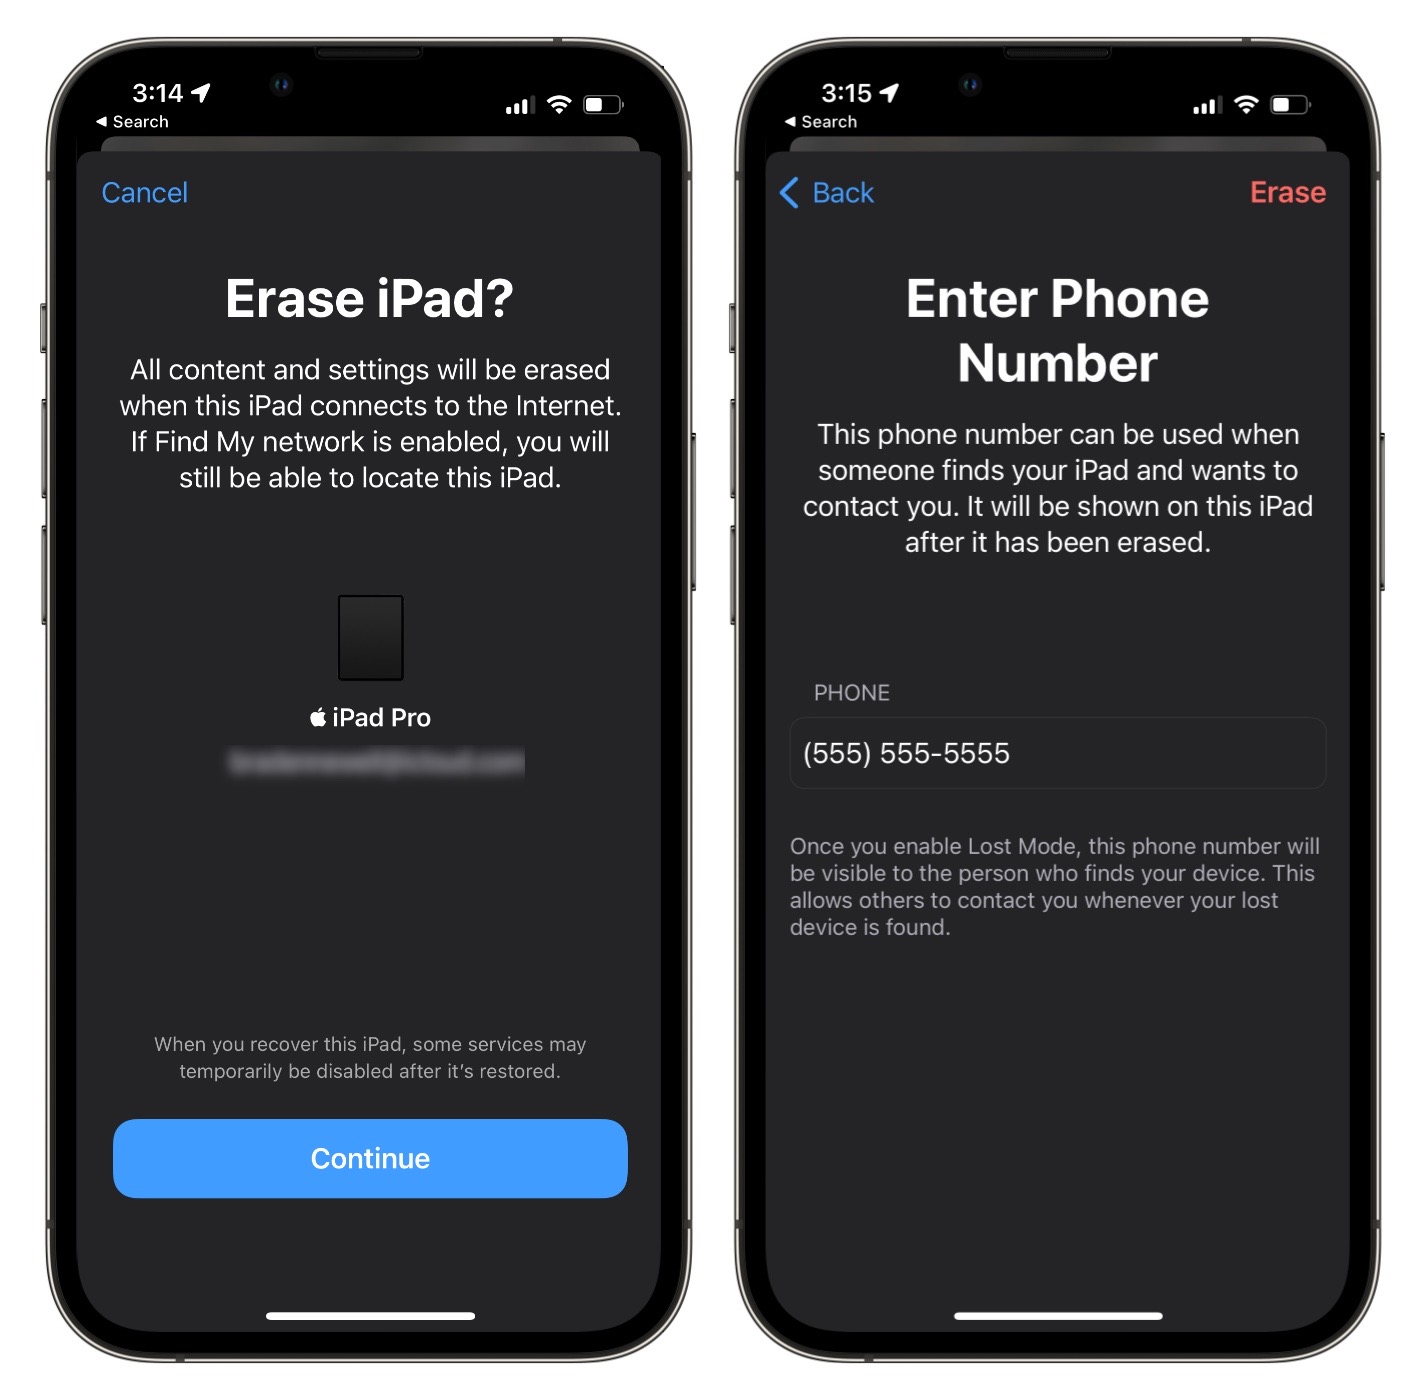 After you have waited some time and your device seems permanently lost, it’s time to erase the device remotely. You can permanently erase all of your content off the device remotely using the Find My app on another Apple device or via iCloud.com/find. Doing this means if you do recover the device in the future, you’ll have to set it back up as new or with an iCloud backup. While you can do this step early on after losing your device, most people want to wait to see if they can recover it to avoid needing to set back up the device.
You can remotely erase your missing device by:
1. Opening the ‘Find My’ app
2. Tap Devices
3. Tap on the missing device
4. Tap Erase This Device
5. Tap Continue
6. Enter in an optional recovery message
7. Tap Erase
MobileSyrup may earn a commission from purchases made via our links, which helps fund the journalism we provide free on our website. These links do not influence our editorial content. Support us here.
