
If there’s one selling point Apple wants you to associate with the iPhone, it’s privacy and security. Apple loves to champion that your iPhone knows a lot about you.
Therefore, it should be you and only you who can access your device’s data. After all, you may not remember where you were four Thursdays ago at 11:52 am, but your iPhone probably does.
Even if you have nothing to hide from a legal point of view, I’d bet you still wouldn’t want some stranger to be able to access your photos or text messages. This stance became very clear in 2016 when Apple’s CEO Tim Cook refused to create a “backdoor” to allow the FBI access to a seized iPhone 5c. In every OS release, Apple adds more privacy and security features to its devices, especially the iPhone.
Below are ten settings you should check to secure your iPhone better:
1. Use a complex passcode
While many of us likely already use passcodes on our devices, there are also people out there who don’t. Passcodes are the best first layer of defence to protect the private data on your iPhone. Apple offers four different passcode options; 4-digit, 6-digit, custom numeric, and custom alphanumeric. Using a 4-digit passcode was the standard for a long time and had a 1/10,000 chance of being cracked.
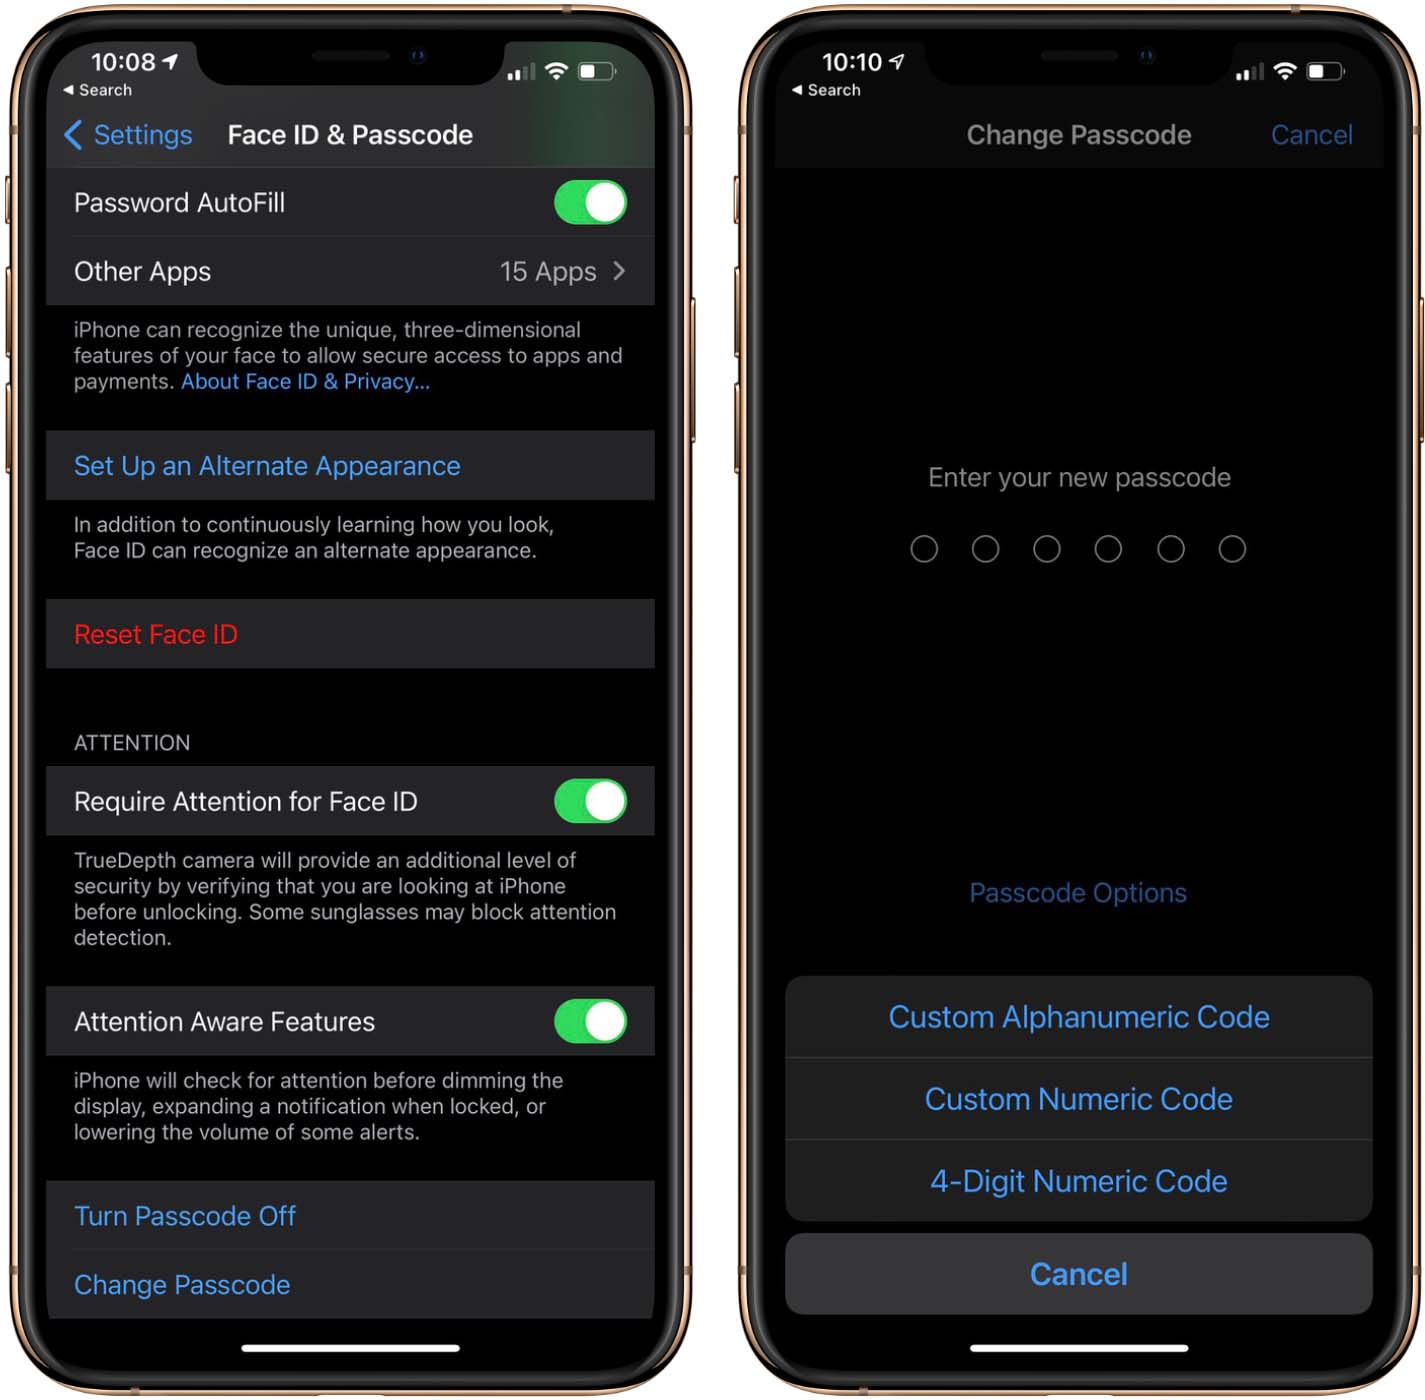
In iOS 9, Apple added a 6-digit passcode option which offers a 1/1,000,000 opportunity of being cracked. With custom numeric and custom alphanumeric passwords, the longer and more complex you make them, the more secure they will be. For example, I recommend making a sentence with 14 or more characters. According to security.org’s password strength checker, something like “I love my iPhone” would take three hundred billion years to crack.
Use a trusted password strength checker to ensure all of your passwords are secure.
To add a passcode to your iPhone:
- Launch Settings
- Tap Face ID & Passcode
- Tap Turn Passcode On
- Tap Passcode Options
- Select one of the options
- Type in your new passcode
- Tap Next
- Type in your new passcode again
- Tap Done
To change your existing passcode:
- Launch Settings
- Tap Face ID & Passcode
- Type in your passcode
- Tap Change Passcode
- Type in your passcode again
- Tap Passcode Options
- Select one of the options
- Type in your new passcode
- Tap Next
- Type in your new passcode again
- Tap Done
2. Require Attention for Face ID
Many of us use Face ID and probably don’t notice that our iPhone requires us to look directly at the device’s front camera to unlock. If your eyes were closed or covered when you raise your iPhone, it won’t unlock. This feature is called Require Attention for Face ID.
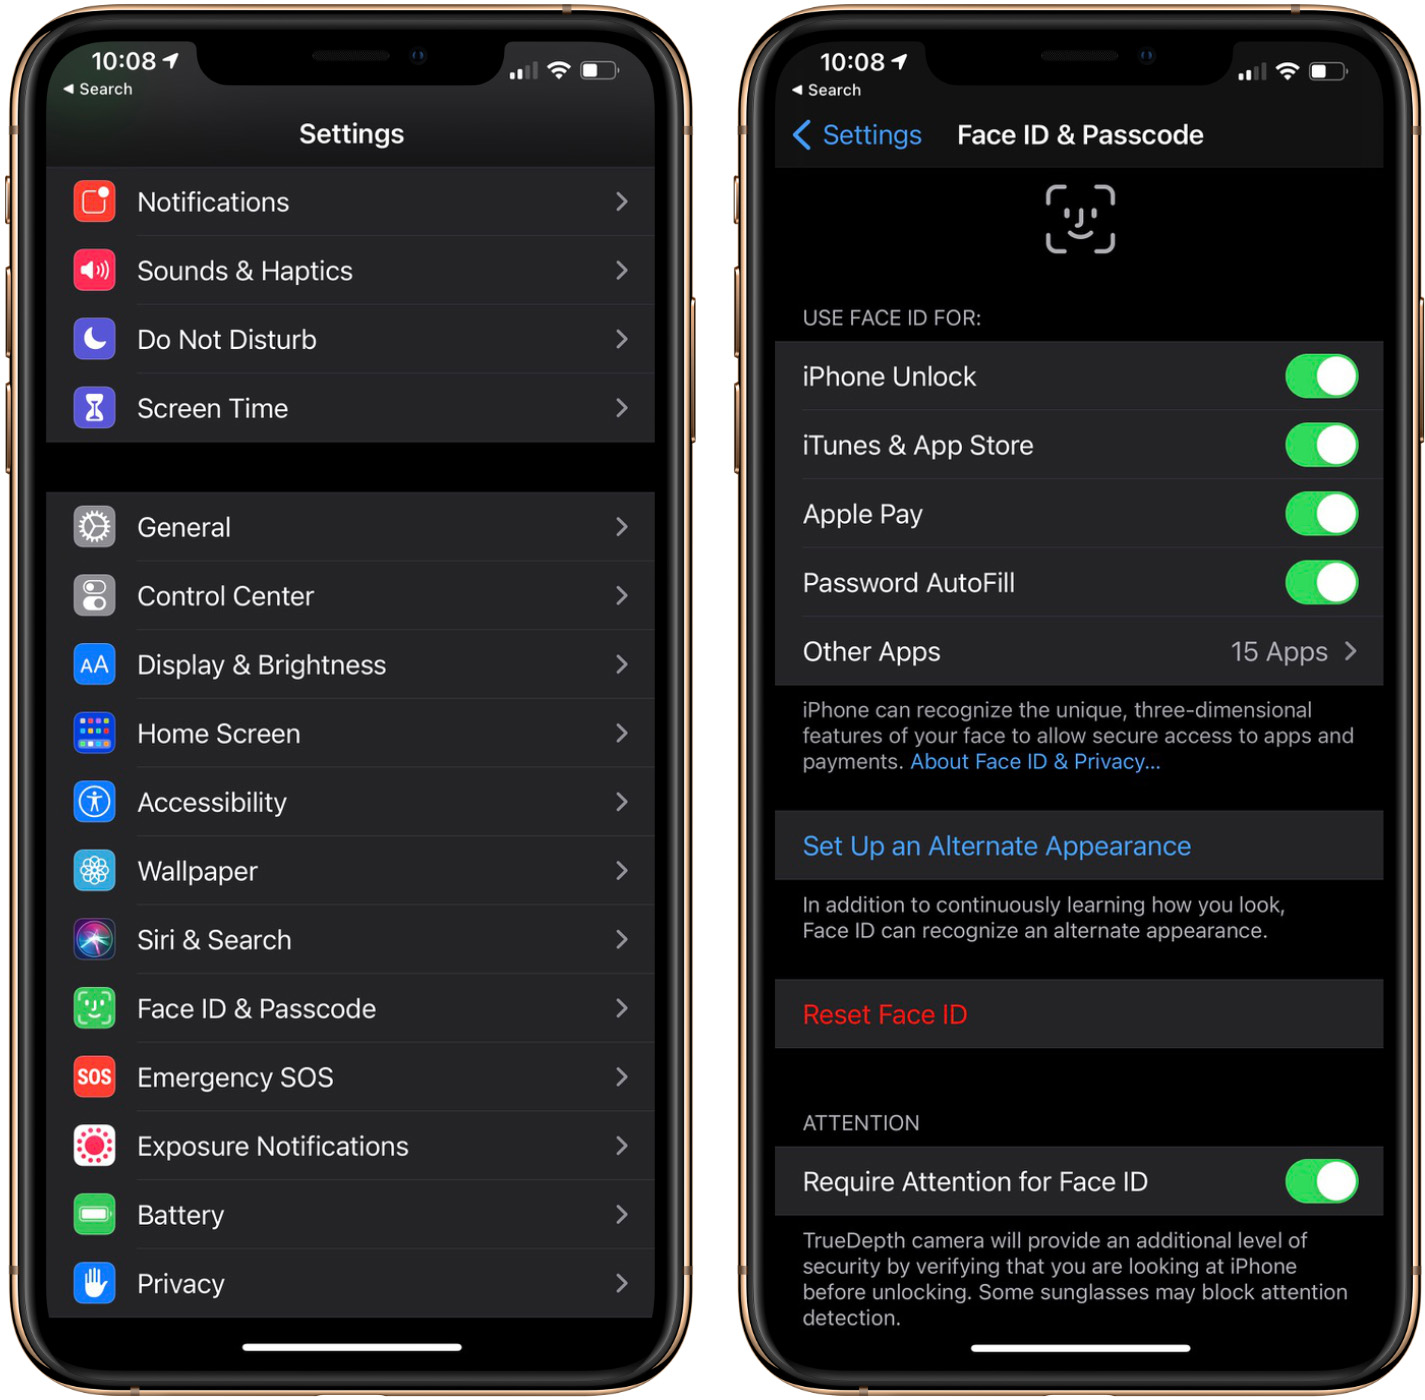
Require Attention for Face ID is used to protect you from someone attempting to unlock your phone while you’re asleep. Those with accessibility needs can toggle the setting off. While turning off this setting may seem more convenient, it also dramatically reduces your iPhone’s security.
To turn on Require Attention for Face ID:
- Launch Settings
- Tap Face ID & Passcode
- Type in your passcode
- Toggle Require Attention for Face ID on
3. Limit access while your device is locked
In the Face ID & Passcode section of your iPhone’s settings, there’s a list of items that you can toggle on or off to either grant or prevent access to information while your iPhone is locked. Most people have these items turned on for maximum convenience. For example, they may do things like swipe down and open the control center while their iPhone is locked. However, access to these items can make information on your device more accessible, such as asking Siri to make a phone call to someone in your contacts.
Settings you can enable or disable access to while your iPhone is locked include ‘Today View,’ ‘Notification’ Center,’ ‘Control Center,’ ‘Siri,’ ‘Reply with Message,’ ‘Home Control,’ ‘Wallet’ and ‘Return Missed Calls.’ The fewer of these you have enabled, the less likely someone may be able to gain access to private data on your iPhone without your passcode.
Below are the steps to disable these settings:
- Launch Settings
- Tap Face ID & Passcode
- Type in your passcode
- Scroll to the “allow access when locked” section
- Toggle off the items you would like to prevent access to while your iPhone is locked
4. Disable USB accessory access after one hour
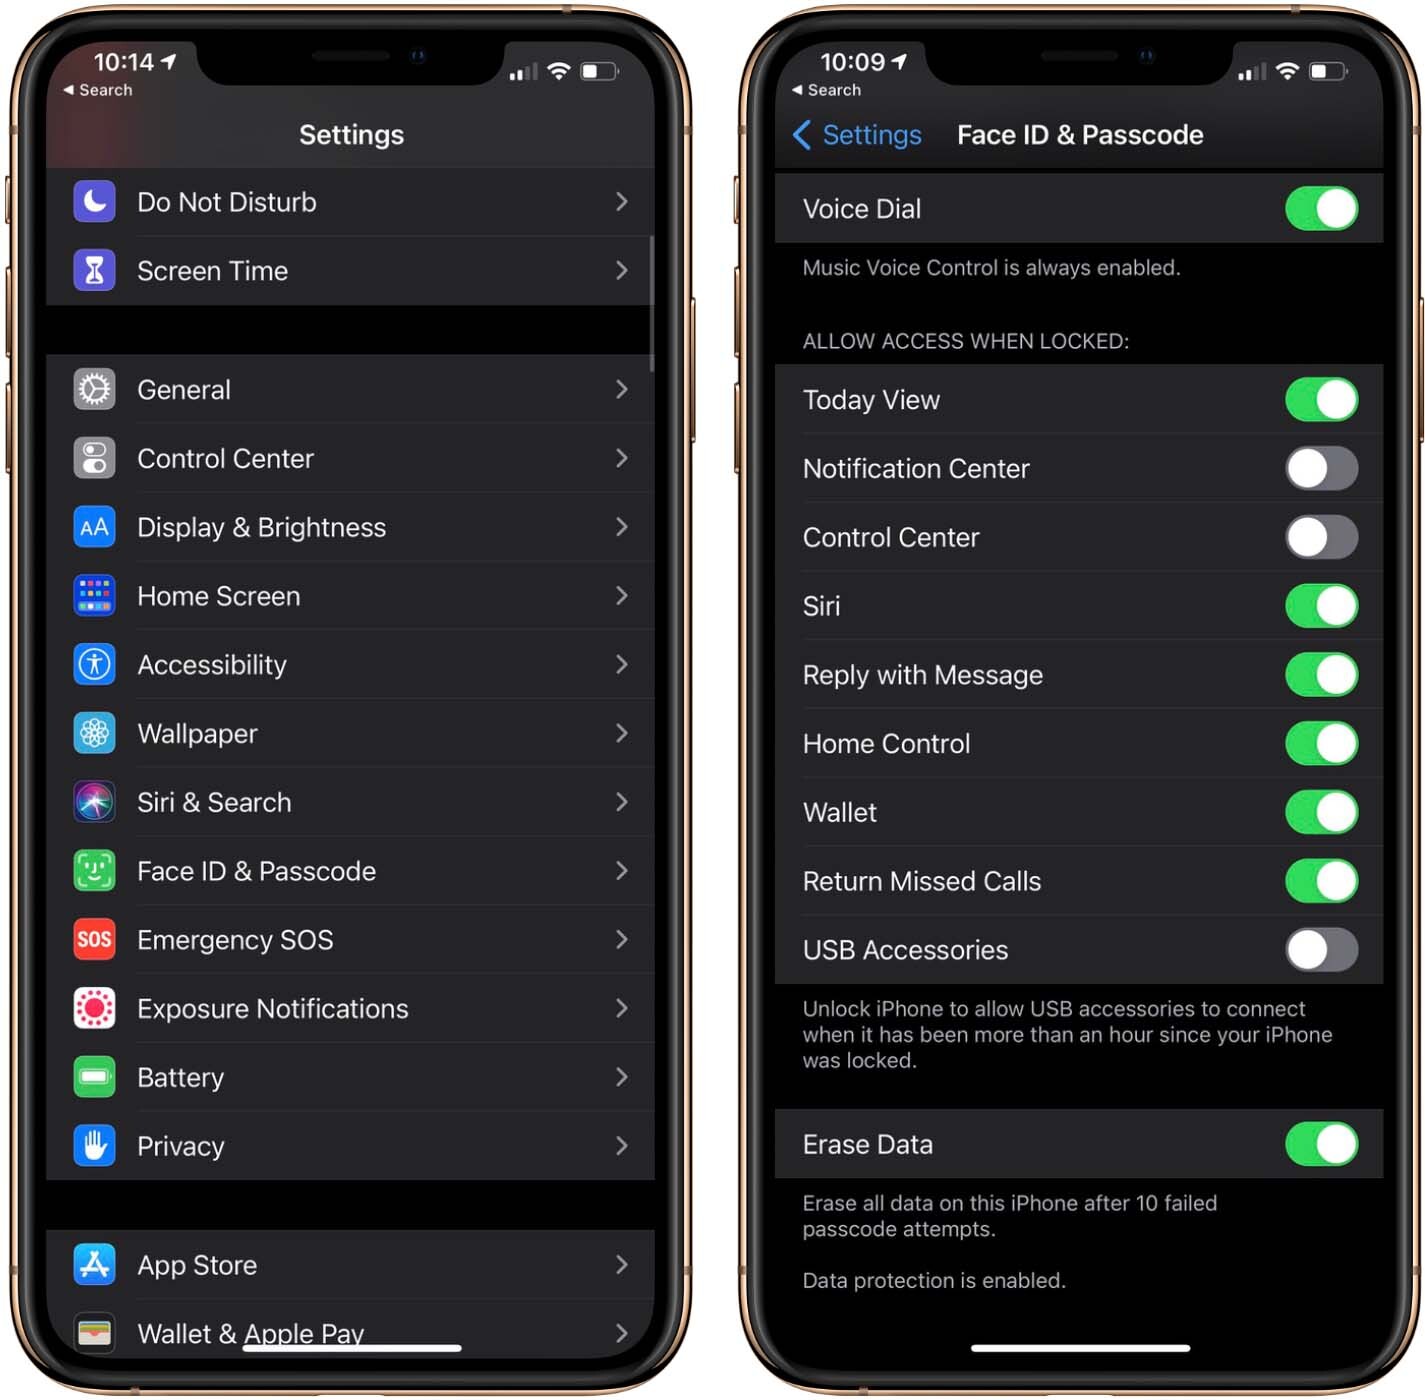
Law enforcement and bad actors alike may attempt to unlock your iPhone by connecting it to computers via USB. A way to help prevent USB devices from communicating with your iPhone is by turning off USB Accessories. This setting requires you to enter your passcode every hour to permit your iPhone to speak with a USB device.
If your passcode hasn’t been entered in an hour, your iPhone will cut off all communication with the USB accessory. This iOS setting is displayed a little differently than most. While this setting is toggled on, you grant USB accessories near unlimited access to your iPhone. However, toggling USB Accessories off will limit USB connection time with your iPhone to one hour. Combine turning off this setting with a strong passcode, and you’ve essentially protected your phone from brute force attacks.
Disable USB accessories through the following steps:
- Launch Settings
- Tap Face ID & Passcode
- Type in your passcode
- Toggle USB Accessories off
5. Erase data after ten failed passcode attempts
This setting is not for the faint of heart, but it ensures your data never falls into the wrong hands. By turning on the Erase Data setting, your iPhone will erase itself after a passcode has been entered incorrectly ten consecutive times. Of course, make sure you have a backup or are willing to take on the risk. Sometimes a curious toddler or a joke gone wrong may leave your iPhone erased too.
Enable Erase Data by:
- Launch Settings
- Tap Face ID & Passcode
- Type in your passcode
- Toggle Erase Data on
6. Auto-Lock Time
Many users get annoyed when their iPhone dims and locks on them too quickly. However, they may not think about how faster auto-lock keeps their device more secure. A faster auto-lock means there is a smaller window of opportunity for someone to be able to access your iPhone when you aren’t paying attention.
Below are the steps to change your auto-lock speed:
- Launch Settings
- Tap Display & Brightness
- Tap Auto-Lock
- Select one of the options from the list
7. SIM Passcode
If someone has your iPhone, a passcode may keep them from getting access to the data on the device, but what about your phone number? A SIM passcode will prevent someone from taking the SIM card out of your iPhone and placing it in theirs. Your SIM card doesn’t house much in terms of personal data, but it does tell cellphone towers which device to direct phone calls and text messages.
“Entering a SIM passcode too many times incorrectly will lock the SIM.”
Someone may use your SIM card to impersonate you or to gain access to accounts with two-factor authentication. A SIM passcode locks your SIM card, so you have to enter the PIN to gain access to that phone number when entered into a new phone. If you use a password manager, make sure to note your new SIM passcode. Entering a SIM passcode too many times incorrectly will lock the SIM. If you’ve never used a SIM passcode before, contact your carrier to determine the default PIN for their SIM cards (i.e. the default PIN for Telus SIMs is 1234).
To add a PIN to your SIM, take the following steps:
- Launch Settings
- Tap Cellular
- Tap SIM PIN
- Toggle SIM PIN on
- Enter the previous or default SIM PIN (i.e. the default PIN for Telus SIMs is 1234)
- Tap Change PIN
- Enter in the old or default PIN
- Tap Next
- Type in your preferred PIN
- Tap Next
- Type in your preferred PIN again
- Tap Done
8. Automatic Software Updates
One of the best ways to protect any device from malicious actors is to ensure your iPhone remains updated with the latest version of its operating system to patch bugs and security vulnerabilities. Apple has tried to make this easy for people with two settings: download iOS updates and install iOS updates. These settings will attempt to download and install any new versions of iOS automatically overnight when your iPhone is connected to power and WiFi.
To turn on Automatic Software Updates, follow these steps:
- Launch Settings
- Tap General
- Tap Software Update
- Tap Automatic Updates
- Toggle Download iOS Updates and Install iOS Updates on
9. Automatic App Updates
Similar to the reasons updating iOS is essential, updating your apps helps protect you from possible security vulnerabilities and bugs patched by new app versions. Your iPhone has a setting called Automatic App Updates. Turning this setting on will update your apps to their latest version when your iPhone is connected to Wi-Fi. Turning on automatic app updates means you don’t have to check the App Store for pending app updates periodically.
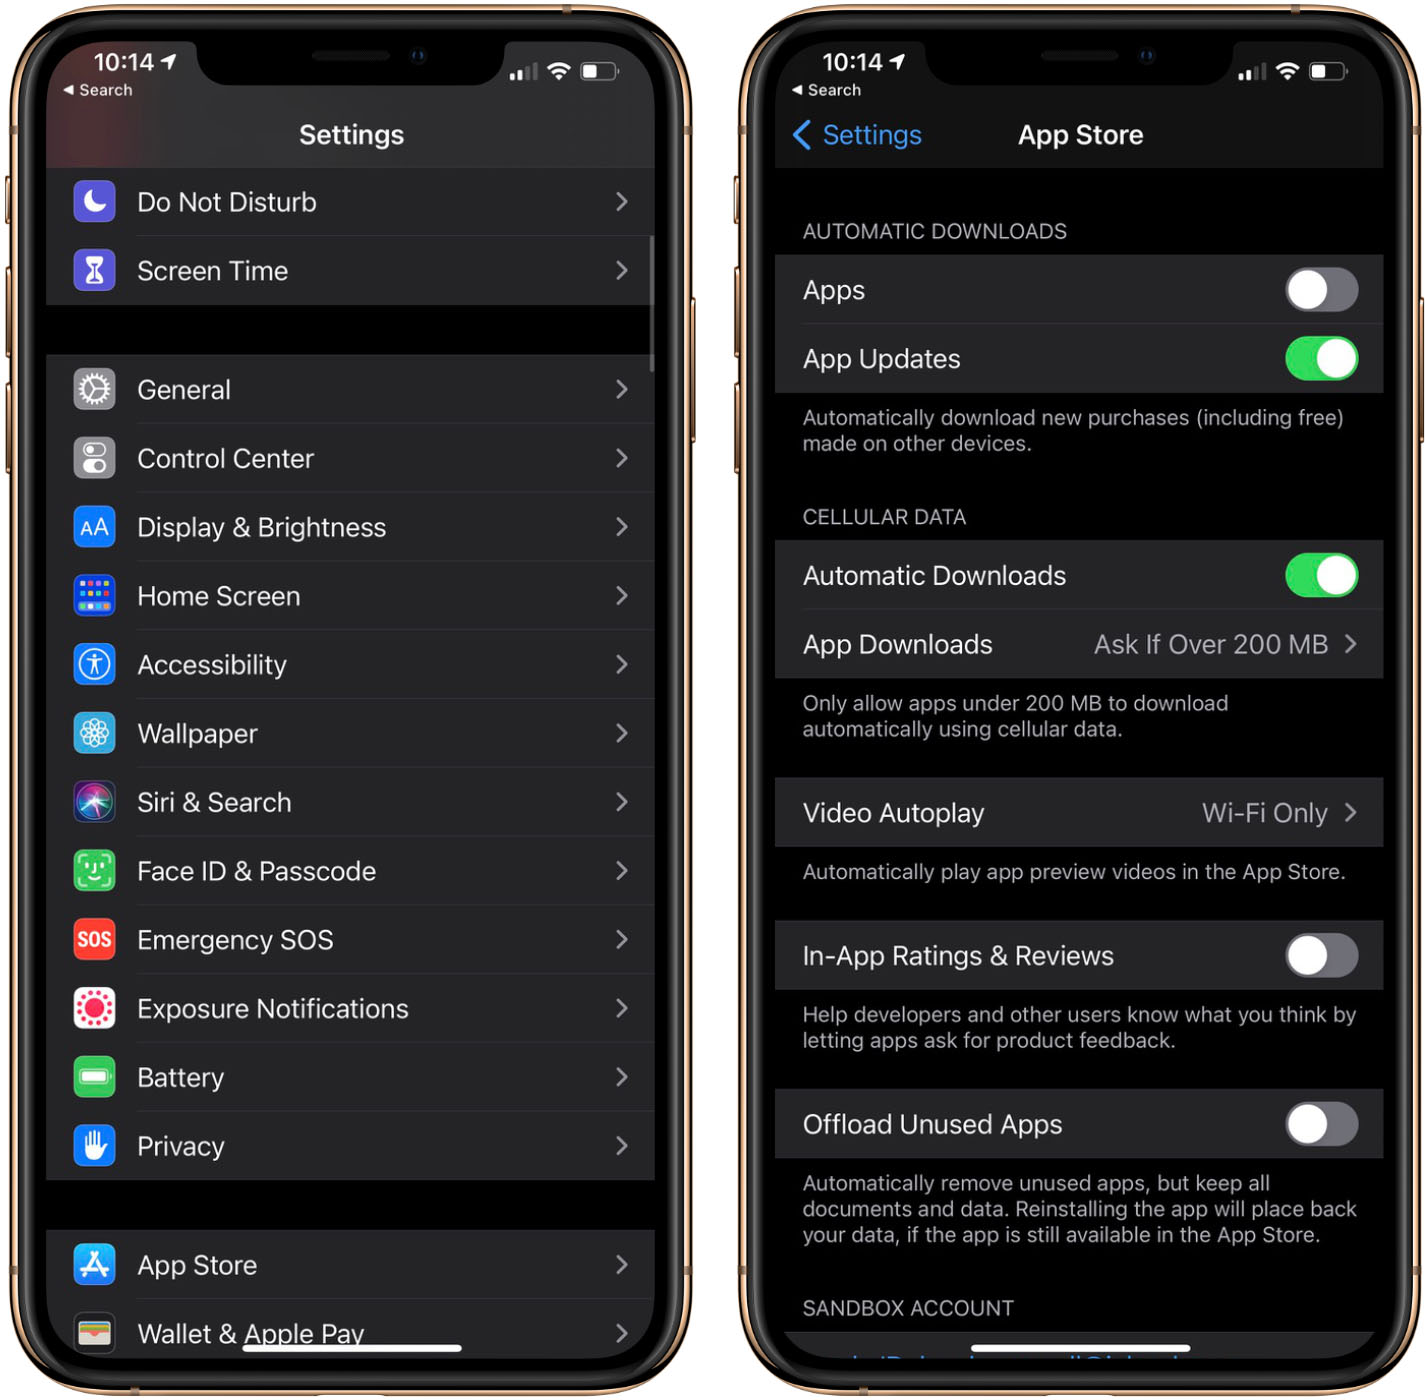
Here’s how to turn on automatic app updates:
- Launch Settings
- Tap App Store
- Toggle App Updates on
10. Find My
One of the best and most secure features of owning an Apple device is ‘Find My.’ There are three settings to Find My, all of which I recommend enabling on your iPhone. The first is Find My iPhone. This setting allows you to track, lock, or erase your iPhone from another Apple device with the Find My app installed or by visiting icloud.com/find. When Find My iPhone is enabled, it also prevents someone from setting your iPhone back up fresh if they’ve erased it via Finder or iTunes. When someone attempts to set up a device with Find My iPhone enabled, they are asked for the Apple ID and password last associated with the device.
The second recommended setting is the Find My network. Participating in the Find My Network allows your iPhone to send low-power Bluetooth singles to other Apple devices when your iPhone doesn’t have an internet connection or is turned off. Those low-power Bluetooth singles allow for other Apple devices to report your iPhone’s approximate location anonymously.
Lastly, there is Send Last Location. This setting will show your iPhone’s last confirmed location in the Find My app when the device cannot report a current location.
To enable the Find My settings:
- Launch Settings
- Tap your name at the very top
- Tap Find My
- Tap Find My iPhone
- Toggle Find My iPhone, Find My network, and Send Last Location to on
MobileSyrup may earn a commission from purchases made via our links, which helps fund the journalism we provide free on our website. These links do not influence our editorial content. Support us here.
