As we begin 2022, many of you may be selecting a new years resolution about health and fitness. These resolutions usually focus on eating better or working out more. Over the second half of 2021, I became interested in smart health technology to do just that. However, recently, I’ve become focused on remaining healthy as I age.
I’m relatively young and reasonably fit. Indeed, exercising regularly and eating smart has helped with that. Yet, many people seem to live pretty healthy lives until unexpected health complications arise. Apple has been doing a lot of work in the health and wellness space to help its users live healthier lives. But your Apple technology can also be used to monitor various parts of your health over time. This monitoring can detect trends and produce data you can share with your doctor.
Here are 12 settings you should turn on to help live a healthier life:
Medical ID
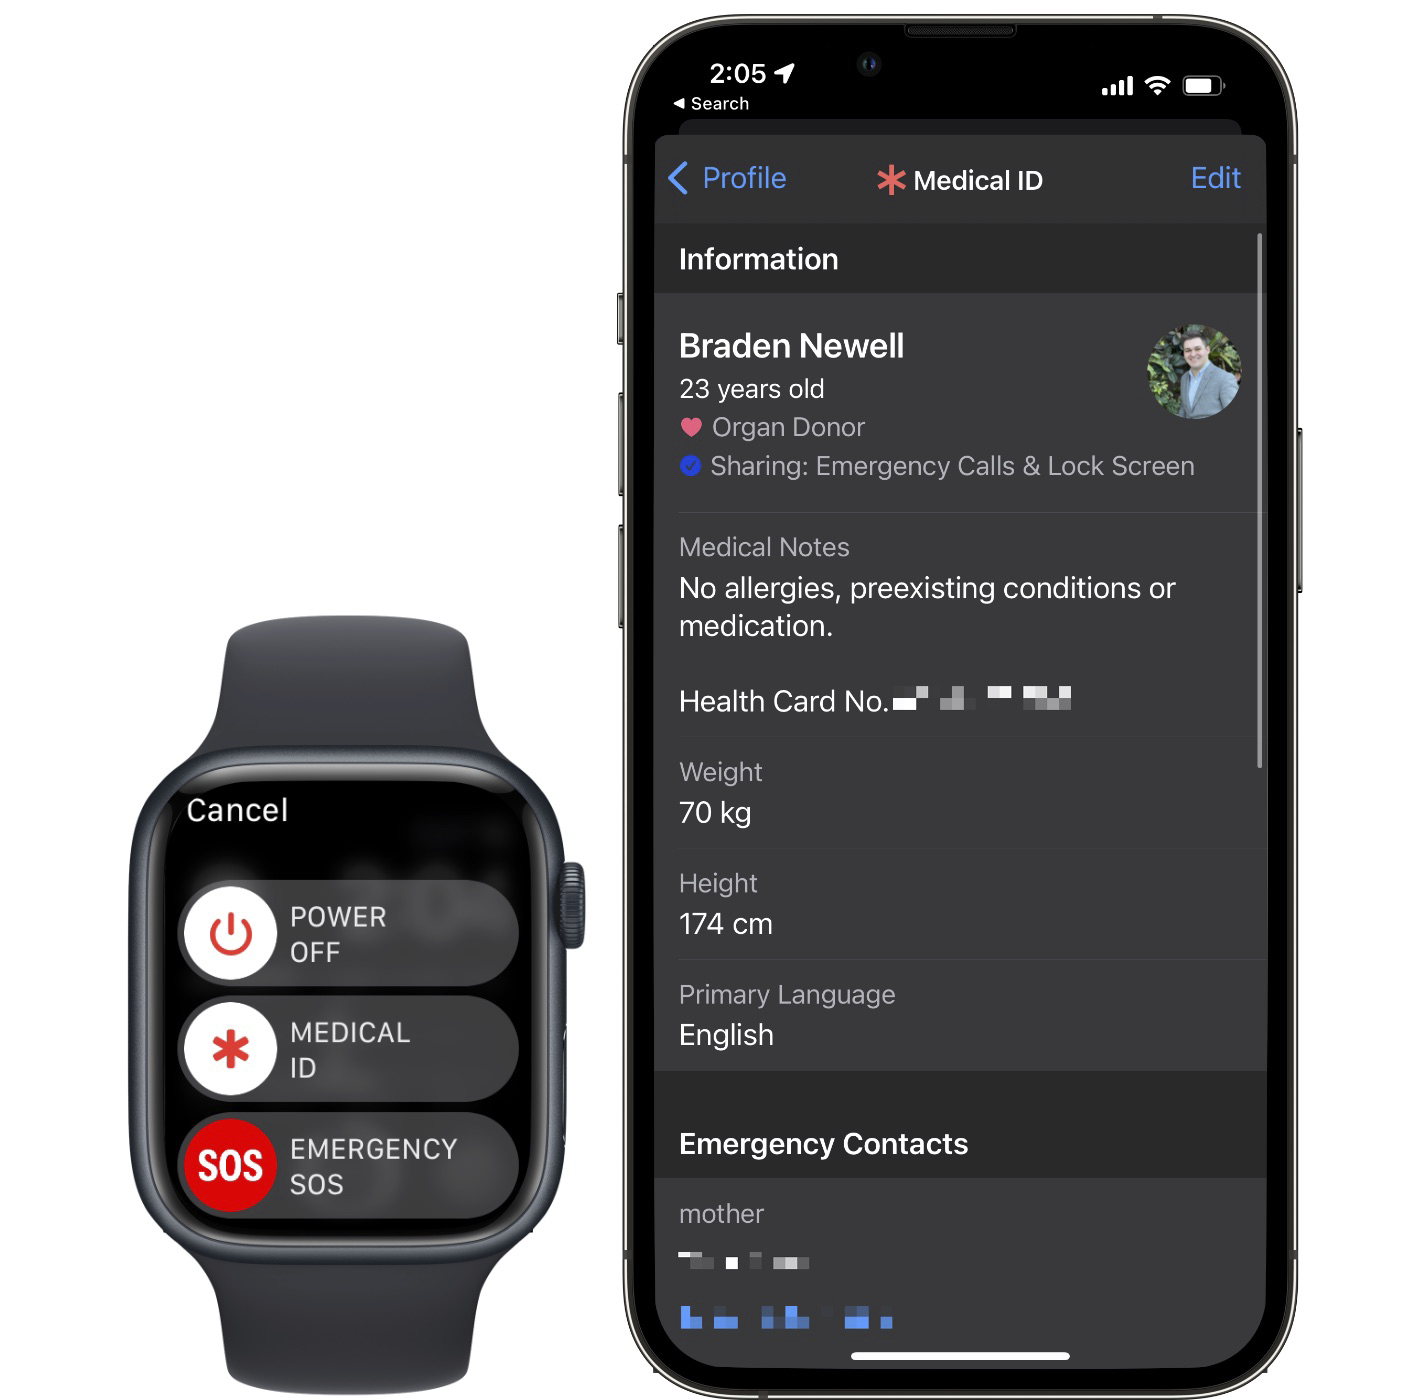
Medical ID is a tool within the Apple Health app that contains crucial health information such as age, weight, height, blood type and personalized notes. Medical ID has two purposes. The first is to give Apple HealthKit services a baseline health profile. The second is to provide crucial health information to first responders if you’re unconscious or unable to communicate.
Taking any iPhone, hold down a volume button and a side button. Depending on your iPhone model, you’ll be prompted with two or three sliders. Swiping ‘Medical ID’ from left to right will display your Medical ID card that first responders can access in an emergency. You can also add emergency contacts and their relationship to you.
To set up Medical ID:
1. Open the ‘Health’ app on your iPhone
2. Tap’ Summary’ in the bottom menu
3. Tap on your profile icon in the right-hand corner
4. Tap’ Medical ID’
5. Follow any prompts and enter the requested information
Note that all information is optional. If you don’t know something like your blood type, you can leave it blank. For example, I like to use the medical notes section for my provincial health card number and re-iterate that I do not have any allergies.
Emergency SOS
Emergency SOS is an extension of Medical ID. Once enabled, you can hold down any volume button and your iPhone’s side button to get a five-second count down. Once the countdown hits zero, it will call 911. On the Apple Watch, hold down the long side button to get the same feature. In addition, if you have emergency contacts added to your Medical ID, they will be notified that you contacted emergency services.
To enable Emergency SOS:
1. Open the ‘Settings’ and/or the ‘Watch’ app on your iPhone
2. Select ‘Emergency SOS’
3. Toggle on ‘Call with Hold’ in Settings and/or ‘Hold Side Button to Dial’ in the Watch app
Walking Steadiness
Your iPhone can detect how steady you are while you walk. Apple says that your iPhone can do this by calculating your walking speed, step length, double support time, and walking asymmetry data stored in the Apple Health app. Some of us may not be too steady on our feet. While others may think nothing is wrong, as many of the items in this article, collecting the data may help alert you to a trend you haven’t noticed.
To enable Walking Steadiness:
1. Open the ‘Health’ app on your iPhone
2. Tap ‘Summary’ in the menubar at the bottom of the screen
3. Scroll until you find ‘Walking Steadiness’
4. Follow the prompts
5. Toggle’ Walking Steadiness Notifications’ on
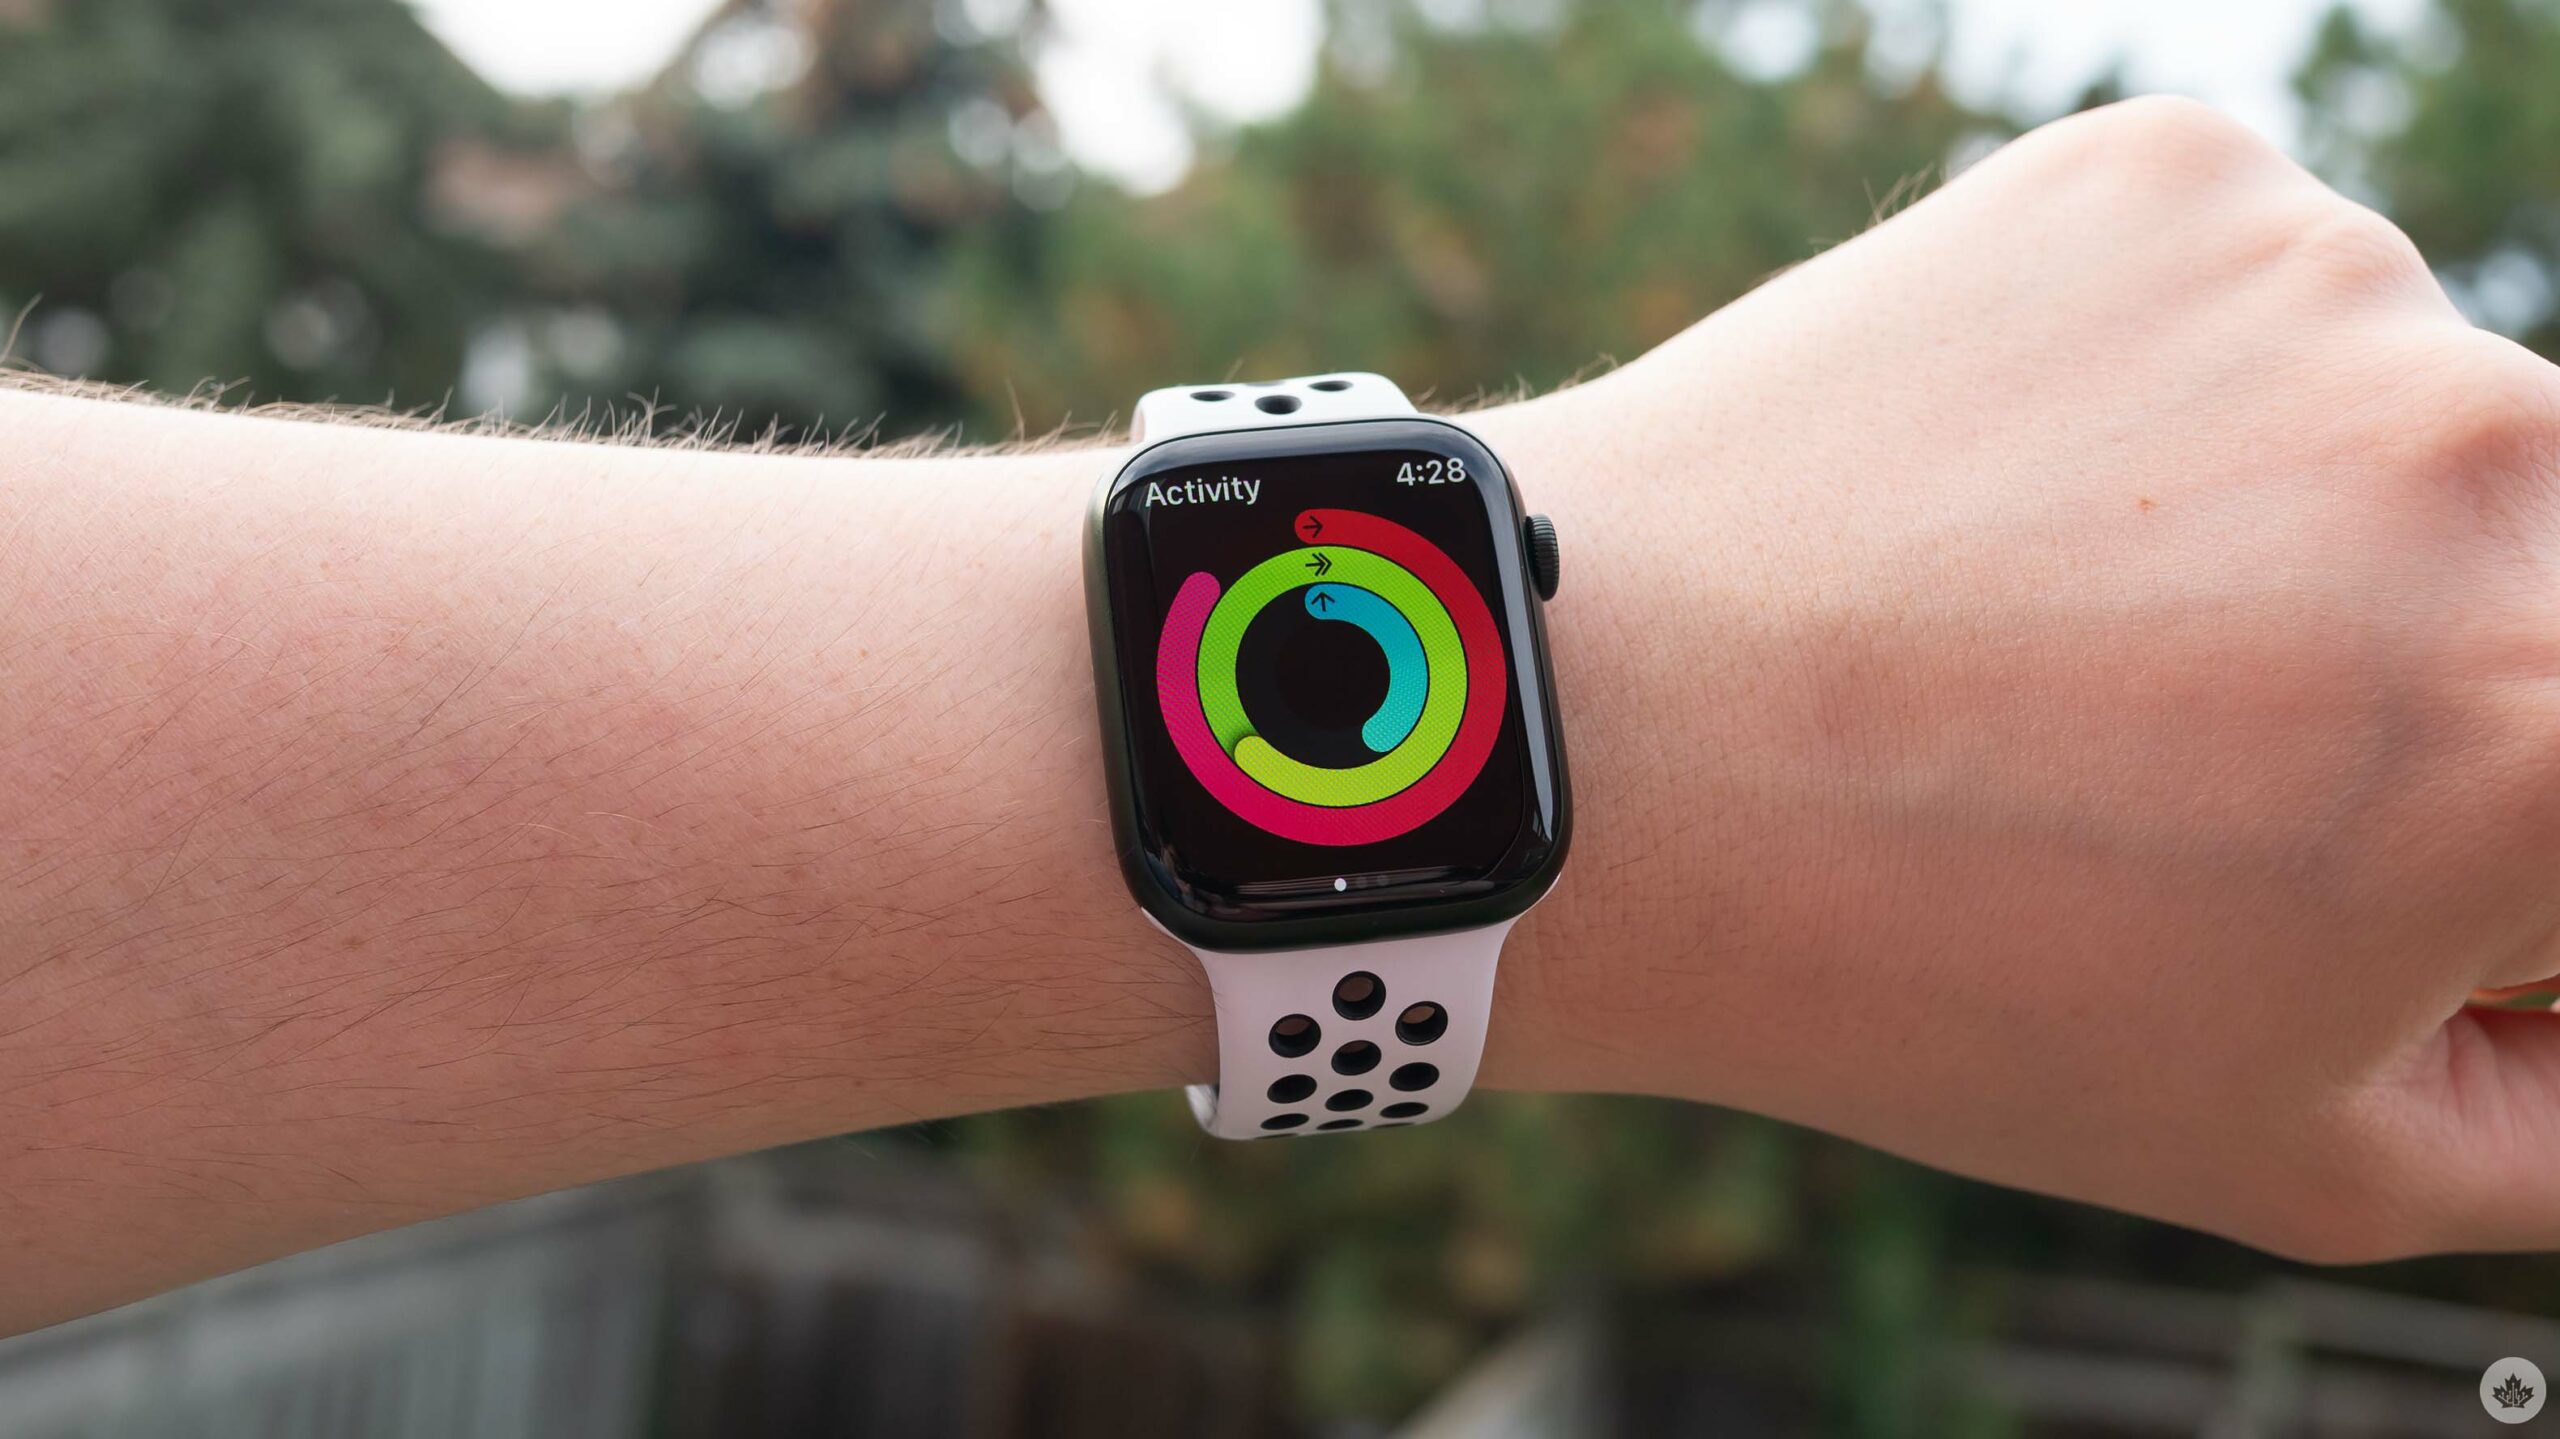
Activity Rings
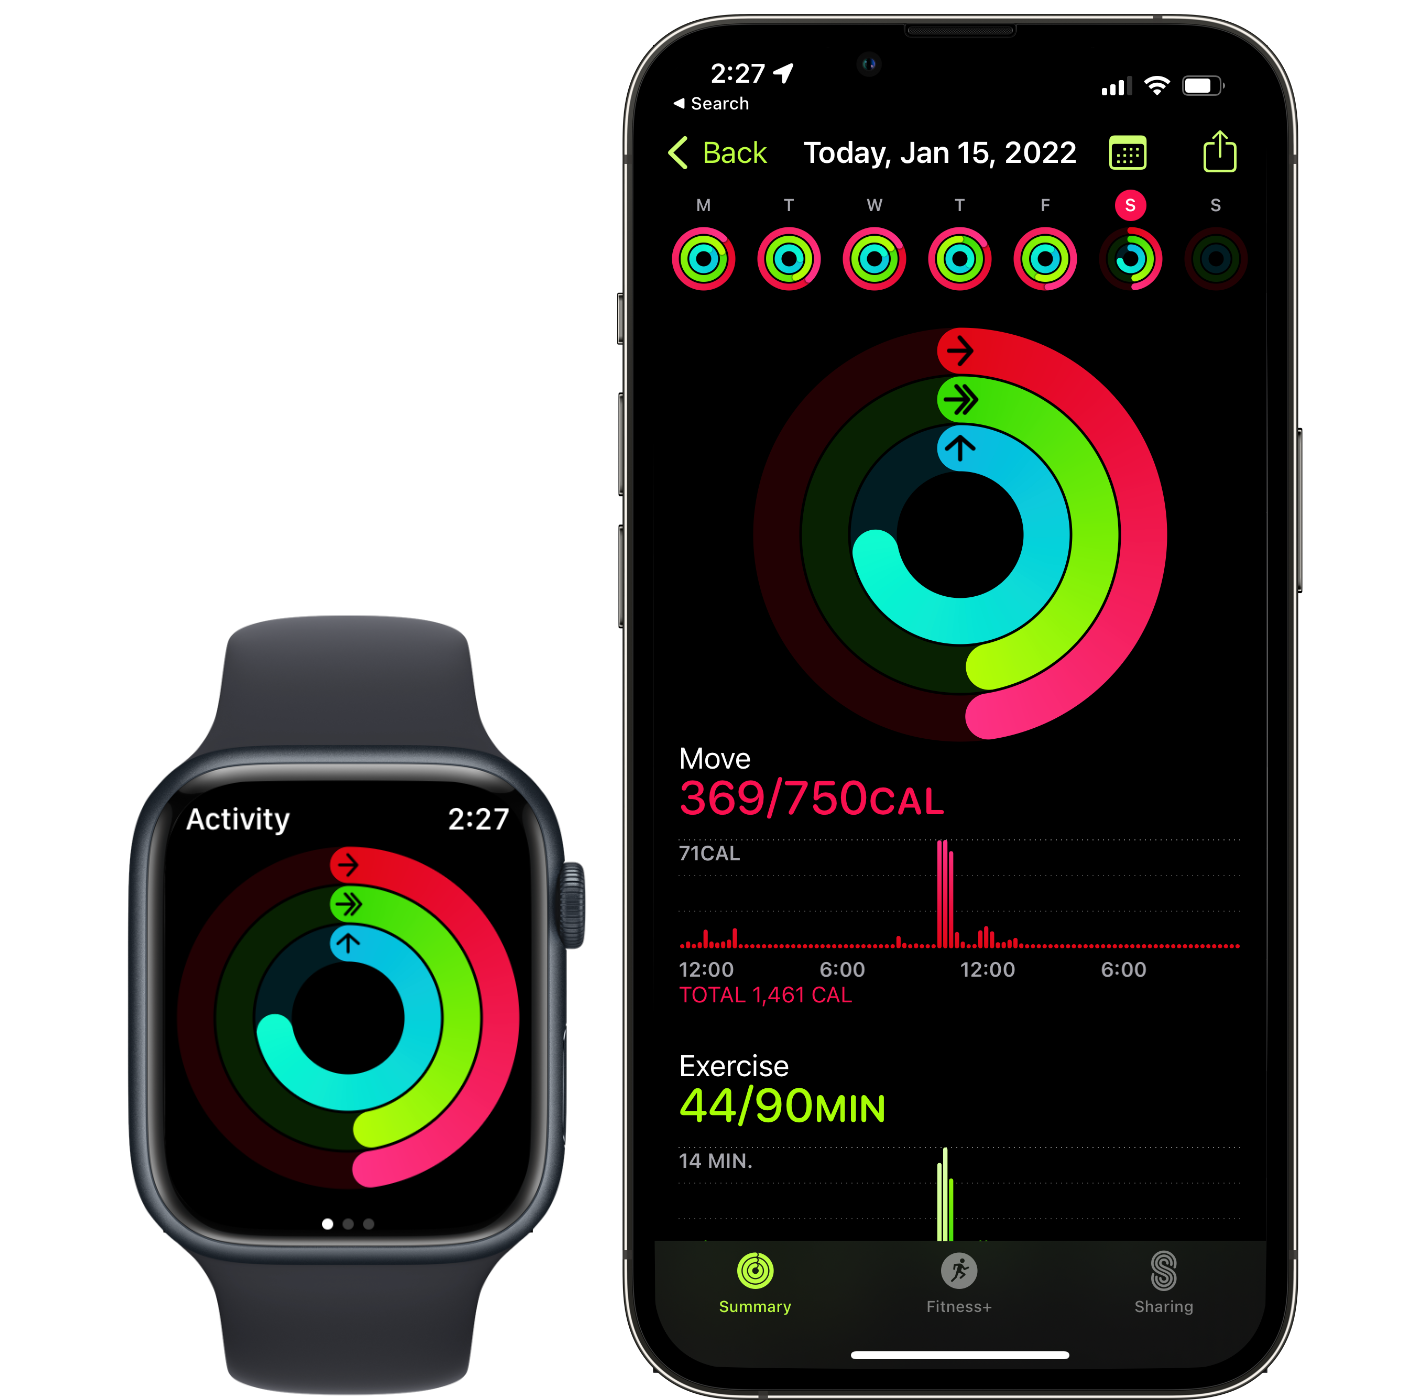
Activity rings are a core feature of the Apple Watch. These three rings are meant to create a gamified experience for fitness. By enabling them, you can track your activity over time. Your Apple Watch’s activity rings are; red for active calories burned, green for minutes of exercise, and blue for the number of hours where you actively stood for at least one minute.
Most Apple Watch users set up their activity rings when they first set up their Apple Watch. However, if you skipped that step, you can open the Activity app on your Apple Watch and follow the prompts. You’ll have the ability to set an active calorie, exercise minute, and standing goals that match your lifestyle and activity levels.
You can then view your activity trends in the Fitness app on your iPhone by scrolling down to ‘Trends’ and tapping on ‘Show More.’ From there, you can tap individual metrics and view graphs and daily averages.
Daily Coaching and Stand Reminders
Now that you have your Activity Rings setup, it’s time to make sure you close them. Apple has added additional notification options to remind Apple Watch wearers to stand and close their rings. Daily coaching is notifications that your Apple Watch will send you when you’re close to completing your activity or exercise ring.
Typically, you’ll be encouraged to take a brief walk of a recommended duration to close one or both of your rings. Standing reminders occur during the last 10 minutes of every hour you haven’t stood for. Standing reminders are meant to encourage you to stand up and stretch. This practice helps improve your body’s circulation and prevents cramps.
To enable Daily Coaching and Stand Reminders:
1. Open the ‘Watch’ app on your iPhone
2. Tap’ Activity’
3. Toggle’ Stand Reminders’ and/or ‘Daily Coaching’ on
High and Low Heart Rate Alerts
Following a similar mantra to the ECG functionality — even though you may be healthy — high and low heart rate alerts can notify you when something odd is detected. For example, high heart rate alerts will notify you if your heart rate exceeds 100-150 beats per minute (BPM) when you aren’t doing any physical activity. Likewise, the low heart rate alerts will notify you when your heart rate dips below 40-50 BPM. High and low heart rate alerts are available on all Apple Watch models. You can read more about heart health notifications on Apple’s website.
To turn on high and low heart rate notifications:
1. Open the ‘Watch’ app on your iPhone
2. Tap’ Heart’
3. Tap ‘High Heart Rate’
4. Tap on whatever option best suits you personally (100-150 BPM)
5. Tap ‘Heart’ in the top left-hand corner
6. Tap ‘Low Heart Rate’
7. Tap on whatever option best suits you personally (40, 45, or 50 BPM)
To check your heart rate manually:
1. Open the ‘Heart Rate’ app on your Apple Watch
2. Wait a few seconds for your Apple Watch to take a current measurement
Your Apple Watch takes heart rate measurements in the background throughout the day. All of your heart data can be viewed in the Health app on your iPhone.
Hand Washing
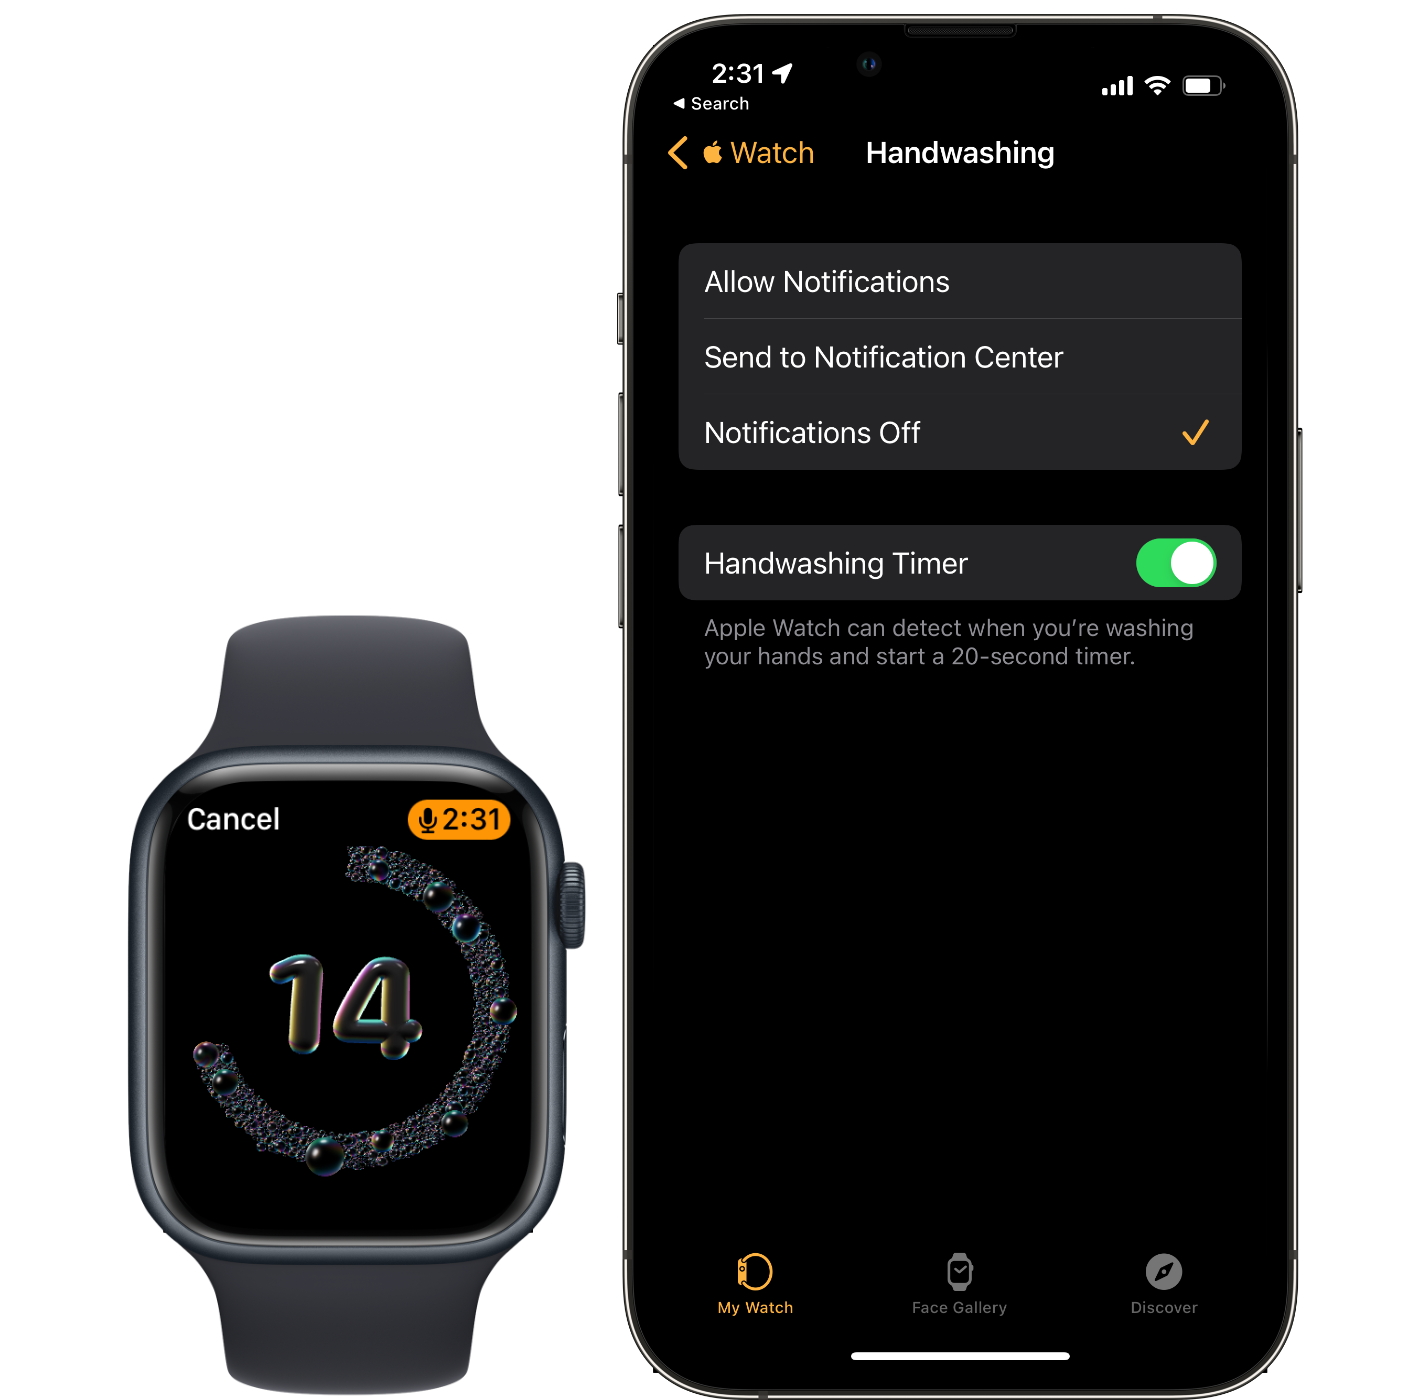
Hand washing detection on the Apple Watch is one of the most practical yet underrated features. Your Apple Watch uses a combination of hand washing-type motion combined with the sound of water to present you with a twenty-second timer. As COVID-19 continues to impact our lives, hand washing is a vital tool to protect ourselves. However, many don’t wash their hands for the recommended twenty seconds. Your Apple Watch can help remind you!
To enable Hand washing detection:
1. Open the ‘Watch’ app on your iPhone
2. Tap ‘Handwashing’
3. Toggle ‘Handwashing Timer’ on
VO2 Max
VO2 max is the metric doctors use to calculate your cardio fitness levels. Your cardio fitness level represents the maximum amount of oxygen that your body can use during a workout. Essentially, the higher your VO2 max level, the more oxygen your body can use during an exercise. Therefore, VO2 max levels positively correlate with your overall fitness level. Doctors with specialized machines determine proper VO2 max levels, but your Apple Watch can give you an educated guess. You can read more about VO2 max on Apple’s website.
To enable VO2 max detection:
1. Open the ‘Watch’ app on your iPhone
2. Tap’ Heart’
3. Toggle ‘Cardio Fitness Notifications’ on
Noise Detection
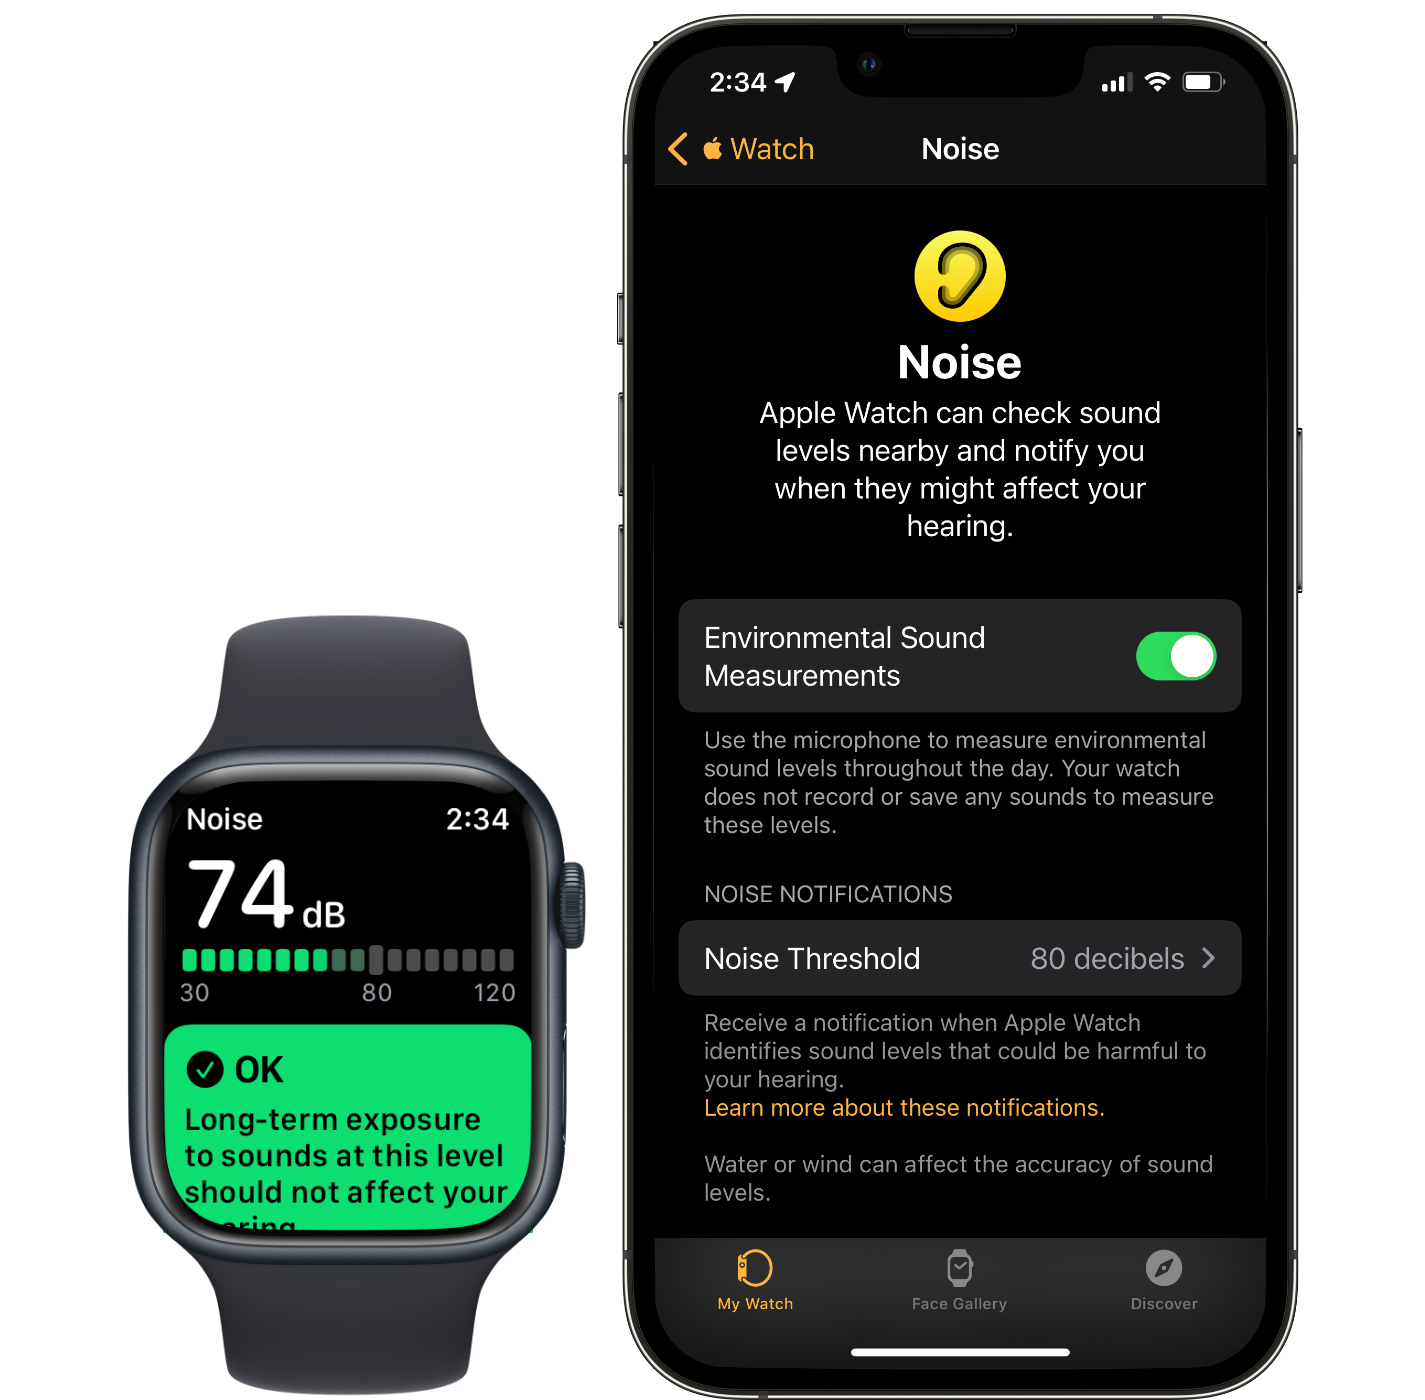
Adding to the Apple Watch’s list of abilities, Apple added loud noise detection. It’s no secret that listening to loud noises for long periods can damage your ears. So Apple has created an app that allows your Apple Watch to detect and monitor for the World Health Organization’s audio limit recommendations. If your Apple Watch notices you’re in a loud environment for too long, your Apple Watch will alert you.
To enable Noise Detection:
1. Open the ‘Watch’ app on your iPhone
2. Tap ‘Noise’
3. Toggle ‘Environmental Sound Measurements’ on
4. Tap ‘Noise Threshold’
5. Select the minimum noise threshold you’re comfortable with
Fall Detection
Apple Watches Series 4 and later supports a feature called Fall Detection. Fall detection will alert 911 and emergency contacts if your Apple Watch detects you took a fall and fail to respond to a notification within 60 seconds. The idea is that in an event where you may be knocked unconscious or be unable to move, 911 will be alerted to your location. Users over 65 years of age have this feature turned on automatically.
If you’re under 65, you’ll need to enable it manually. Apple notes that the more active you are, the more false positives you may have. I will say I have fall detection turned on, live a reasonably active lifestyle, and never had a false positive from working out.
To enable Fall Detection:
1. Open the ‘Watch’ app on your iPhone
2. Tap’ Emergency SOS’
3. Toggle’ Fall Detection’ on
4. Select either ‘Always on’ or ‘Only on during workouts’
Electrocardiogram (ECG/EKG)
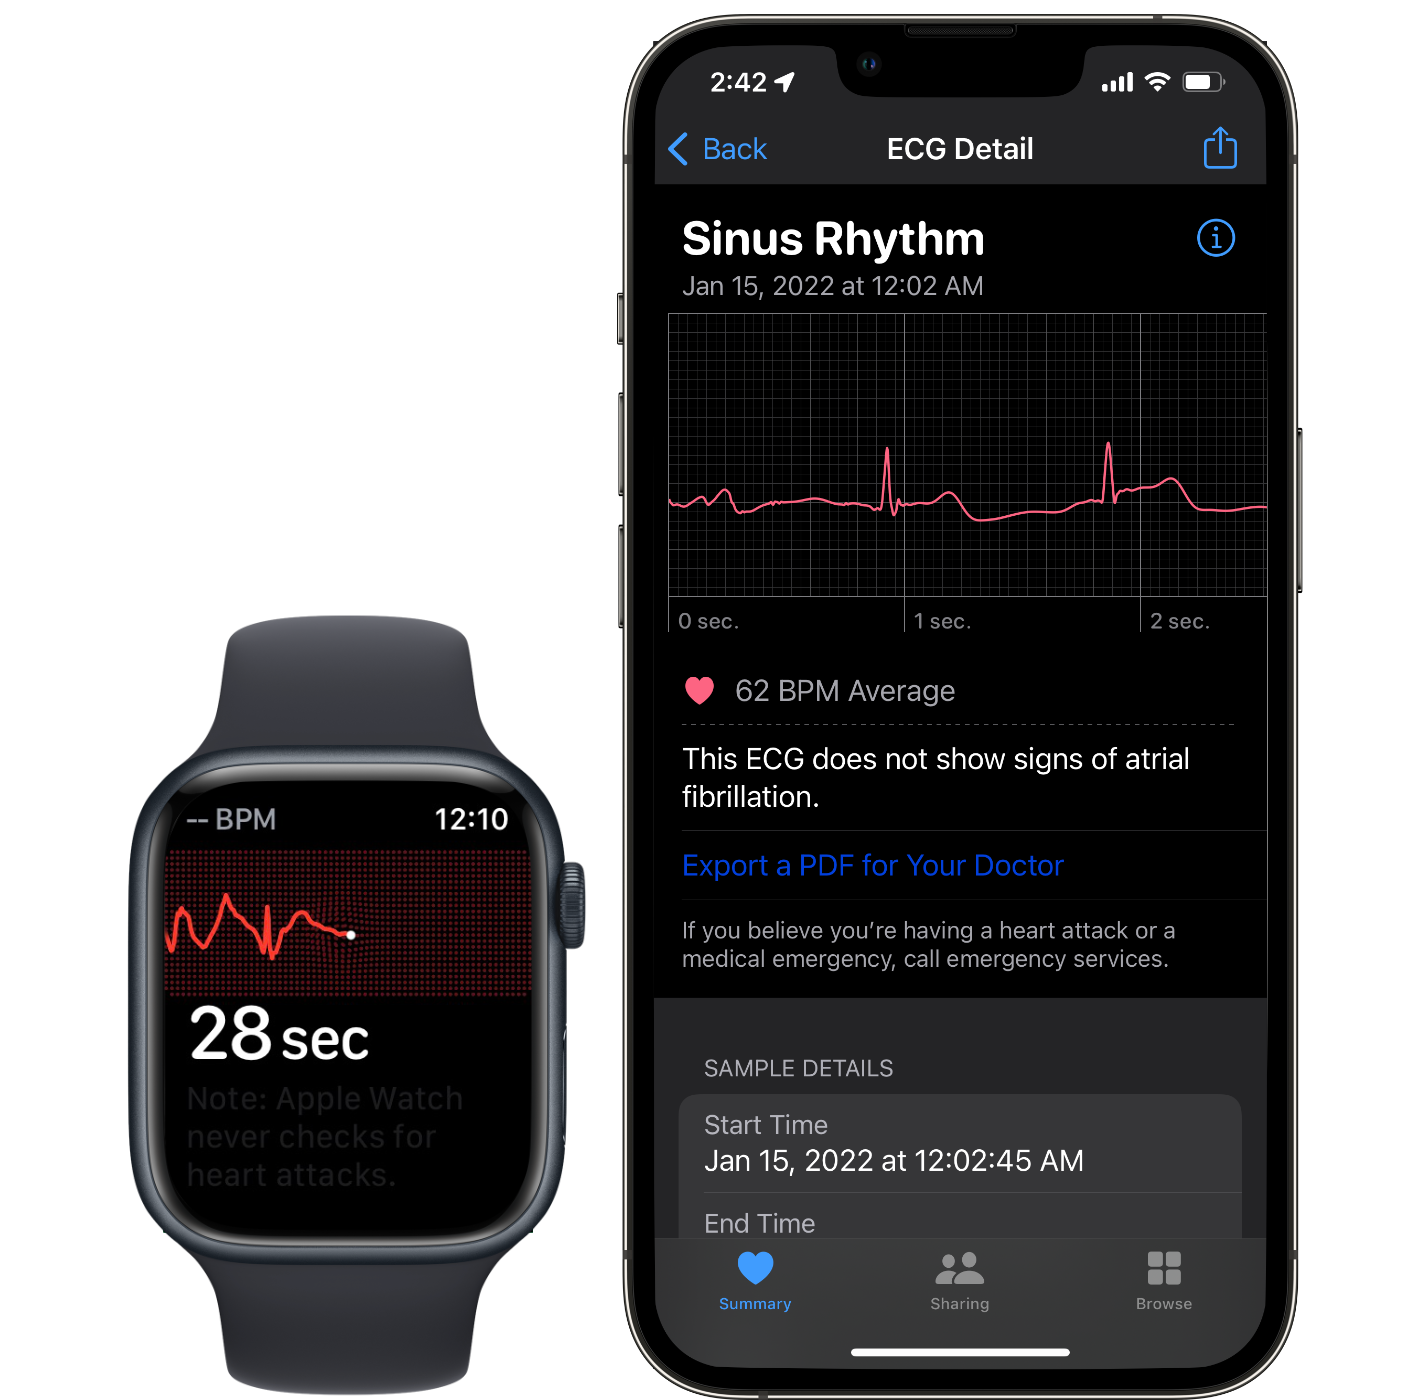
Apple Watch Series 5, 6, and 7 owners can take an ECG or electrocardiogram in addition to checking their heart rate. The Apple Watch’s ECG detection has been certified to detect a form of heart irregularity called atrial fibrillation or AFib. Of course, this is no substitution for a medical ECG in a hospital. However, many think we’re entirely healthy until something unexpected happens. There are numerous stories of an Apple Watch detecting an irregularity and saving the user’s life. You can learn more about AFib and the ECG functionality on Apple’s website.
To turn on ECG:
1. Open the ‘Watch’ app on your iPhone
2. Tap’ Heart’
3. Tap ‘Install’ next to “ECG app”
4. Toggle on ‘Irregular Rhythm’
To take an ECG:
1. Open the ‘ECG’ app on your Apple Watch
2. Take your index figure on the hand that is not wearing the Apple Watch and rest it on the Digital Crown for 30 seconds
3. Do not move while the ECG is taking place
4. You’ll get one of three results; sinus rhythm (normal heart rhythm), atrial fibrillation, or inconclusive
Blood Oxygen
Apple Watch Series 6 and 7 owners have an additional sensor to detect their blood oxygen levels. Blood oxygen is the percentage of oxygen your red blood cells carry from your lungs to the rest of your body. You can learn more about it on Apple’s website. Typically, people have blood oxygen levels of 95-100%. Unlike Apple’s ECG app, the blood oxygen app is not approved by Health Canada to provide any medical diagnosis. Instead, the app includes data that you can share with your doctor.
To enable Blood Oxygen detection:
1. Open the ‘Watch’ app on your iPhone
2. Tap ‘Blood Oxygen’
3. Toggle ‘Blood Oxygen Measurements’ on
4. Optionally, toggle ‘In Sleep Focus’ and/or ‘In Theatre Mode’ if you’d like background detection when the sensor lights may be distracting.
To check your Blood Oxygen level:
1. Open the ‘Blood Oxygen’ app on your Apple Watch
2. Tap ‘Start’
3. Hold still
4. Wait 15 seconds
5. You’ll receive a percentage result
MobileSyrup may earn a commission from purchases made via our links, which helps fund the journalism we provide free on our website. These links do not influence our editorial content. Support us here.
