
While it may seem like a trivial matter, adding an email signature can be beneficial and improve your emails. Whether you go for a simple ‘Sincerely’ tagged on the end of your messages or want to kit out your signature with contact info, it’s less typing and an extra level of professionalism.
However, you may not know how to change your email signature. If you’re using Gmail, thankfully, it’s a straightforward process.
To start, head to Gmail on your computer (you can do this on your phone too, which we’ll address below). In the top right-hand corner of Gmail, look for the gear icon. It should be next to a three-by-three grid of dots and your account profile picture.
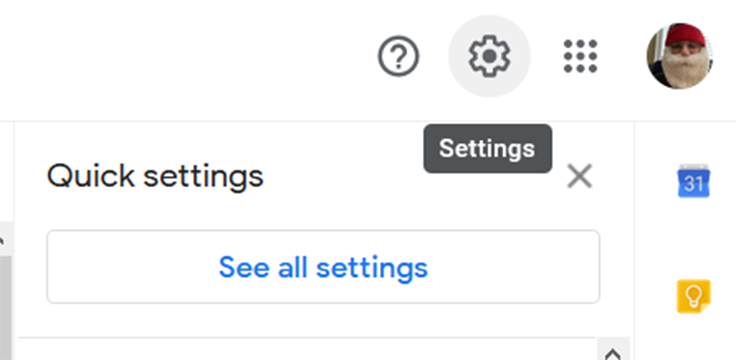
Click the gear then ‘See all settings.’ Under the ‘General’ tab, scroll down to ‘Signature.’ From there, you can edit an existing signature or create a new one. Additionally, there are settings for adjusting the signature font, text size, formatting like Bold, Italics and Underline, hyperlinks and more.
Below the signature editor are default settings for which email address a signature applies to and whether to use it for new emails or replies and forwards.
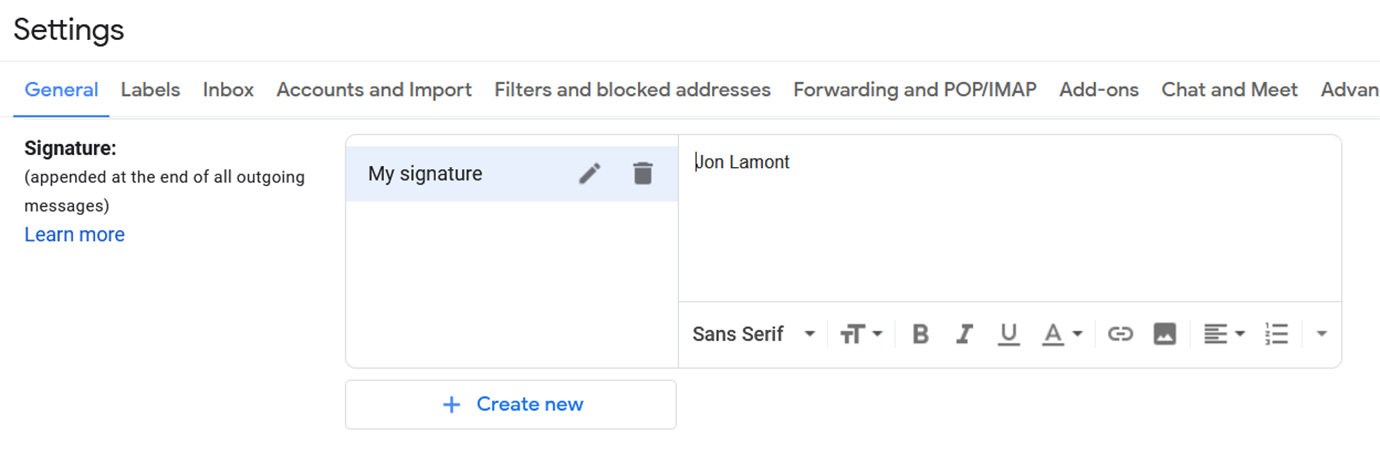
Finally, there’s an option to insert the signature before quoted text in replies and remove the ‘–‘ line that typically precedes it.
On mobile, the process is similar. Tap the three-line hamburger button in the top-left corner of the Gmail app to open the side menu. Scroll down and tap ‘Settings,’ then tap the account you want to edit.
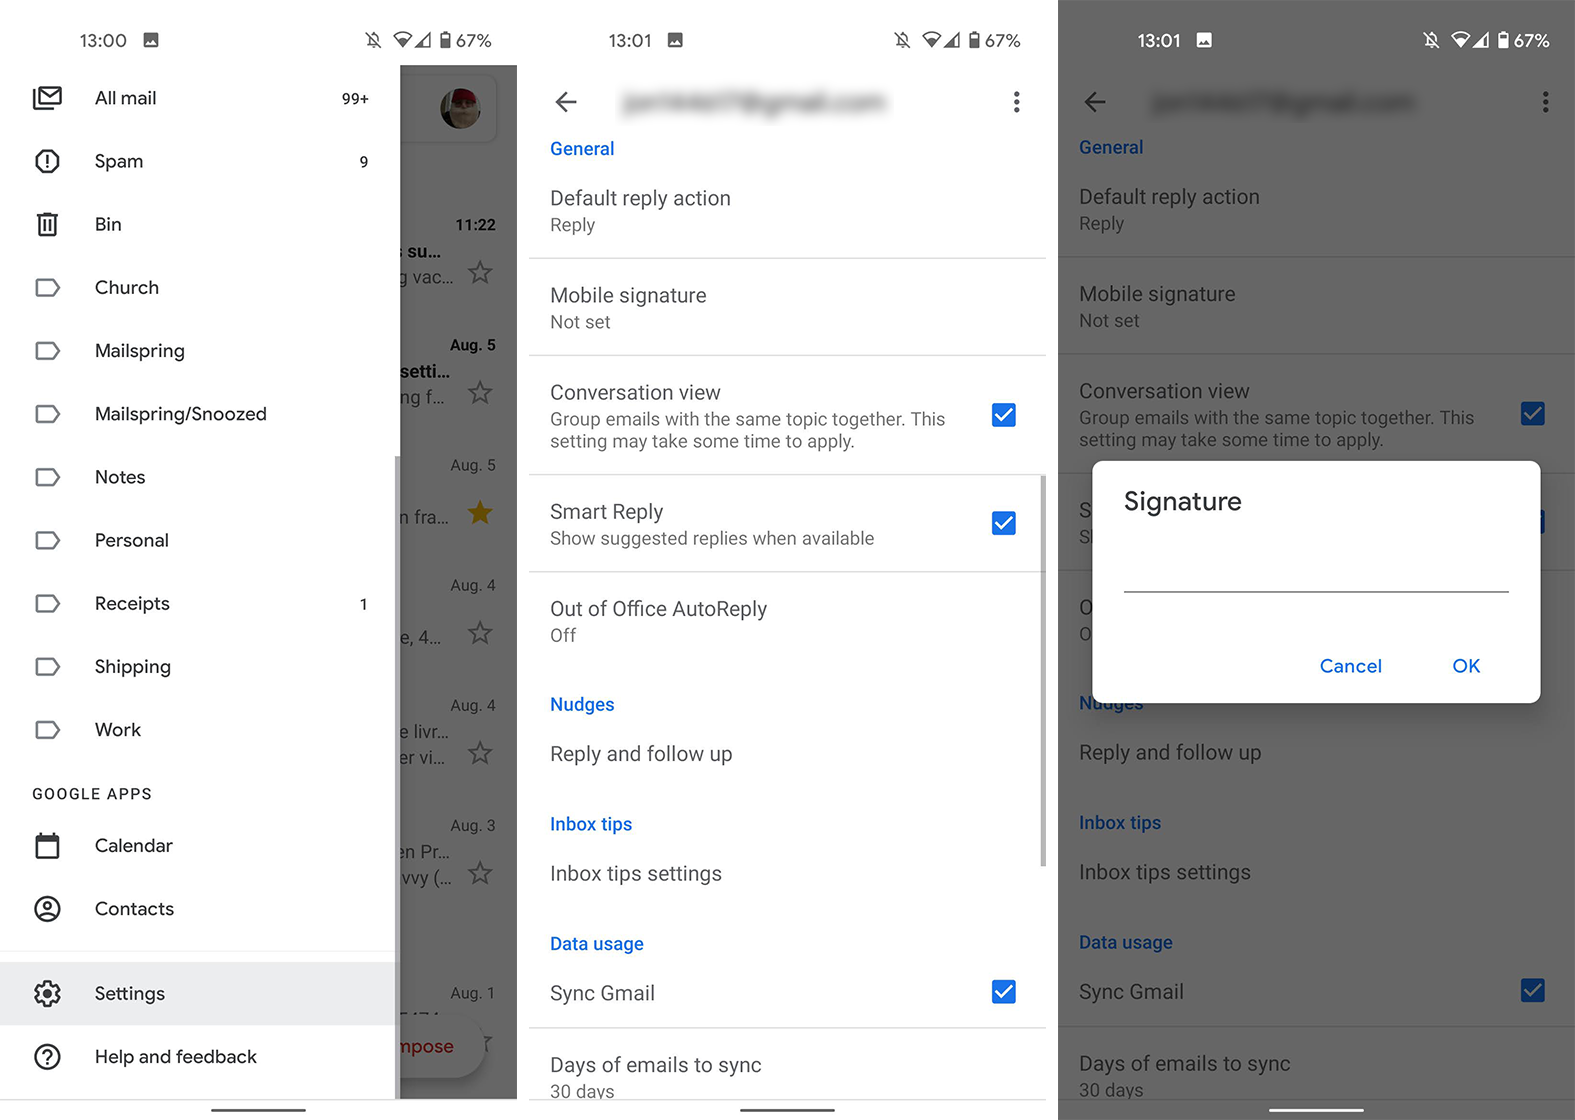
Scroll down to ‘Mobile signature’ under the ‘General’ section. Tap it and enter your signature. It’s worth noting that the signature field is less customizable on mobile. However, you can create a signature using Gmail’s desktop tools, copy it from an email, and then paste it in the ‘Mobile signature’ editor to get a similar signature on both mobile and desktop.
MobileSyrup may earn a commission from purchases made via our links, which helps fund the journalism we provide free on our website. These links do not influence our editorial content. Support us here.
