
Google’s Android 9.0 P Developer Preview is live, and it’s a little earlier than anticipated.
However, anyone interested in testing out Google’s latest Android operating system can do so by installing the Android P system image onto their 2016 and 2017 Pixel devices. To be clear, the Android P Developer Preview is not available on any other device other than the 2016 Pixel and 2017 Pixel 2 twins.
Be warned, this is a lengthy and complicated process that will require you to erase all of the data on your device. Moreover, the developer preview is not guaranteed to be stable and could potentially brick your device. Make sure to install Android P on a test device and not your daily smartphone — just in case something goes wrong.
It should also be mentioned that Android P’s official name has yet to be unveiled. It might be Pi, it might be Pumpkin Pie, it might be Pistachio, it might even be Peanut Butter.
Step 1: Prepare your device and download the necessary tools
First thing’s first, you’re going to need to make sure you’ve got the latest fastboot tool. Fastboot is part of the Android SDK Platform Tools package, and the package can be downloaded from the Android Studio website.
You’re also going to need to make sure you that you can enable USB debugging on your device. To do so, you’ll first need to enable ‘Developer options’ in the Setting app.
You can enable Developer options by navigating to ‘About phone’ in the Settings app, scrolling down to ‘Build number’ and tapping it seven times.

Once it’s activated, you’ll notice a new setting called Developer options. Scroll down and search for USB debugging in Developer options, and toggle the switch to activate the feature.
You’ll also need to add the fastboot and ADB to your PATH environment variable. In Windows 10, this can be done by navigating to Control Panel > Systems > Advanced > Environment Variables and then clicking on Path under ‘System Variables’ and pressing the edit button.
Once in the editing window, you can browse to the directory with fastboot and ADB and add them in as new environment variables.
There’s a different process for macOS and Linux.
Step 2: Download the correct system image
Anyone interested in installing the preview first needs to navigate to the Android Developers website. The website contains the complete list of Pixel and Pixel 2 system images.
This is probably the easiest step.
Step 3: Manually flash the system image to the device
Here’s where things get complicated. Read on below for the full process, or click here to read Google’s formal instructions.
After you’ve downloaded the correct system image, unzip the file and save it to a safe location.
Next, connect your Pixel or Pixel 2 smartphone to your computer through USB.
In Windows 10, open the command prompt. Once it’s been launched, type ‘cd’ followed by a space and then the name of the location of your file with the Android developer tools.
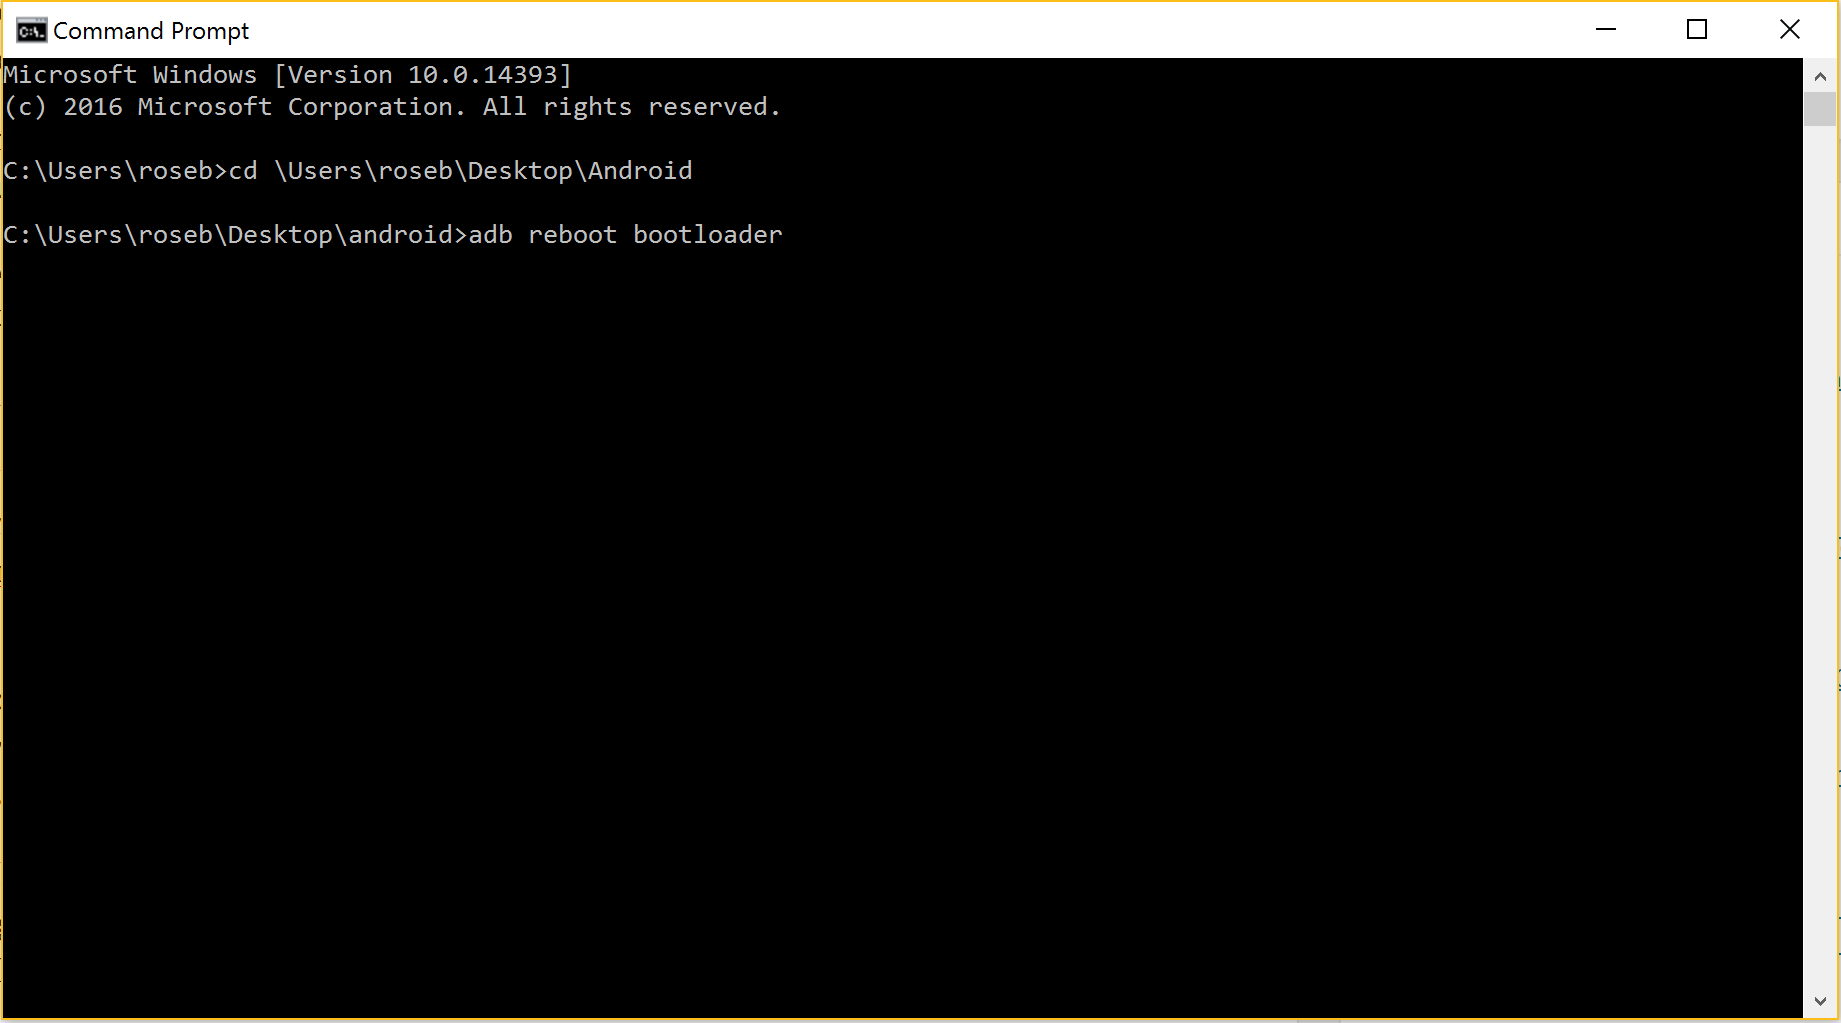
Type ‘adb reboot bootloader’ into command prompt, which should start your device in fastboot mode.
You can also activate fastboot mode by using the appropriate key combination for your device.
You might need to unlock your device’s bootloader. If so, run ‘fastboot flashing unlock’ in command prompt.
Google does warn that Pixel 2 devices must be updated to at least Oreo’s MR1 developer preview. Pixel 2 devices with a loader version older than TMZ20a, the device’s critical partitions may need to be unlocked.
To do so, type in ‘fastboot flashing unlock_critical’ into command prompt.
Your device should then should you a confirmation screen, which will erase all data on your phone.
Step 4: Complete the flashing process
Once your device has displayed a confirmation screen, open up command prompt and locate the files stored within the factory image you downloaded back in step 1.
For instance, if your username is ‘Android’ and you’ve named the factory image ‘androidohwow’ type in ‘cd/Users/Android/Downloads/androidohwow’ and hit enter.
Next type ‘flash-all’ and hit enter to execute this command.
If you’ve accurately followed all of the steps in this article, your phone should process the request and install the Android P Developer Preview.
Google does recommend locking the bootloader against for security reasons.
To do so, simply start the device in fastboot mode again, run the command prompt and execute ‘fastboot flashing lock.’
Step 5: Wiping the Android P developer preview from your device
If you want to go back to Android Oreo and erase all traces of Android P from your phone, you can do so by manually flashing an Android Oreo factory image to your device.
Once again, this is an incredibly detailed and complicated process, so only flash the Android P Developer Preview to your Pixel phone if you feel confident with your technical skills.
In fact, even if you do feel confident in your technical skills, you’re going to want to think twice about downloading this preview, which could bring instabilities and bugs that brick your device.
MobileSyrup may earn a commission from purchases made via our links, which helps fund the journalism we provide free on our website. These links do not influence our editorial content. Support us here.
