
If you’ve been considering making a jump away from Google Chrome, you’re not alone.
Plenty of people are toying with the idea, whether because of concerns over privacy or perhaps issues with performance. Others just want a change of pace.
Thankfully, whatever your reasoning for switching web browsers, the process is a lot simpler than you may think. Most browsers include built-in tools to handle importing your stuff over. Below we’ve included some tips on making use of those tools.
The first step in making the switch is picking a browser to use. While this article isn’t about what browser to use, there are a few things worth considering when making a switch. If you want ultimate compatibility, you’ll likely want to run a Chromium-based browser such as the new Microsoft Edge, Brave or Vivaldi. All these are based on the same foundation as Google Chrome, and should work the same with websites as Chrome. However, they can also be less resource hungry, which is great if you’re using lower-end hardware.
Alternatively, if privacy is your goal, Firefox and Safari (if you’re using iOS or macOS) are both excellent options. Ultimately, it’s best to do some research and see which browser is best for your needs. Once you’ve picked one, download it and you’re ready to start the migration process.
Moving your bookmarks

How this process works can differ from browser to browser, but the majority of web browsers offer a way to import bookmarks from other browsers. Firefox, Edge and Vivaldi, for example, all offer a tool for importing bookmarks.
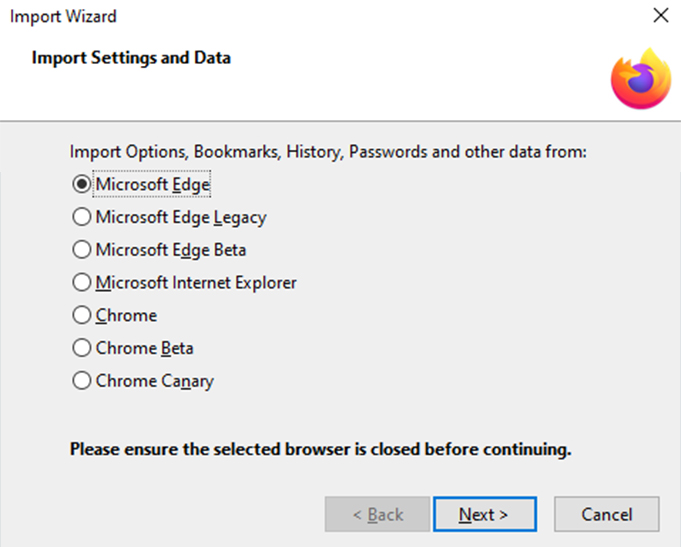
To access the tool, head into the bookmarks (or favourites, according to Edge) section on your new browser. There should be an ‘import’ button along the top of the bookmarks page, or perhaps tucked behind a three-dot overflow menu depending on your browser.
When you click import, you’ll have the option to pick another browser — such as Chrome — and your new browser will import the bookmarks automatically.
If you’re not able to import bookmarks automatically, Chrome also lets you export your bookmarks. From the bookmark manager, click the three-dot overflow menu button in the top right corner, click ‘Export’ then save the file somewhere on your computer. You’ll be able to access it from the import option in your new browser.
Login details
Another important thing to move to a new browser is your login details. If you save these in Chrome, there are a couple ways to deal with them.
The first method is arguably the easier and more beneficial option: use a password manager. There are plenty of excellent third-party password managers out there, some free and some cost money. LastPass, Dashlane and 1Password are all excellent options. Most of these will be able to import your passwords from Chrome.
Then when you use a different device or browser, you’ll just need the extension or app to access all your login details. Not to mention the added security benefits of having all your passwords safely encrypted and stored in one of these apps.
The other method would be to import your passwords automatically. This works similar to bookmarks — navigate to your new browser’s password manager (for example, Firefox includes it in the ‘Privacy & Security’ section). You’ll be able to click ‘Import’ and select Chrome from the menu. Your new browser will automatically handle the process for you.
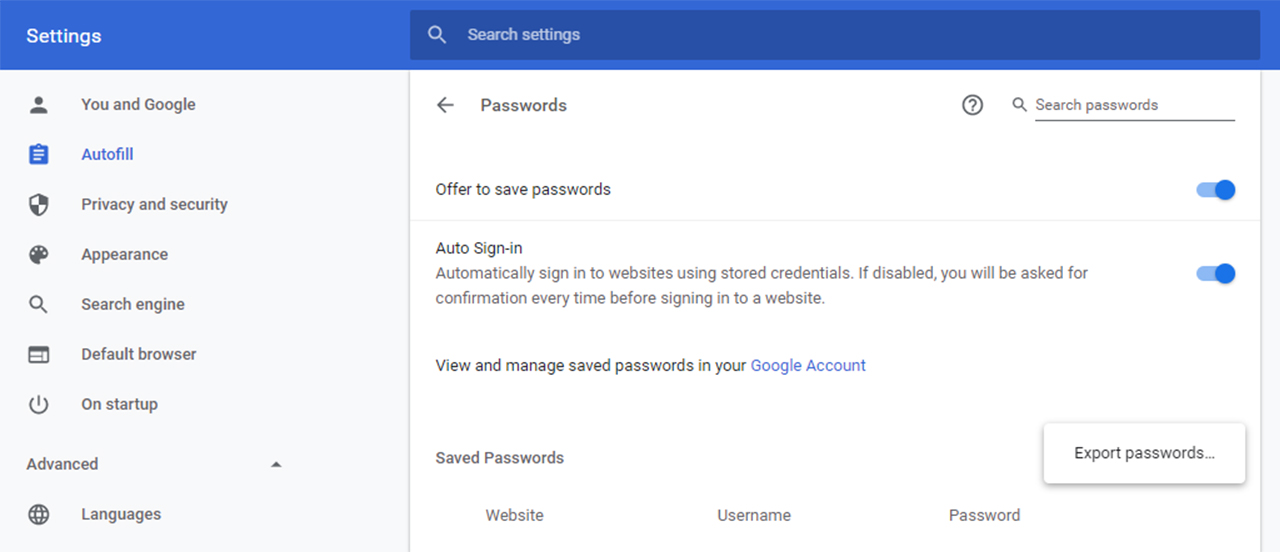
Alternatively, you can manually export your passwords from Chrome by navigating to Settings > Autofill > Passwords and clicking the overflow menu button next to ‘Saved Passwords.’ Not all browsers will be able to import passwords from one of these files. Further, the file will be readable by anyone who can access it, so I’d recommend avoiding this method if possible.
Extensions and add-ons
Depending on how many extensions you use, this section could be a relatively quick process of a frustrating endeavour. Unfortunately, there’s no easy way to move these over like with bookmarks and passwords.
Part of the problem here is that different browsers handle extensions and add-ons in different ways. Trying to move your extensions from Chrome to Firefox would be like trying to copy your apps from an iPhone to an Android phone — extensions are built differently for different browsers.
Thankfully, Firefox offers a robust add-on selection, so it shouldn’t be too difficult to find most of your Chrome extensions and re-install them.
However, if you switch to a Chromium-based browser like the new Edge, you’ll be able to use Chrome extensions (you just can’t automatically move them over). Most Chromium browsers will automatically let you install extensions from the Chrome Web Store, but Microsoft Edge requires an extra setting first. If you switch to the new Edge, click the three-dot menu and select ‘Extensions.’ Then toggle on the ‘Allow extensions from other stores’ option in the bottom left corner. Once enabled, you’ll be able to download extensions from the Chrome Web Store.
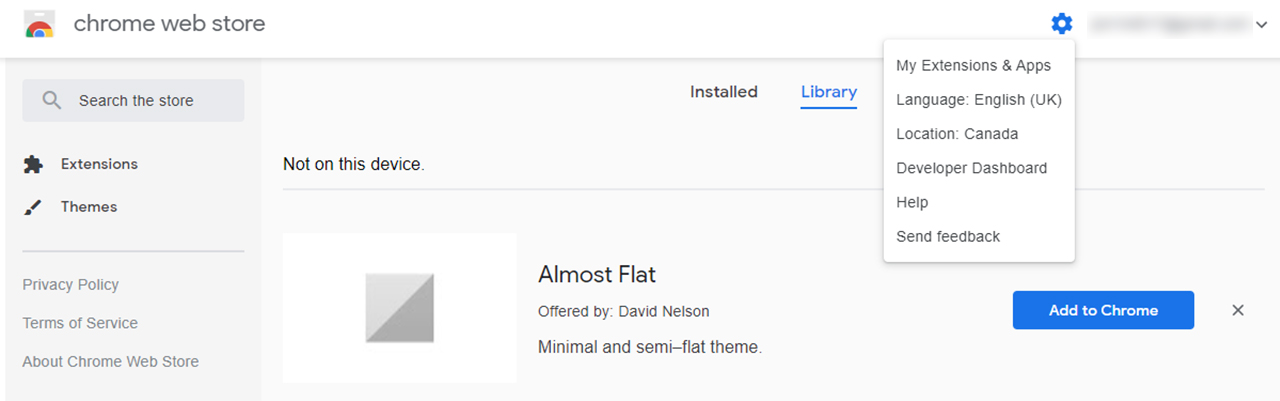
Further, once you get access to the Chrome Web Store, if you sign in with your Google account, you can click the gear icon next to your name in the top-right corner, then ‘My Extensions and Apps.’ On the next page, click ‘Library’ to see a list of all the extensions and apps you added to Chrome. You can then re-install them on your current browser.
Sync and mobile
The last thing you’ll want to do is enable your new browser’s sync features and install the mobile variant if it has one. Most browsers offer access to sync in the top-right corner.
Clicking on the account icon will let you sign in or create an account to sync things like tabs, browsing history, bookmarks and more across devices. This is especially helpful if you swap between a laptop and a desktop. It’s also a great option if you use the same browser on your mobile phone.
Firefox, Edge, Vivaldi, Brave and many others offer mobile variants (although not every browser offers both iOS and Android apps). Make sure to check out what platforms a browser supports before committing to a change.
Going default
Once you’ve set up your new browser, you’ll probably want to make it your default. This is a fairly easy process whether you’re on Windows or macOS.
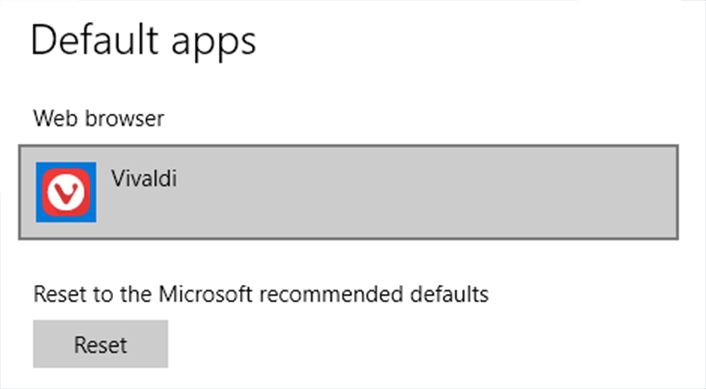
Windows users can search ‘Default apps’ using the search bar in the taskbar and tapping enter. This opens the menu for changing default apps. Find the one labelled ‘web browser’ and click it. Select the new browser and you’re good to go.
For Mac users, head to ‘System Preferences’ > ‘General’ and click the ‘Default web browser’ option to select a new browser from the pop-up.
Most browsers will also prompt you to set them as the default when you first set them up.
With all that done, you should be all moved over to your new browser and ready to go.
MobileSyrup may earn a commission from purchases made via our links, which helps fund the journalism we provide free on our website. These links do not influence our editorial content. Support us here.
