Technology is ever-evolving. Smartphones today feature high RAM, top-of-the-line cameras, impressive refresh rates and long-lasting batteries. What I mean by that is smartphones today are more than capable of performing strenuous and power-hungry activities with ease — including activities like streaming.
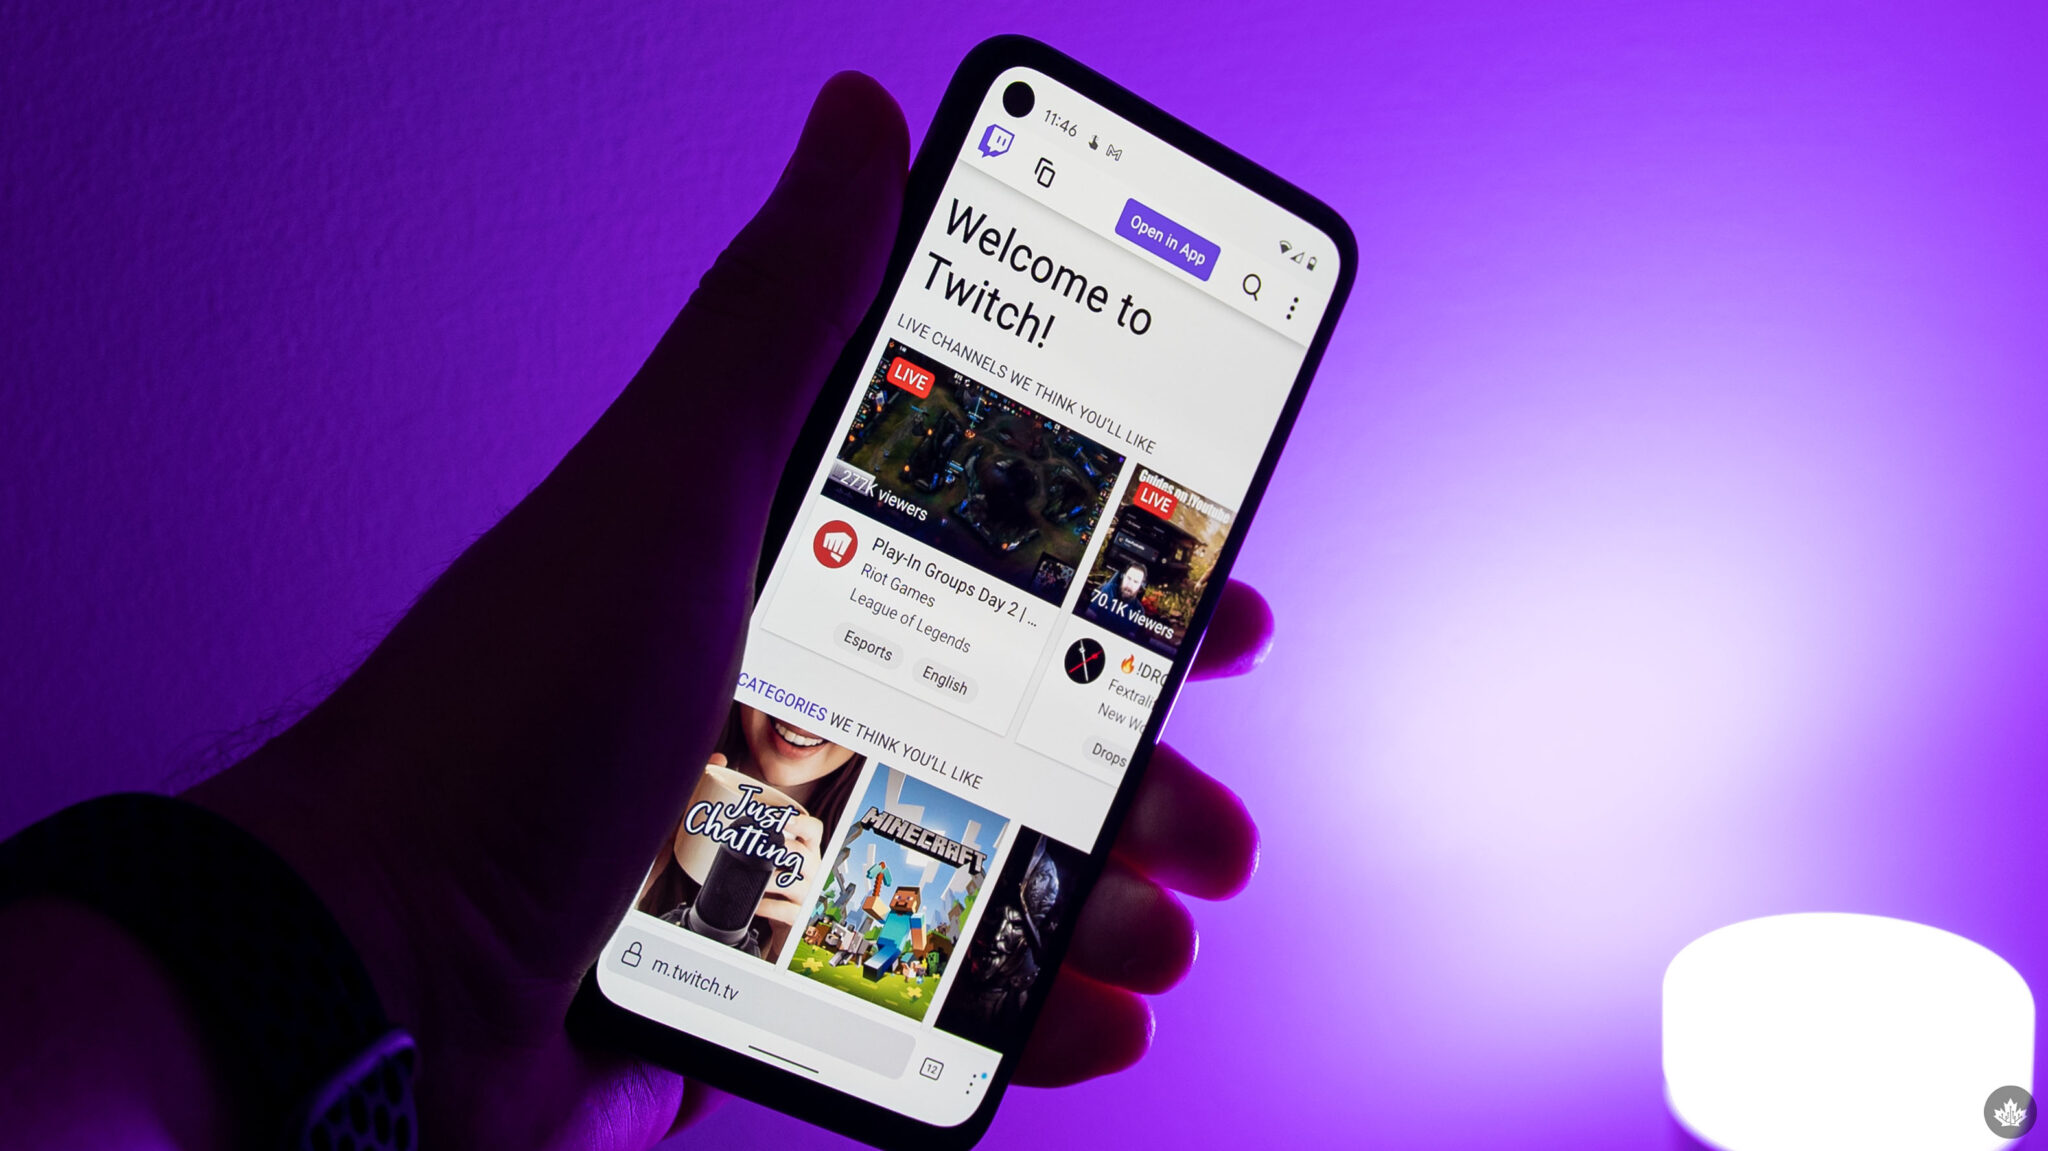
Streaming on Twitch has become a popular activity, and with the recent introduction of the platform’s Ads Incentive Program (AIP, pronounced ‘ape’), streamers are able to earn a “predictable monthly income” simply by streaming for a set amount of hours while airing ads (first screenshot below).
-

- Image credit: Twitch
-
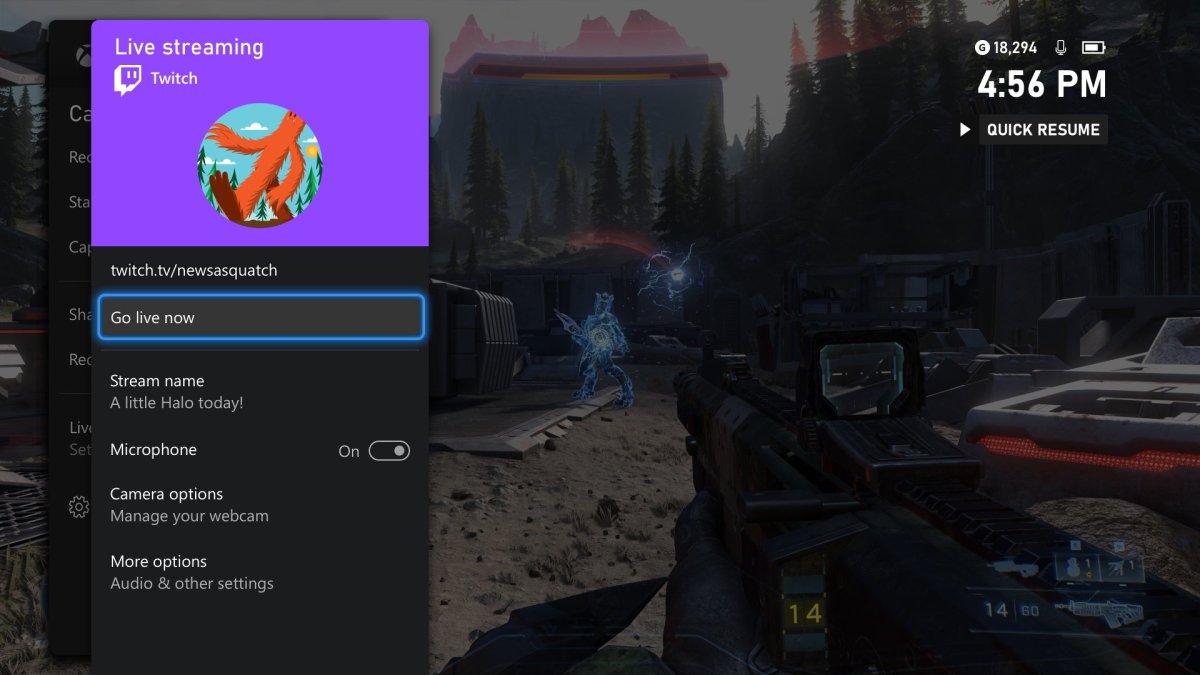
- Image credit: Xbox
While streaming on Twitch is dominated by PC users, updates like this one (second screenshot above) allow console gamers to live stream their content with ease. If you already stream on Twitch, or consider it a potential activity you want to dive into but don’t want to go all out purchasing the right equipment, fret not; you can start your journey by streaming right off your smartphone.
While there are (and were) multiple platforms for live streaming, including YouTube Gaming, Facebook Live and the now-dead Mixer, this article focuses solely on the king of streaming viewership — Twitch, and how you can stream on it directly from your smartphone.
There is no minimum spec requirement for streaming from a smartphone, and all devices, including tablets that support the Twitch app, can be used. However, no spec requirement doesn’t mean that you’ll get the optimal experience with a laggy old device. You also have to keep in mind that streaming will drain your device’s battery pretty quickly, and if you choose to do IRL (in-real-life) streams and show yourself or your surroundings, you’ll have to make sure your stream doesn’t look like it is being broadcasted from a potato.
That being said, let’s dive into how simple it is to live stream on Twitch directly from a smartphone/tablet.
Firstly, you’ll have to download the Twitch app for iOS or Android, depending upon the device you’re using. If you already have a Twitch account — great; if not, make one — it shouldn’t take more than five minutes.
Once logged in, your home screen will look something like the screenshot below. From there, you have two options to go live, both circled in red:
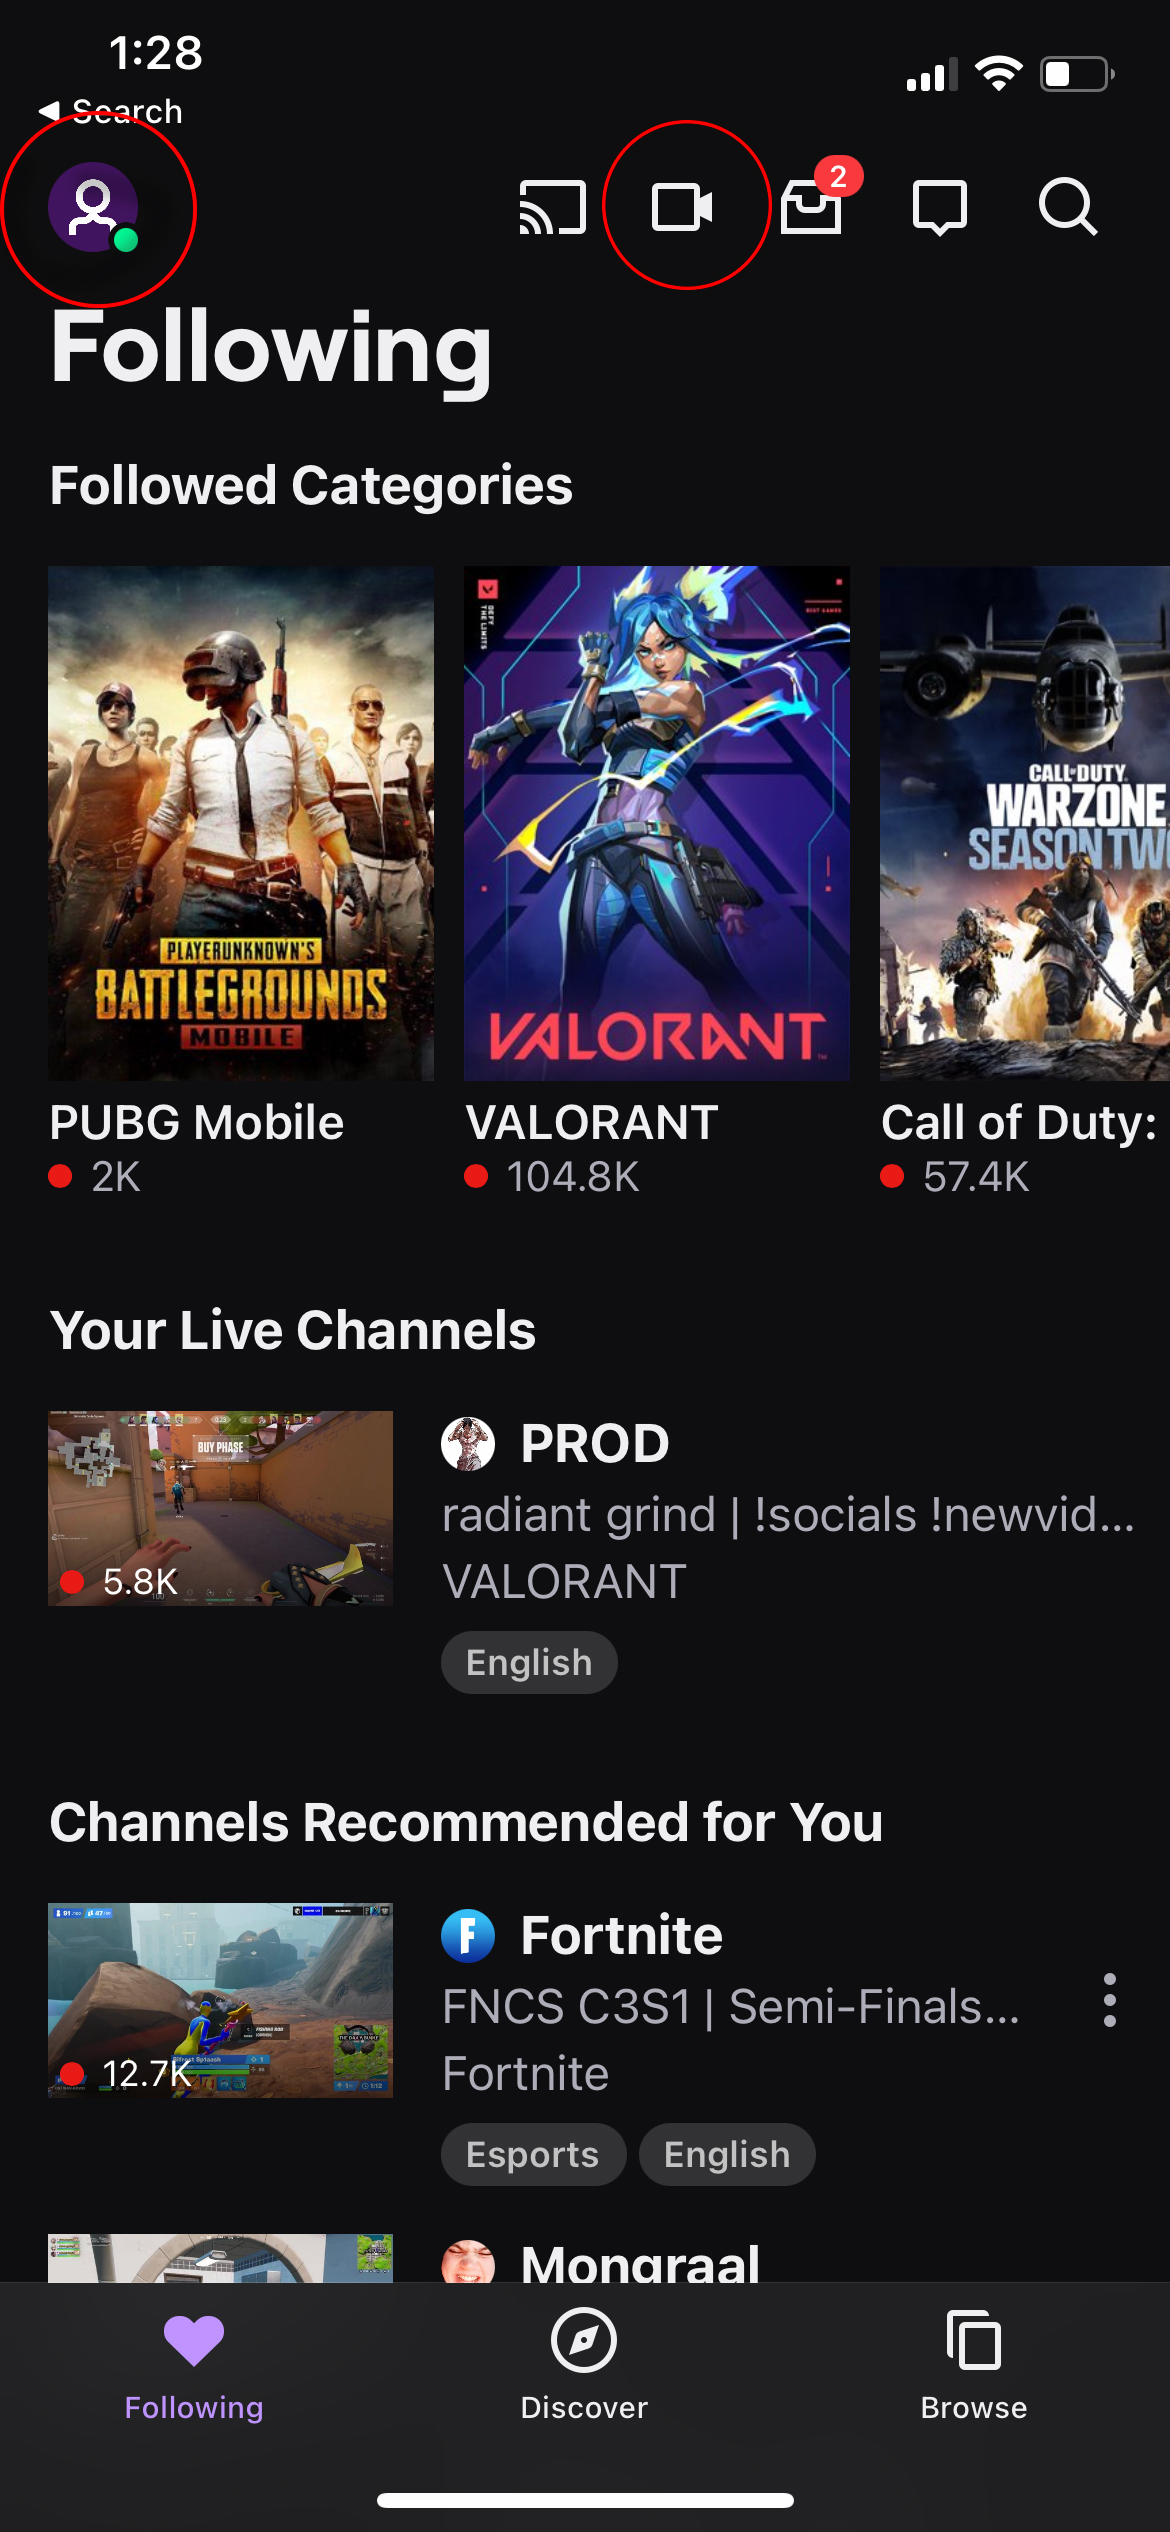
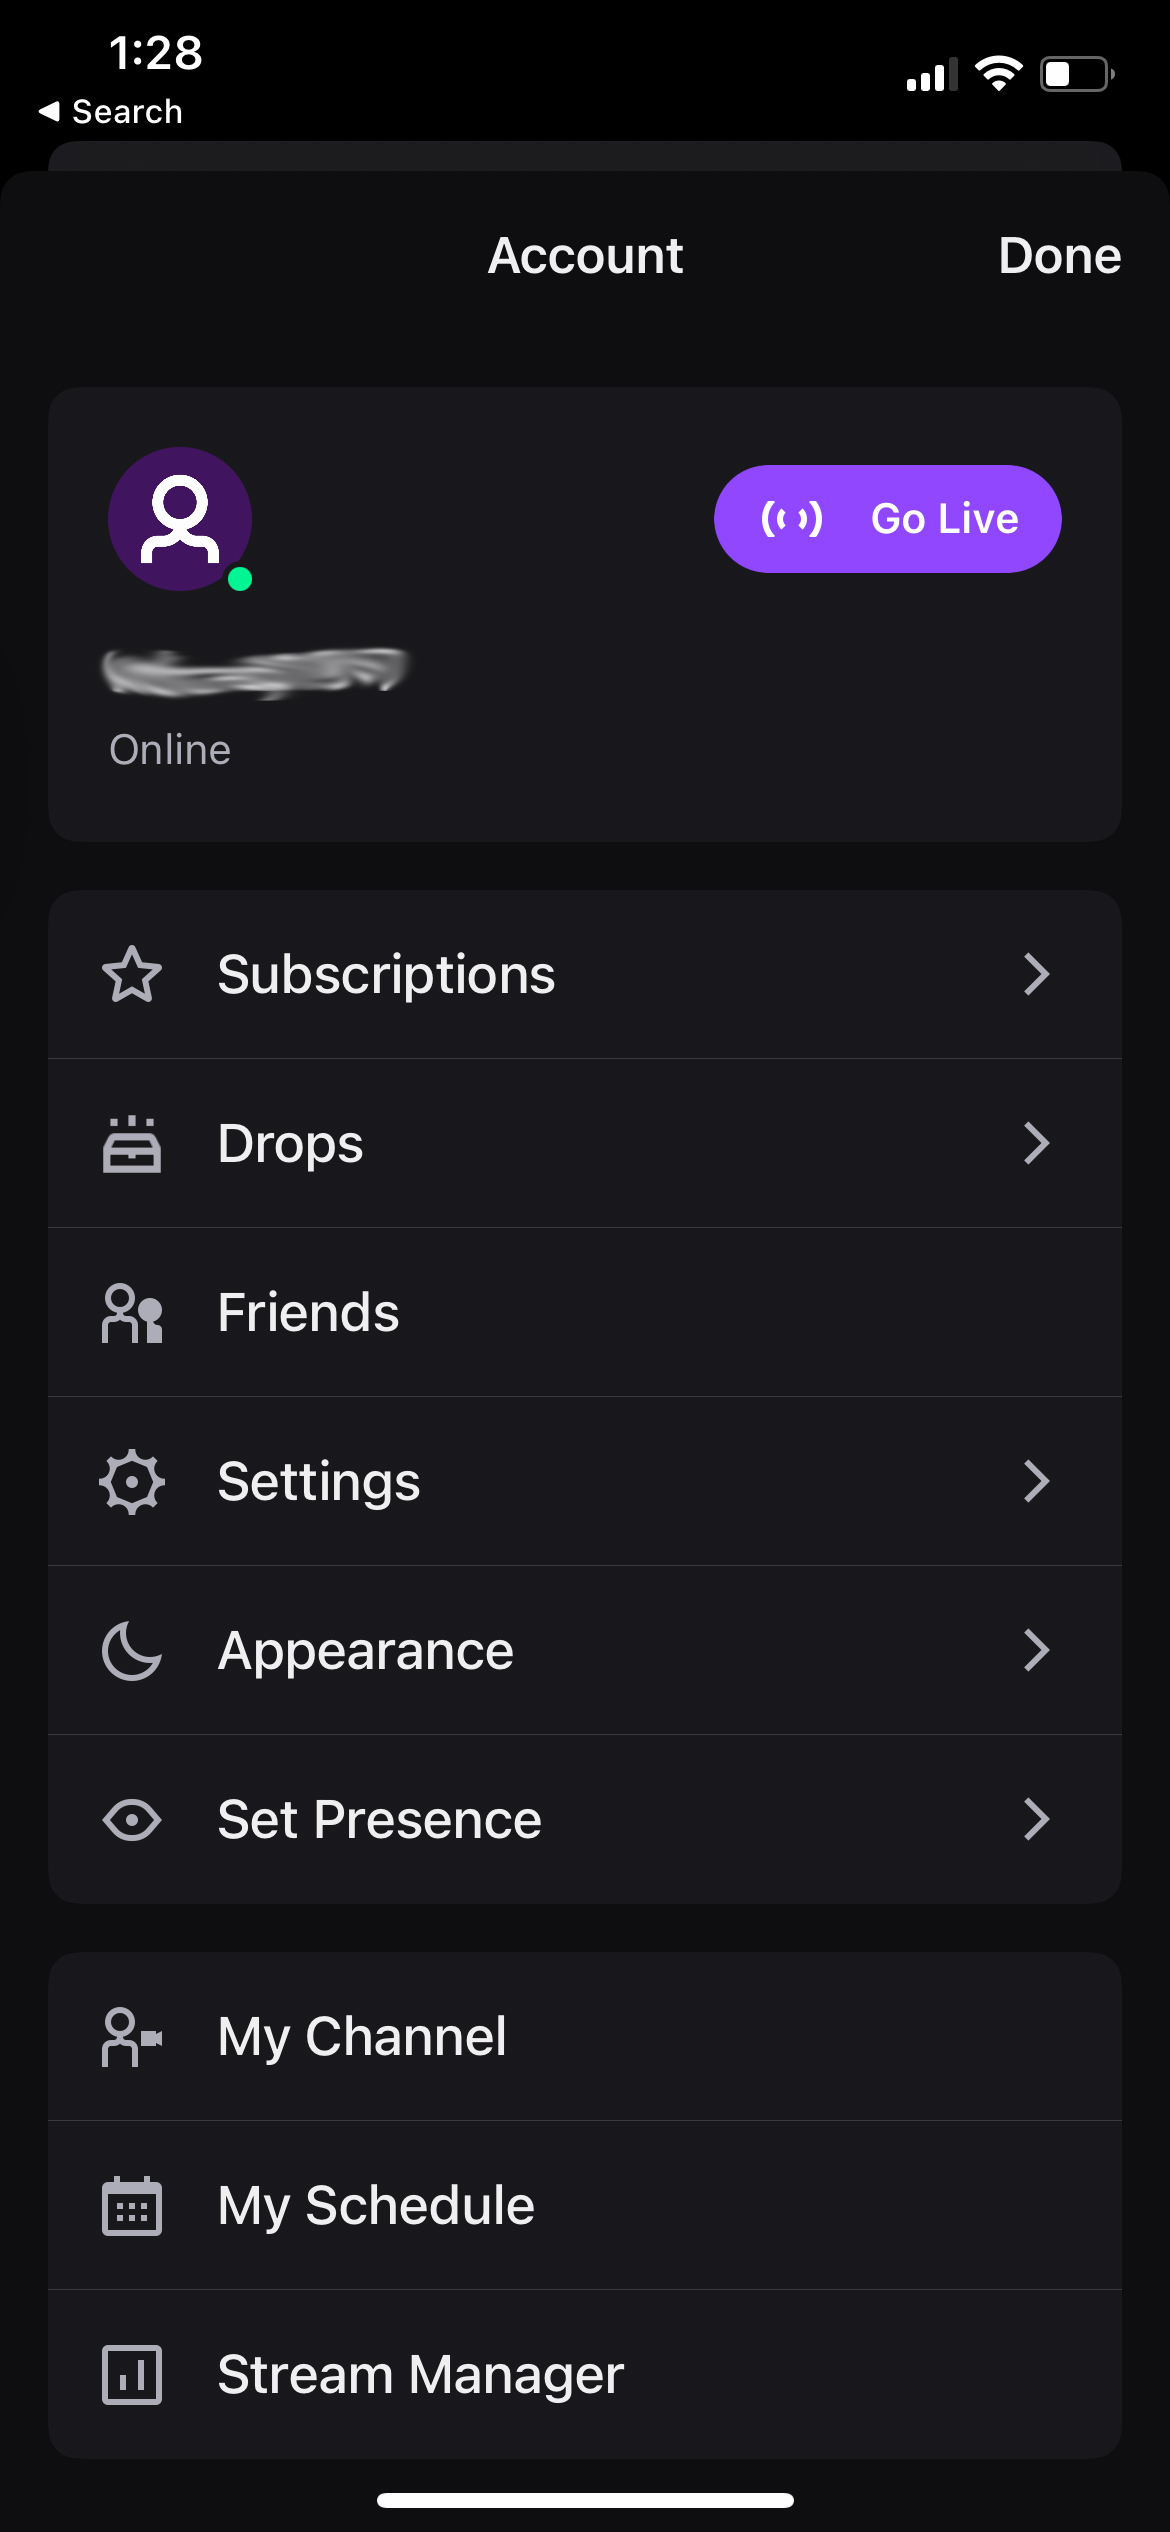
Clicking on the profile icon (first red circle) would take you to the settings section, from where you can click on the ‘Go Live’ button, whereas clicking on the video camera icon (second red circle) would take you straight to the streaming section, as shown below:
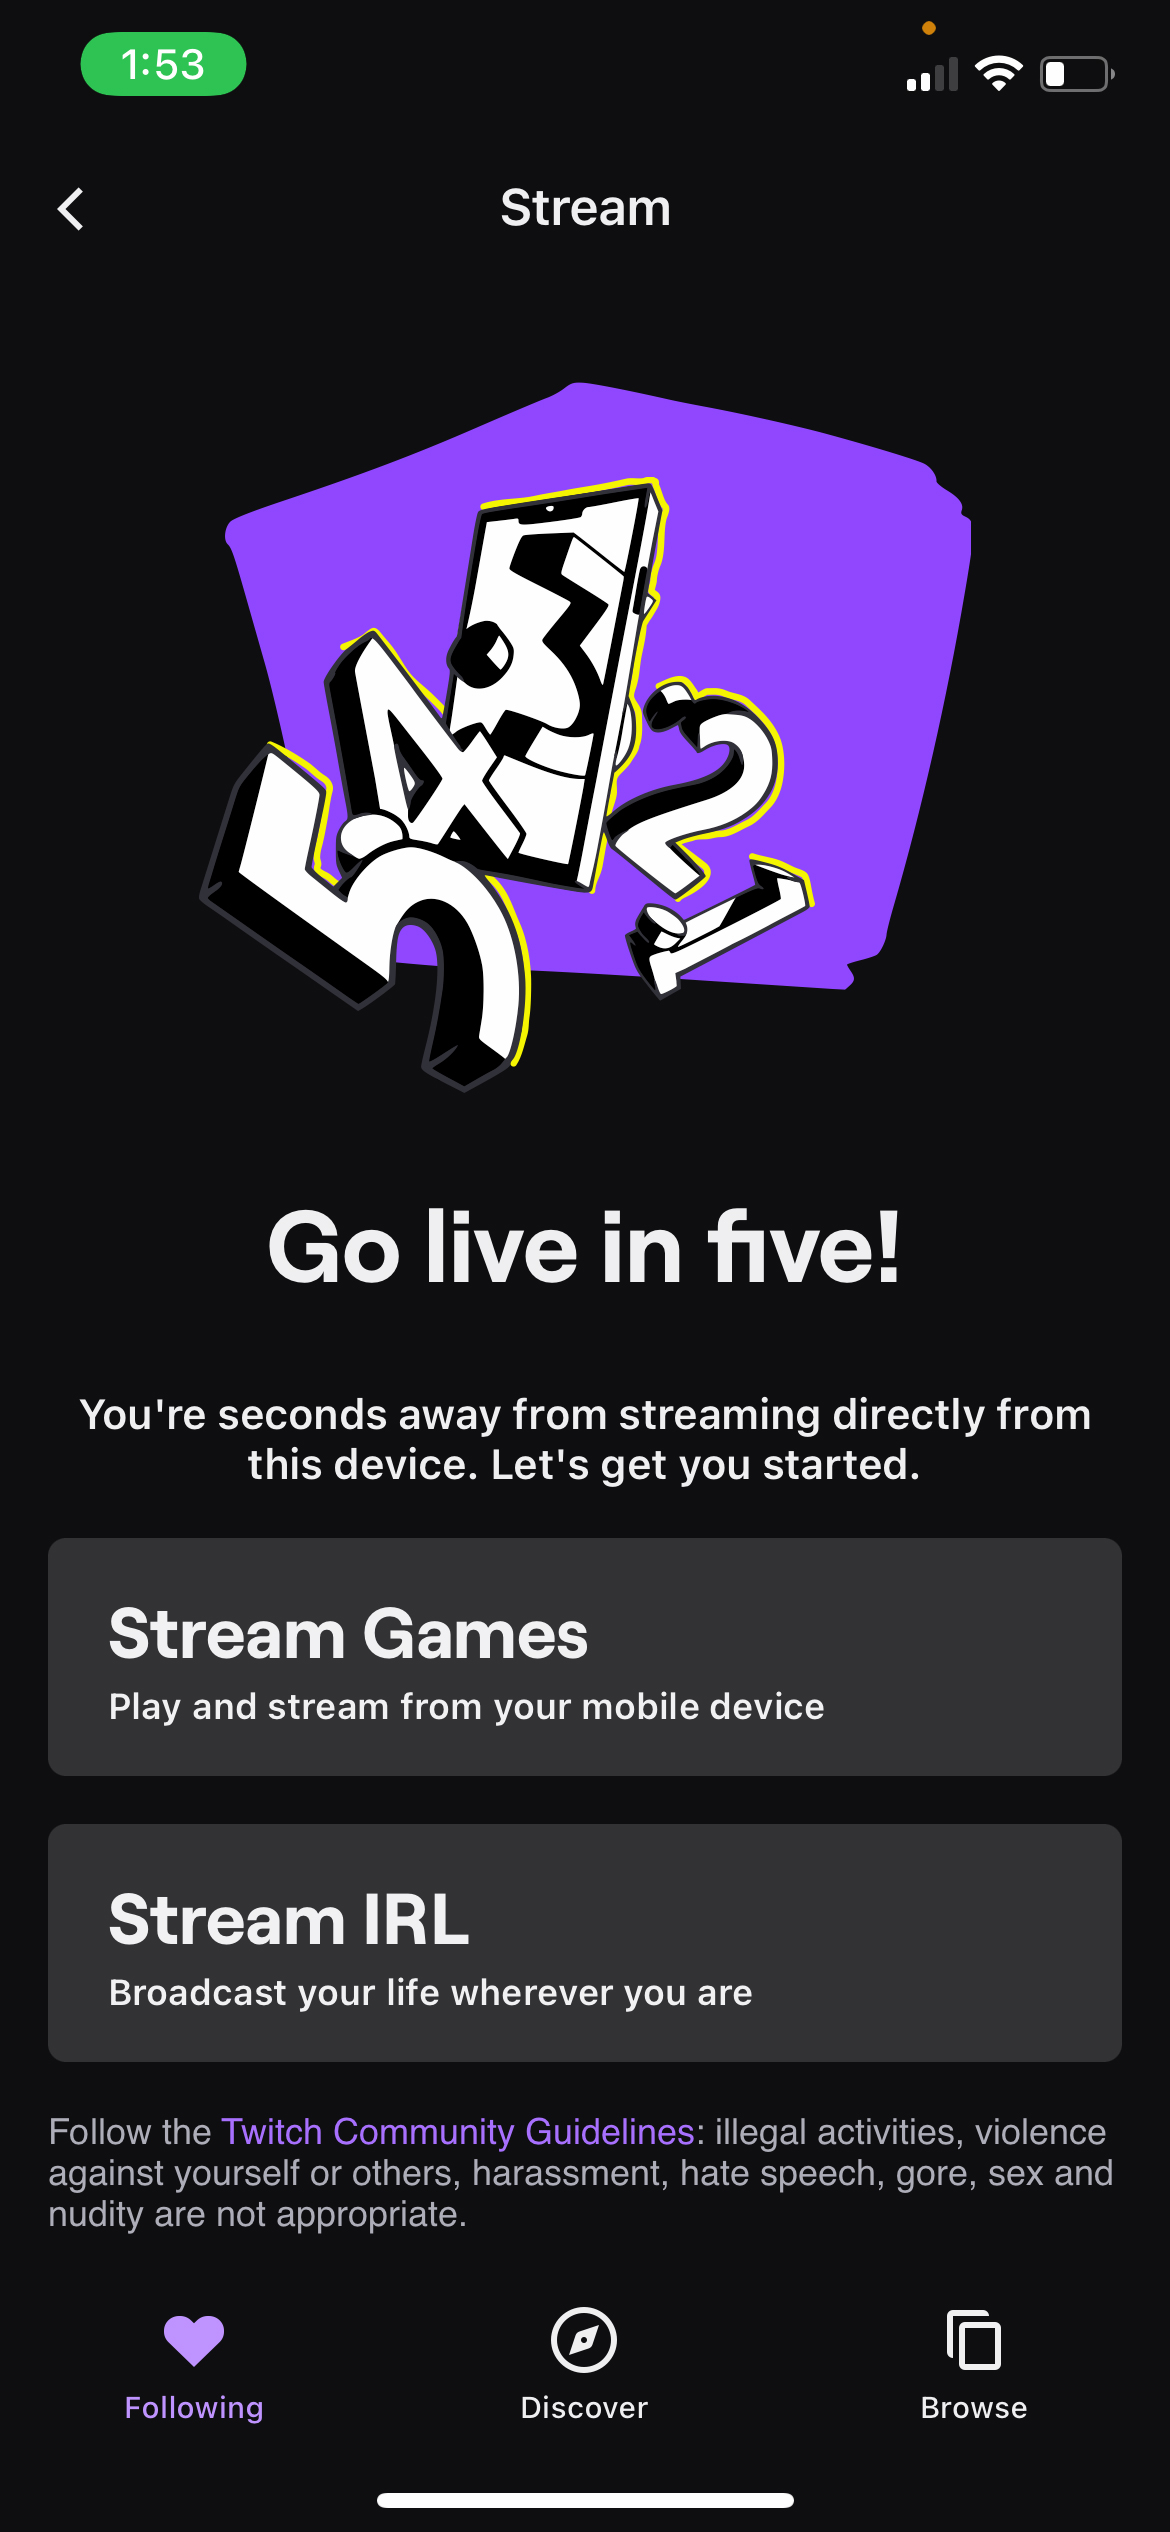
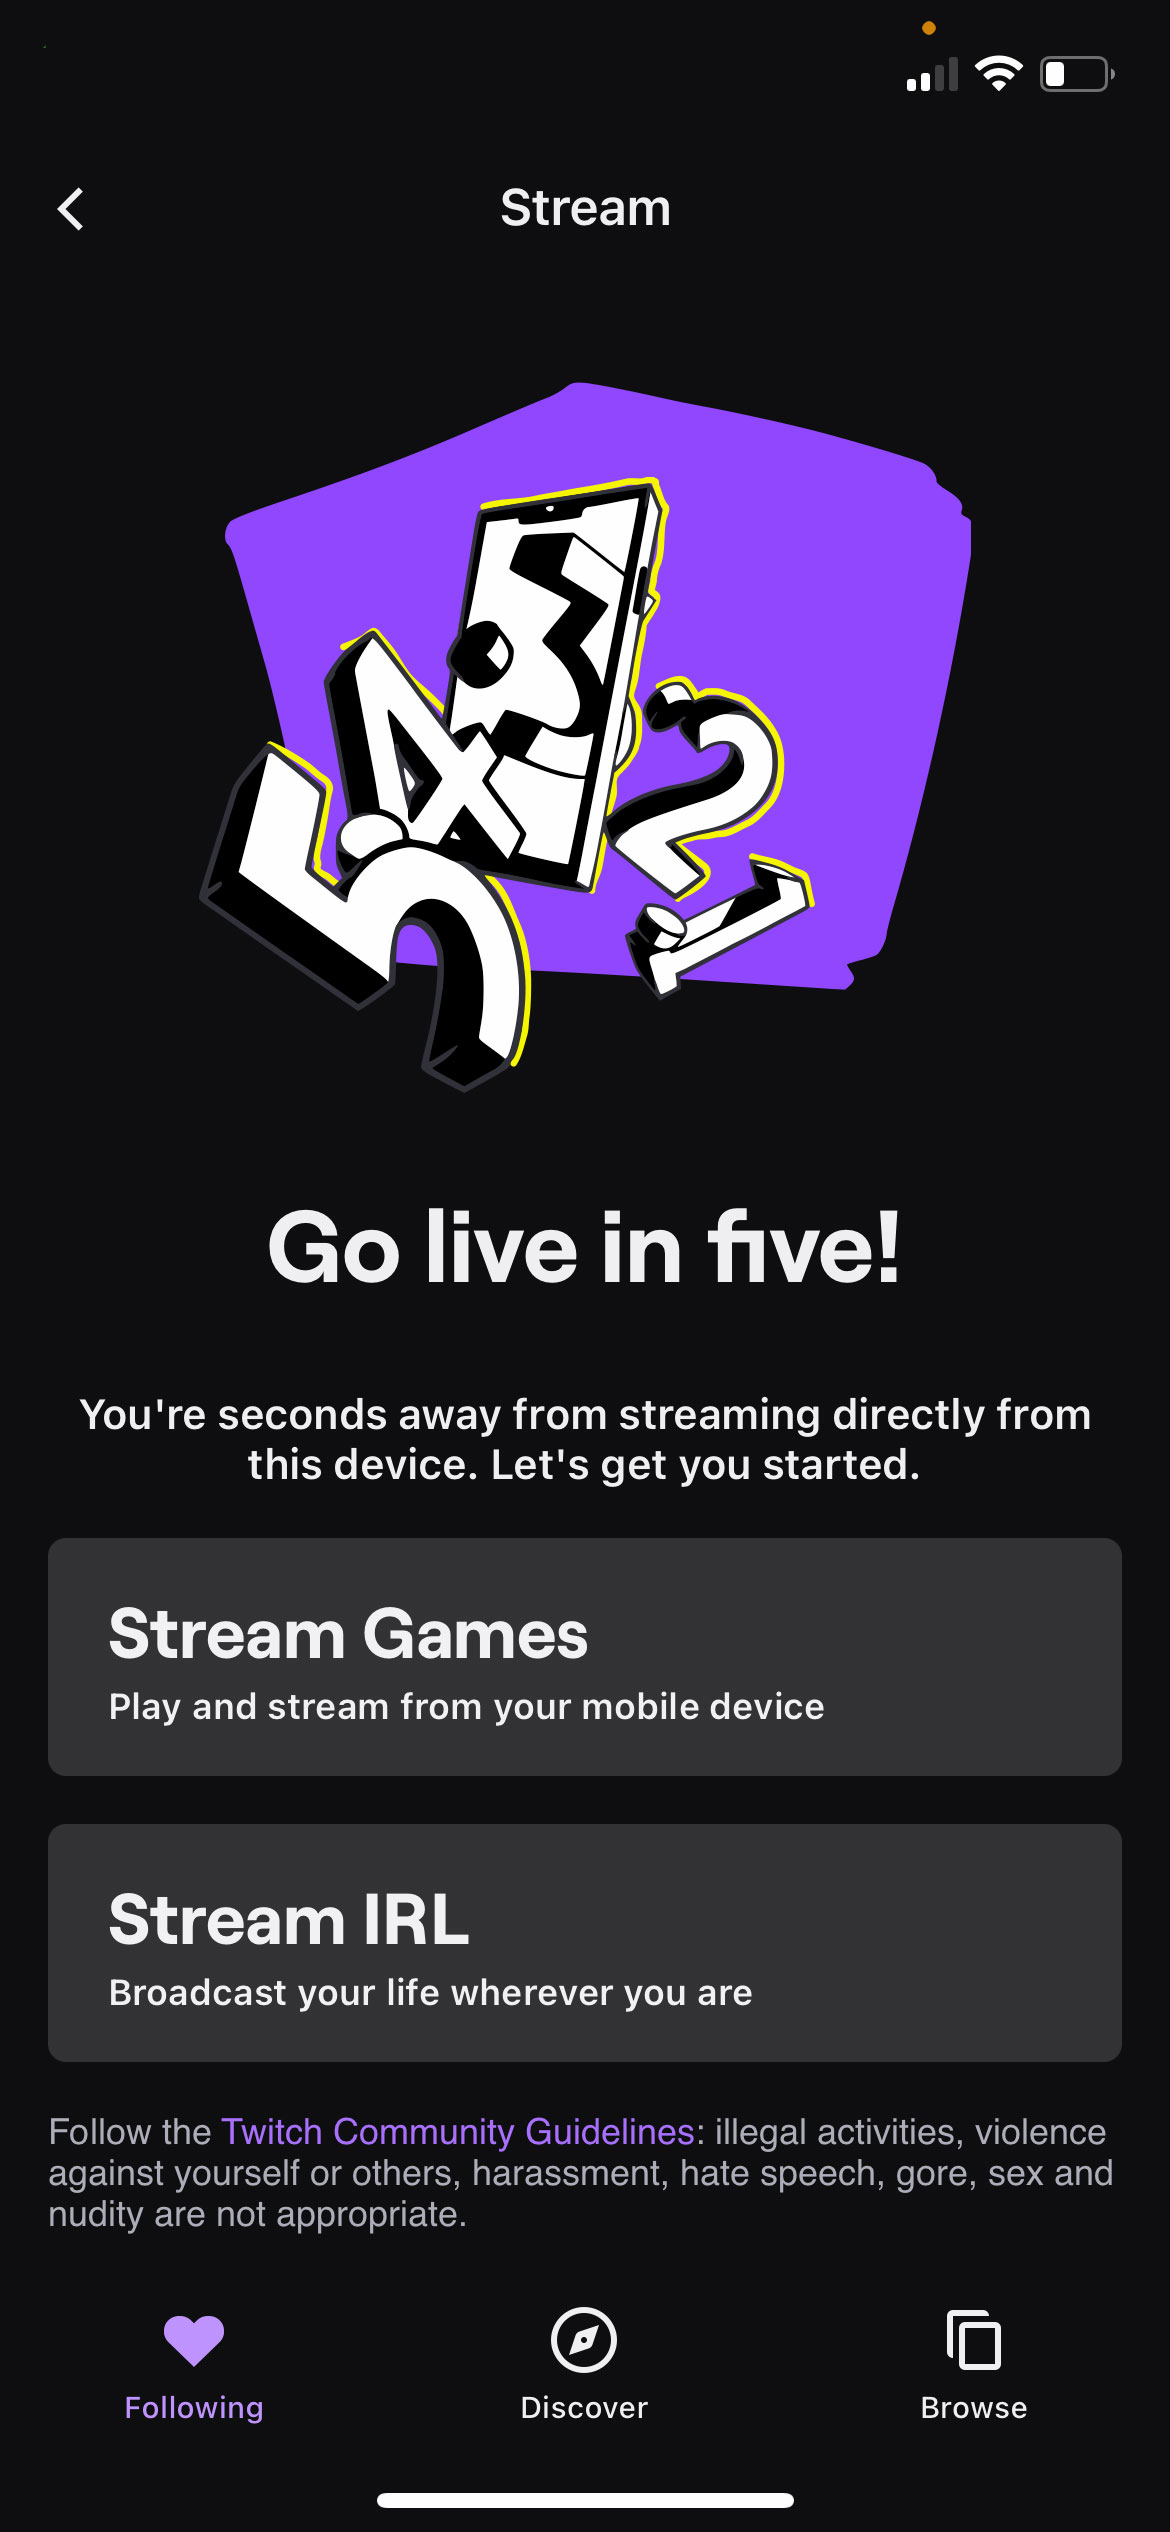
Now, depending on what you wish to stream, i.e. games or your IRL adventures, you can choose one of the two options.
“Stream IRL” lets you use your front and back cameras to show your viewers where you are and what you’re doing, whereas with “Stream Games,” you’re basically sharing your device’s screen.
Let’s start with “Stream Games.”
Upon clicking it, you’ll be taken to the category screen, where you can select the title you wish to stream.
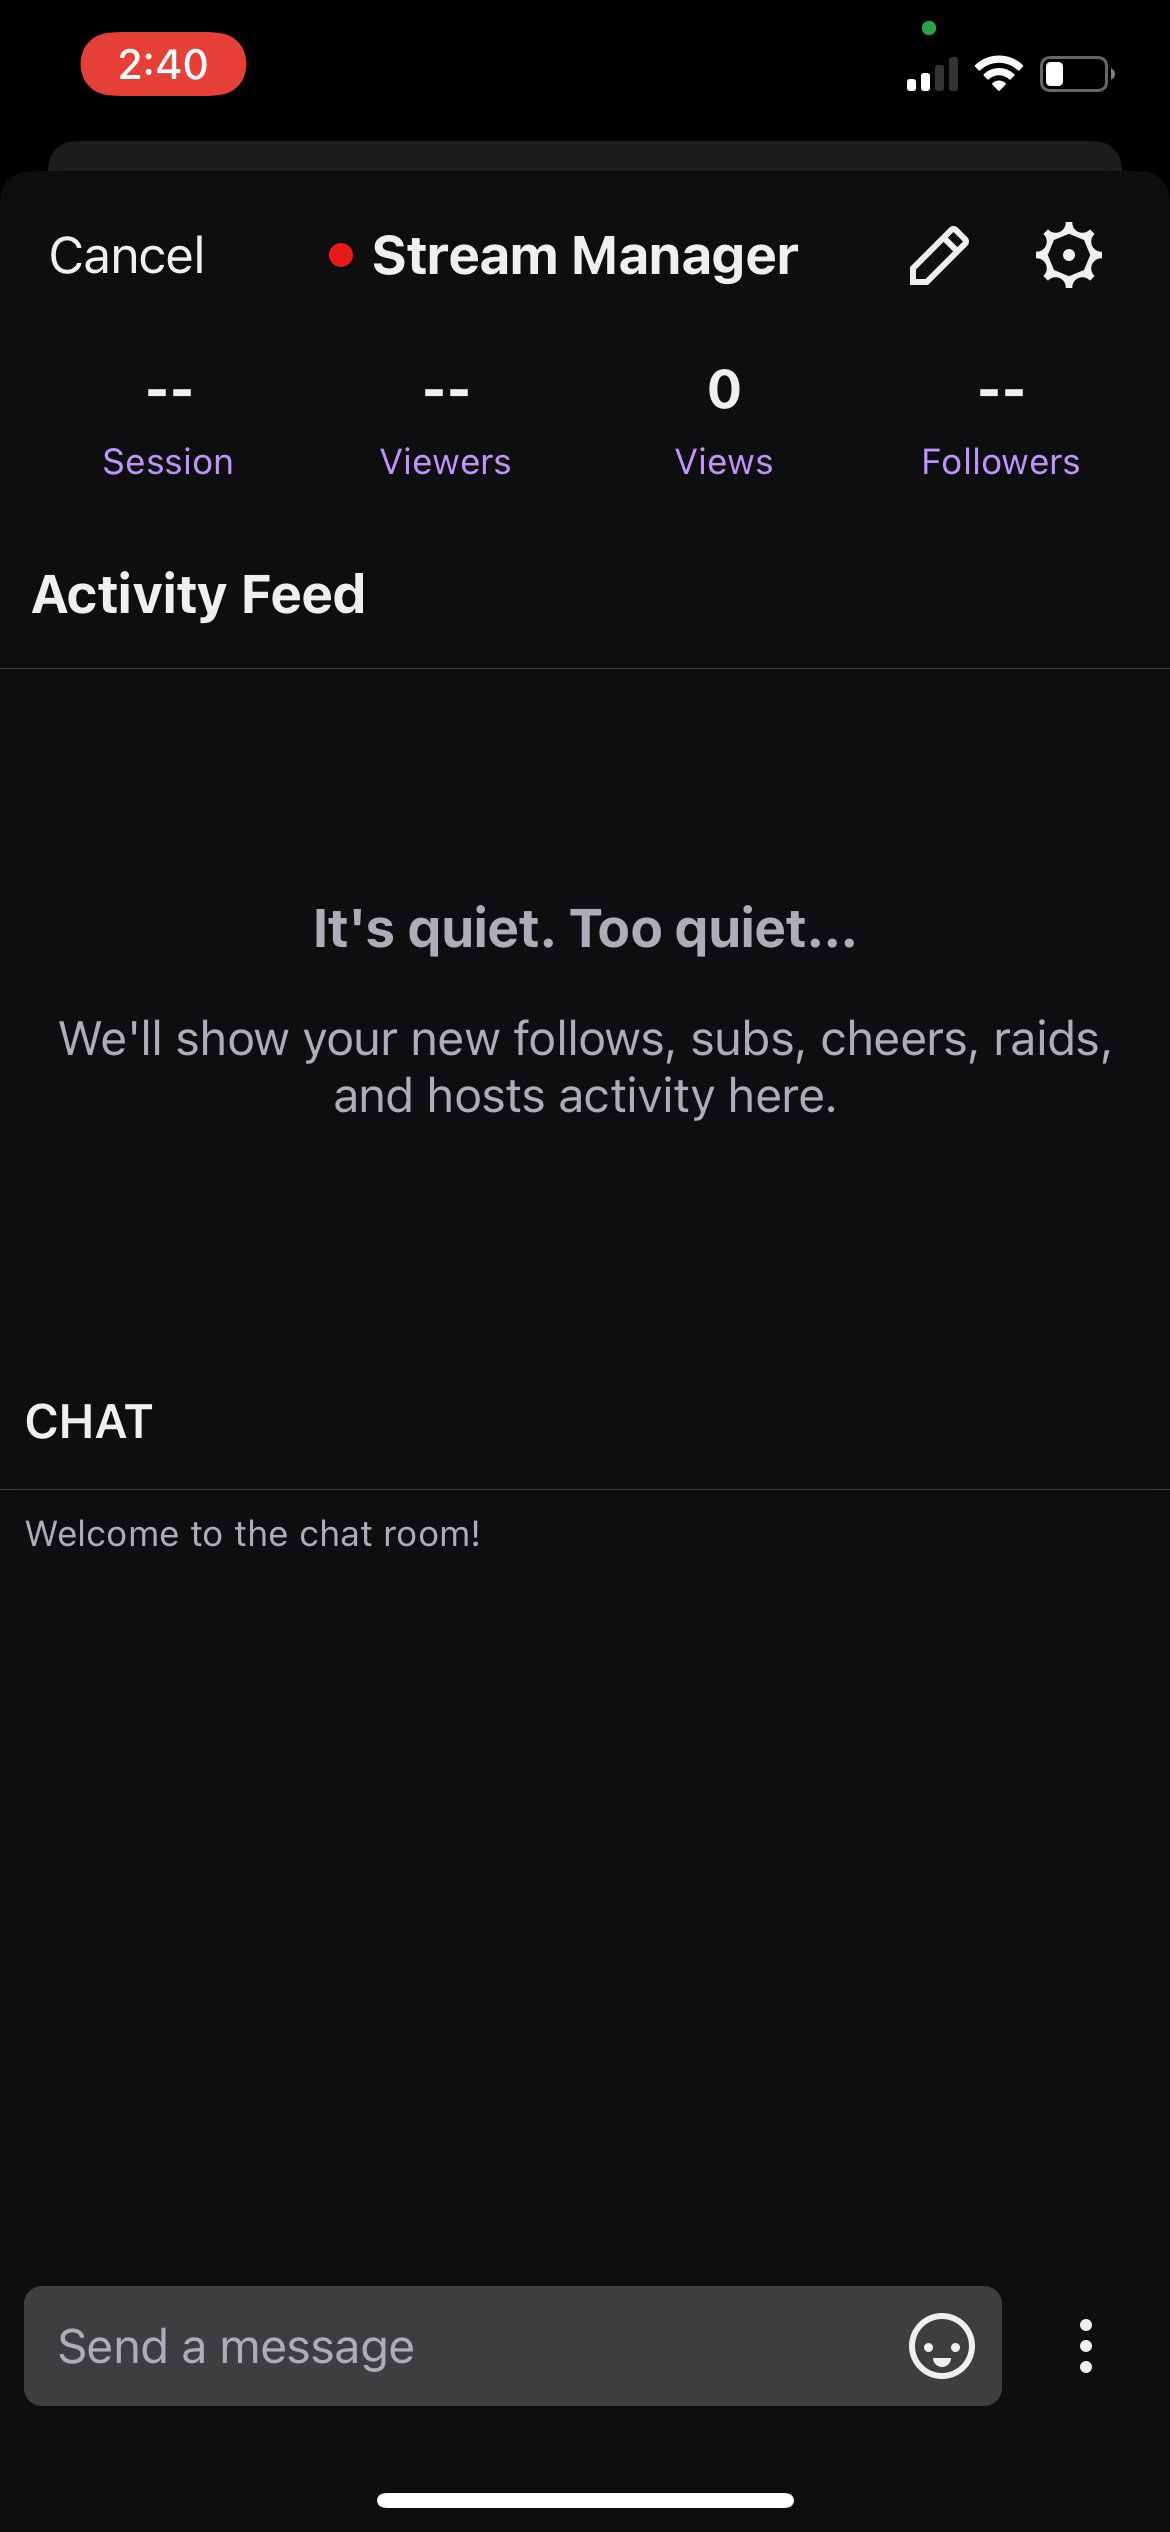
Then you set up your stream with its title, your microphone sensitivity, and the device’s volume. This is also where you enable or disable notifications from your chat, which would pop up like a normal text notification, along with an option to save your stream for up to 60 days.
Clicking the “Edit Stream Info” button allows you to set tags, allowing people with similar tastes to discover you and this is also where you can set a “Going Live Notification” that lets all your followers and subscribers know that you’re streaming.
Finally, you click the big purple ‘live’ button and you’ll be presented with a disclaimer informing you that everything on your screen will be broadcasted, and that includes any pop-up notifications would be visible to all your viewers. Turning on the do not disturb is a good way to avoid any embarrassment.
Click on “Start Broadcast” and your device’s screen will be broadcasted live. You can then switch to the title you wish to stream, and switch back to Twitch whenever you want to read your chat or check the stream statistics.
Screenshots below can guide you through the process mentioned above:
-
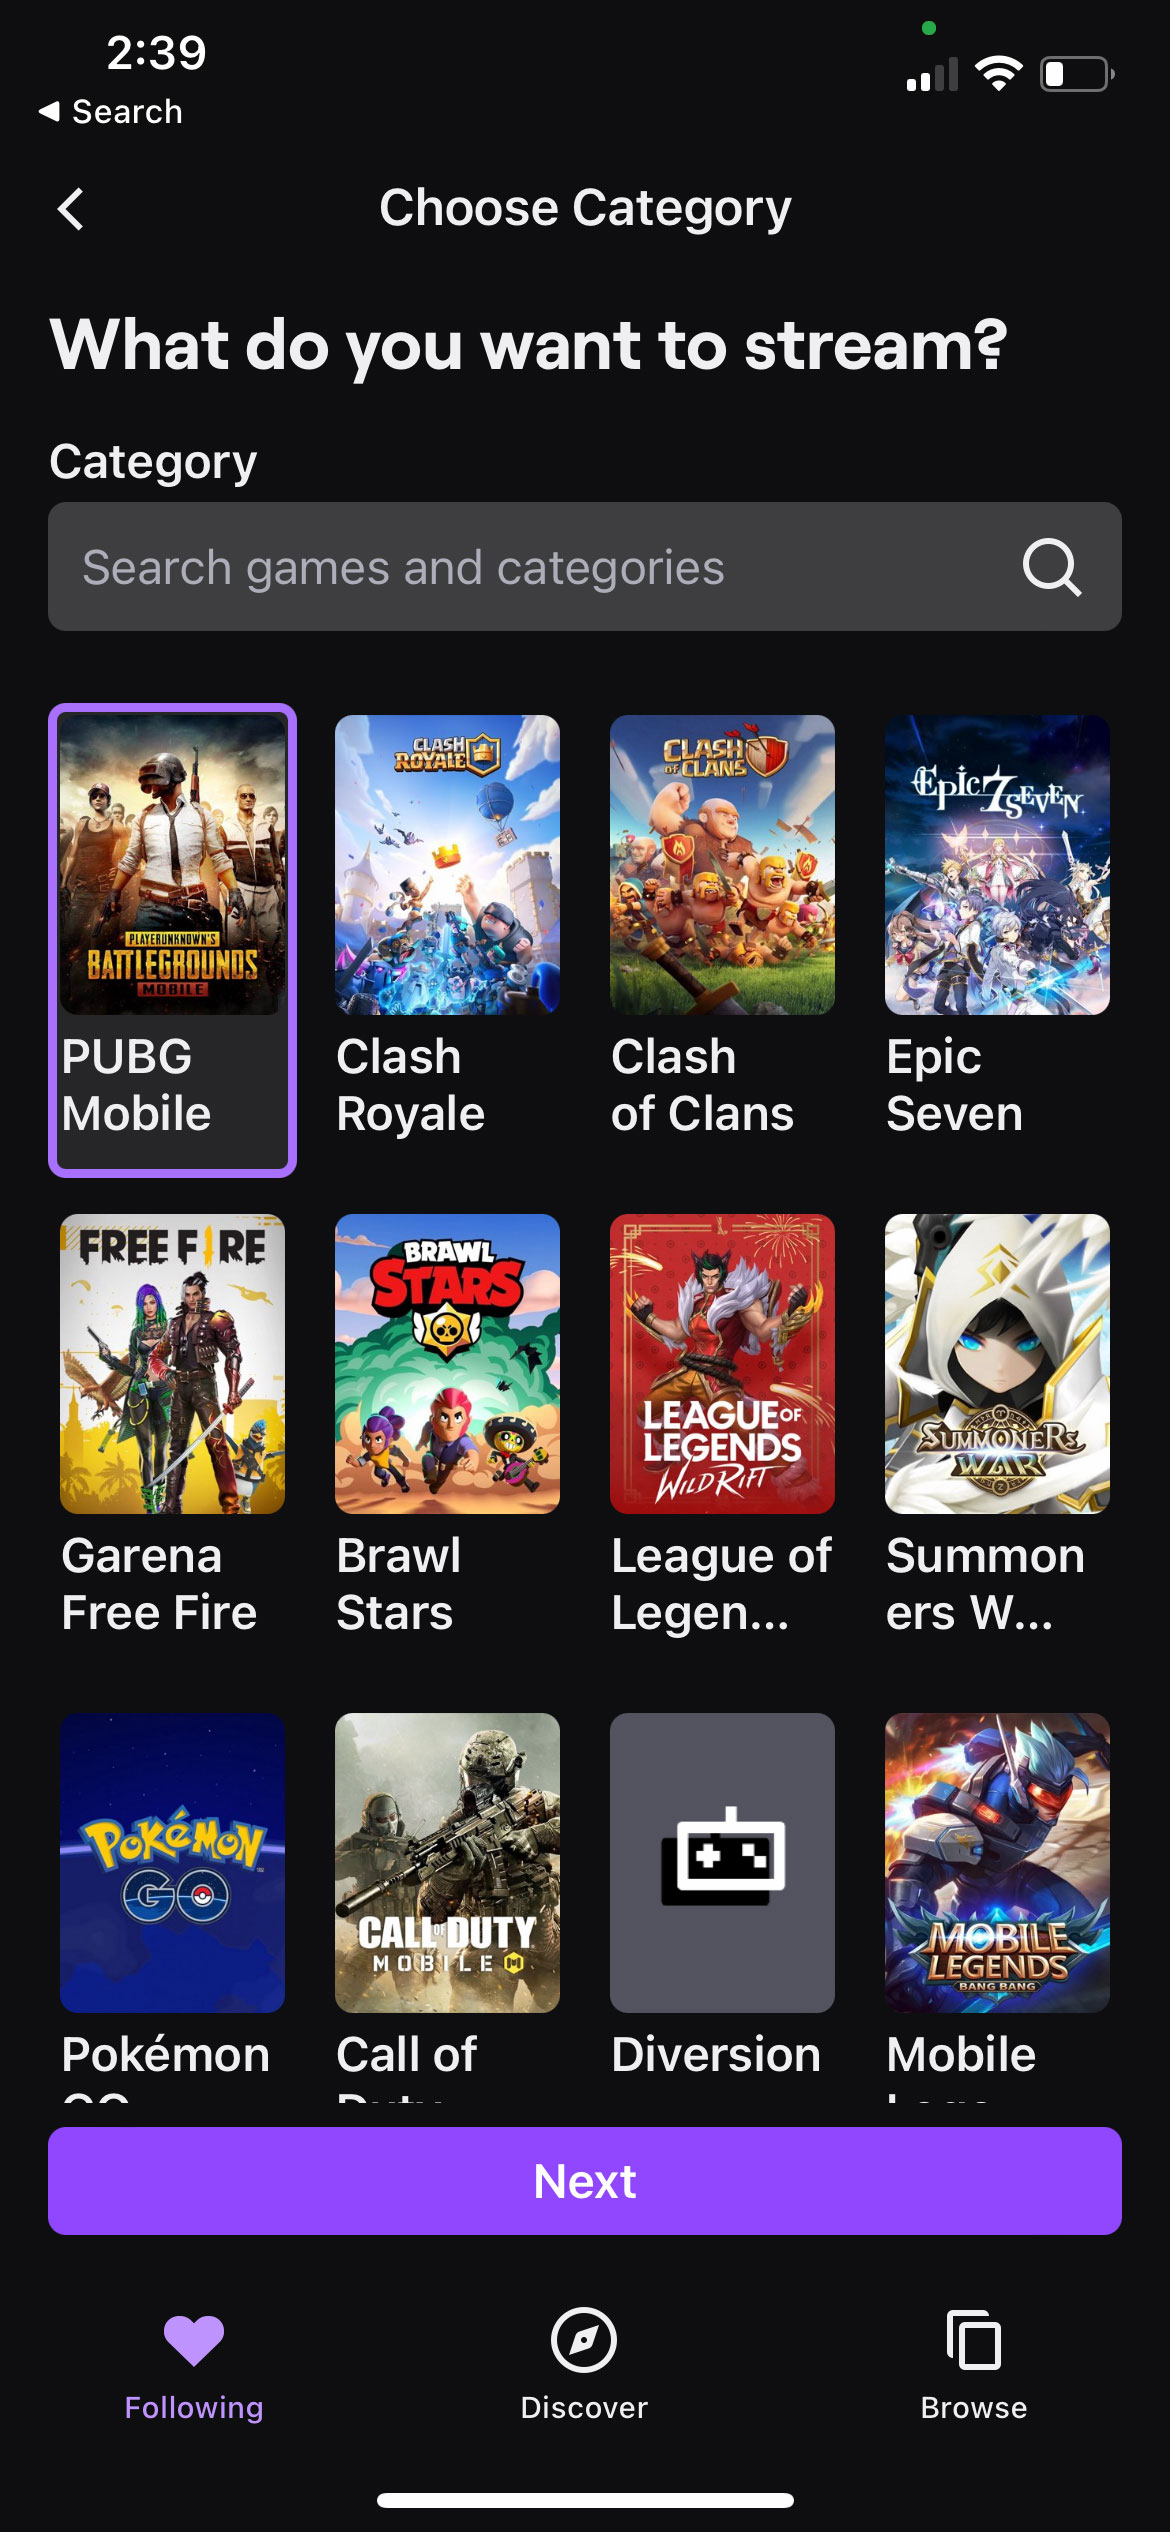
- This is where you choose the title you want to stream.
-
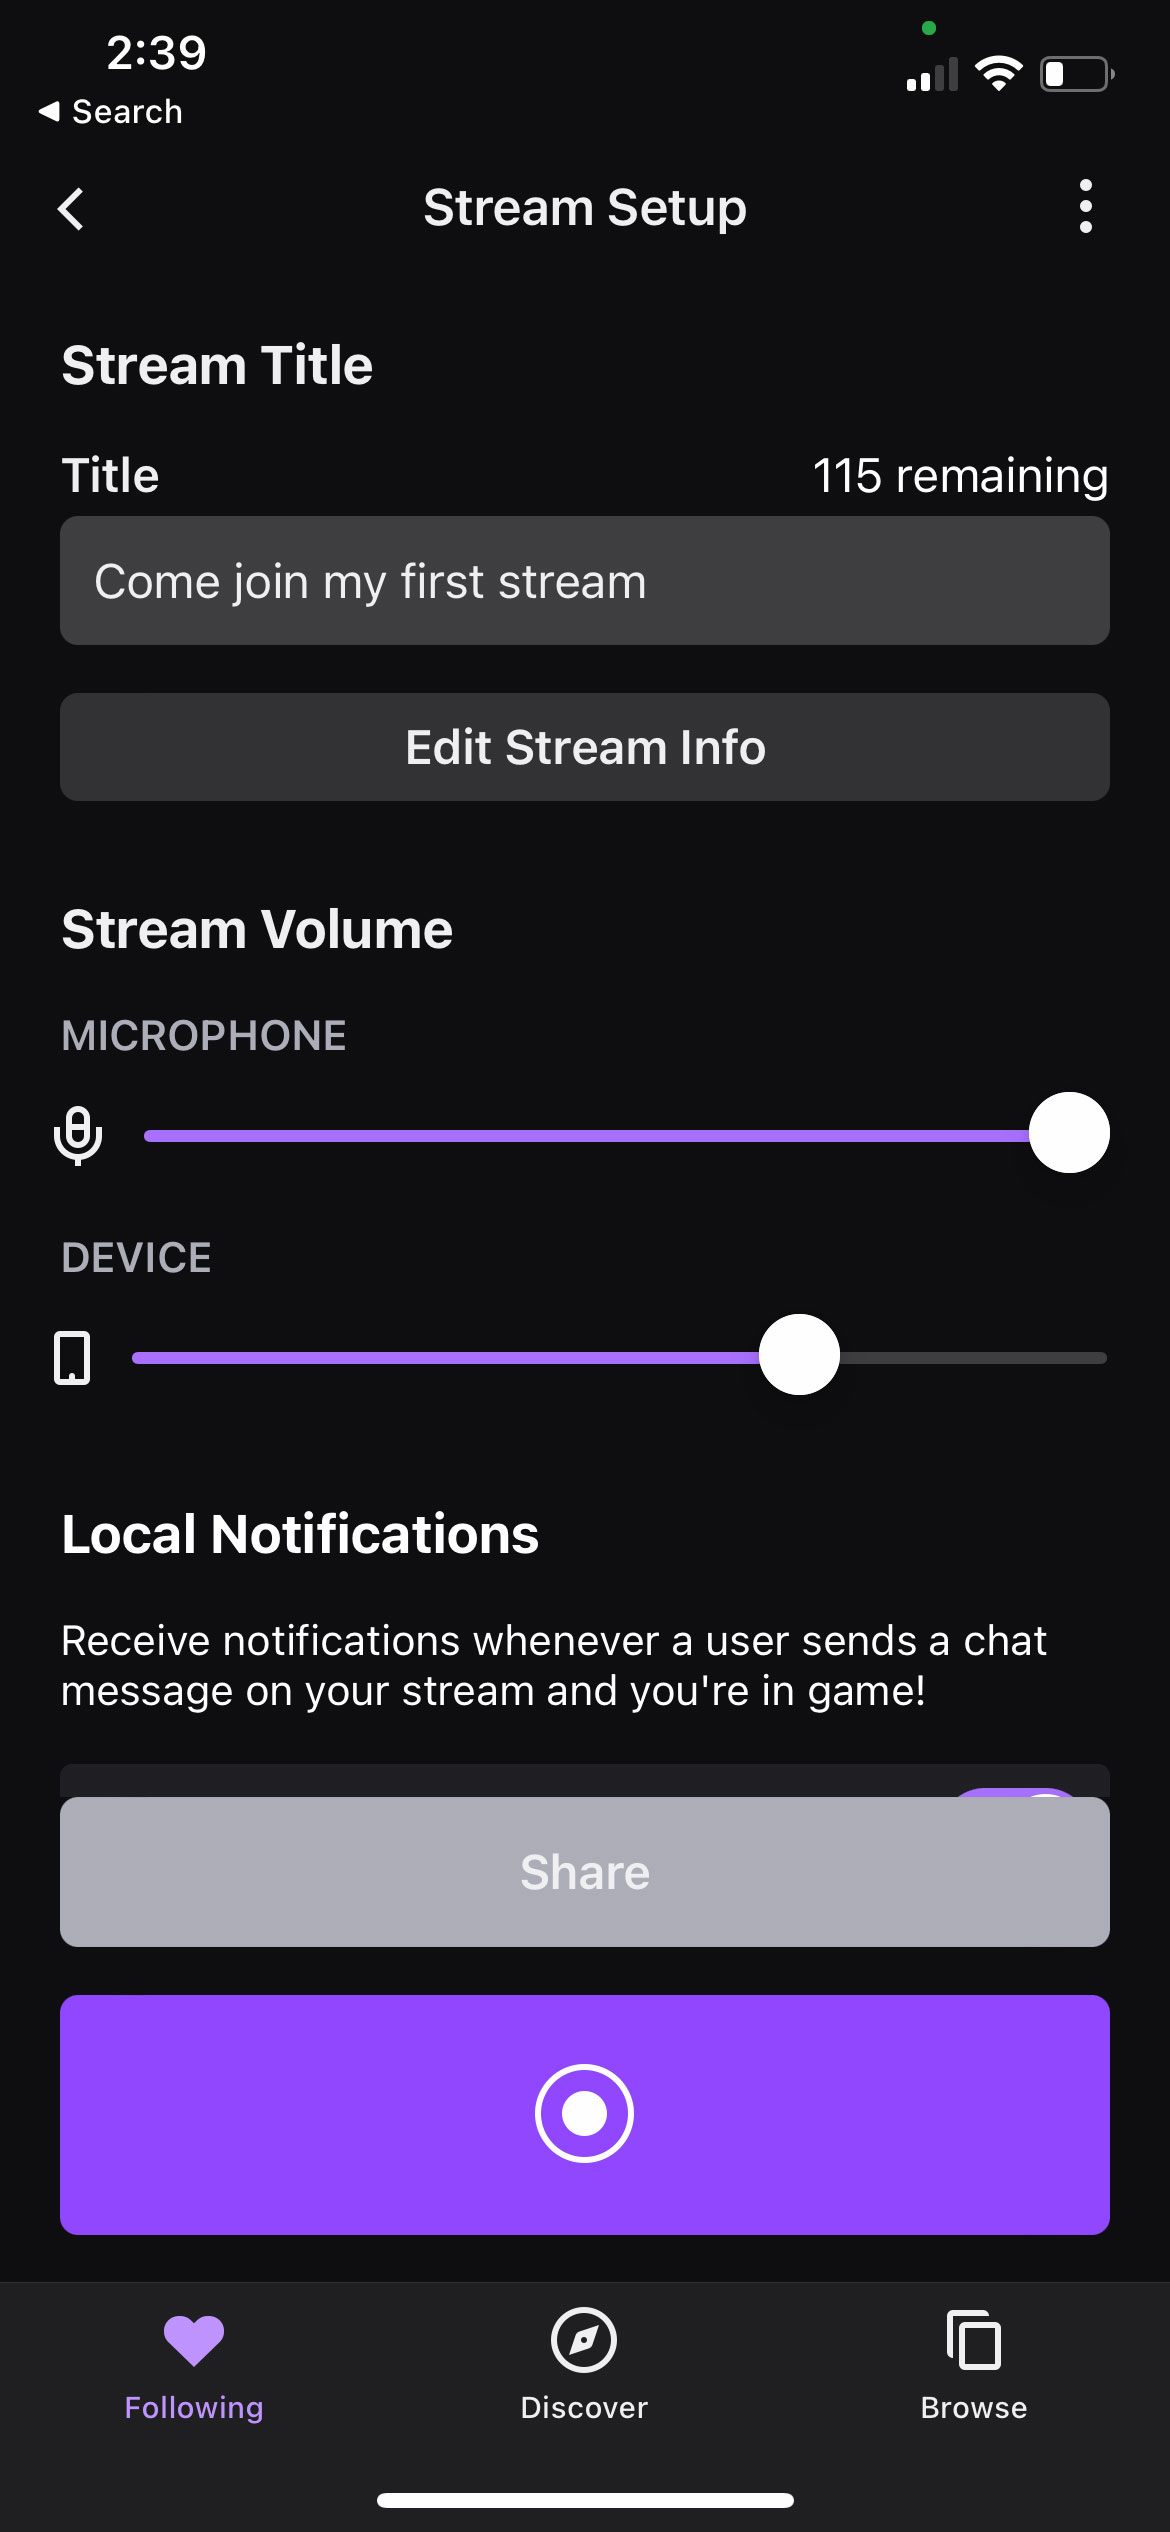
- Then you set up your stream with its title, your microphone sensitivity, device’s volume and other information.
-
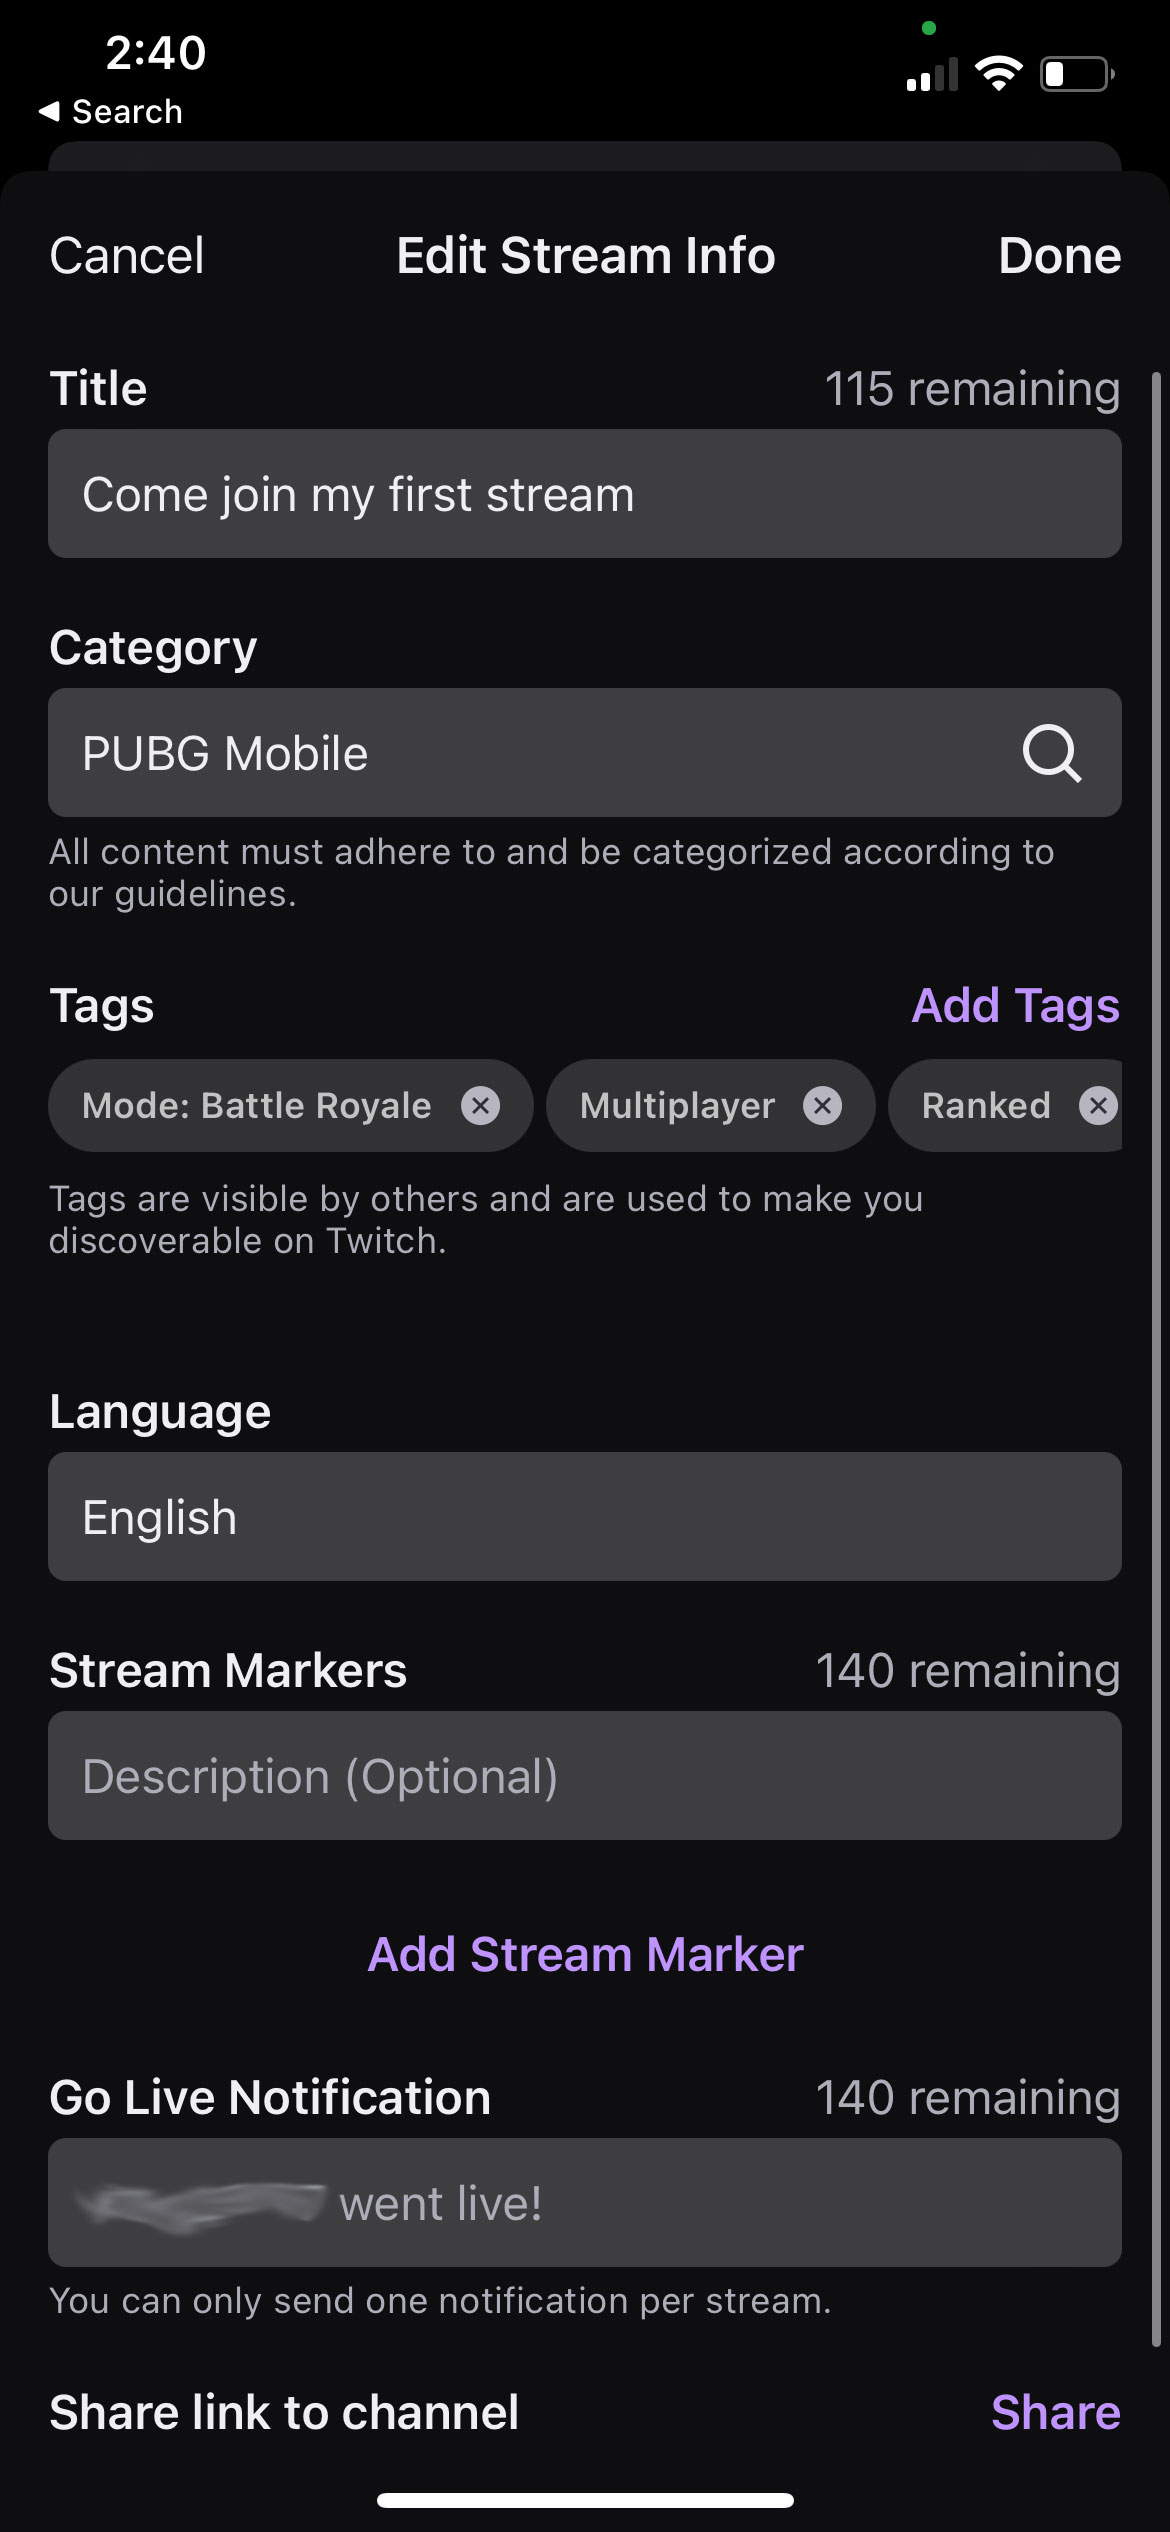
- This is where you set tags, allowing people with similar tastes to discover you.
-
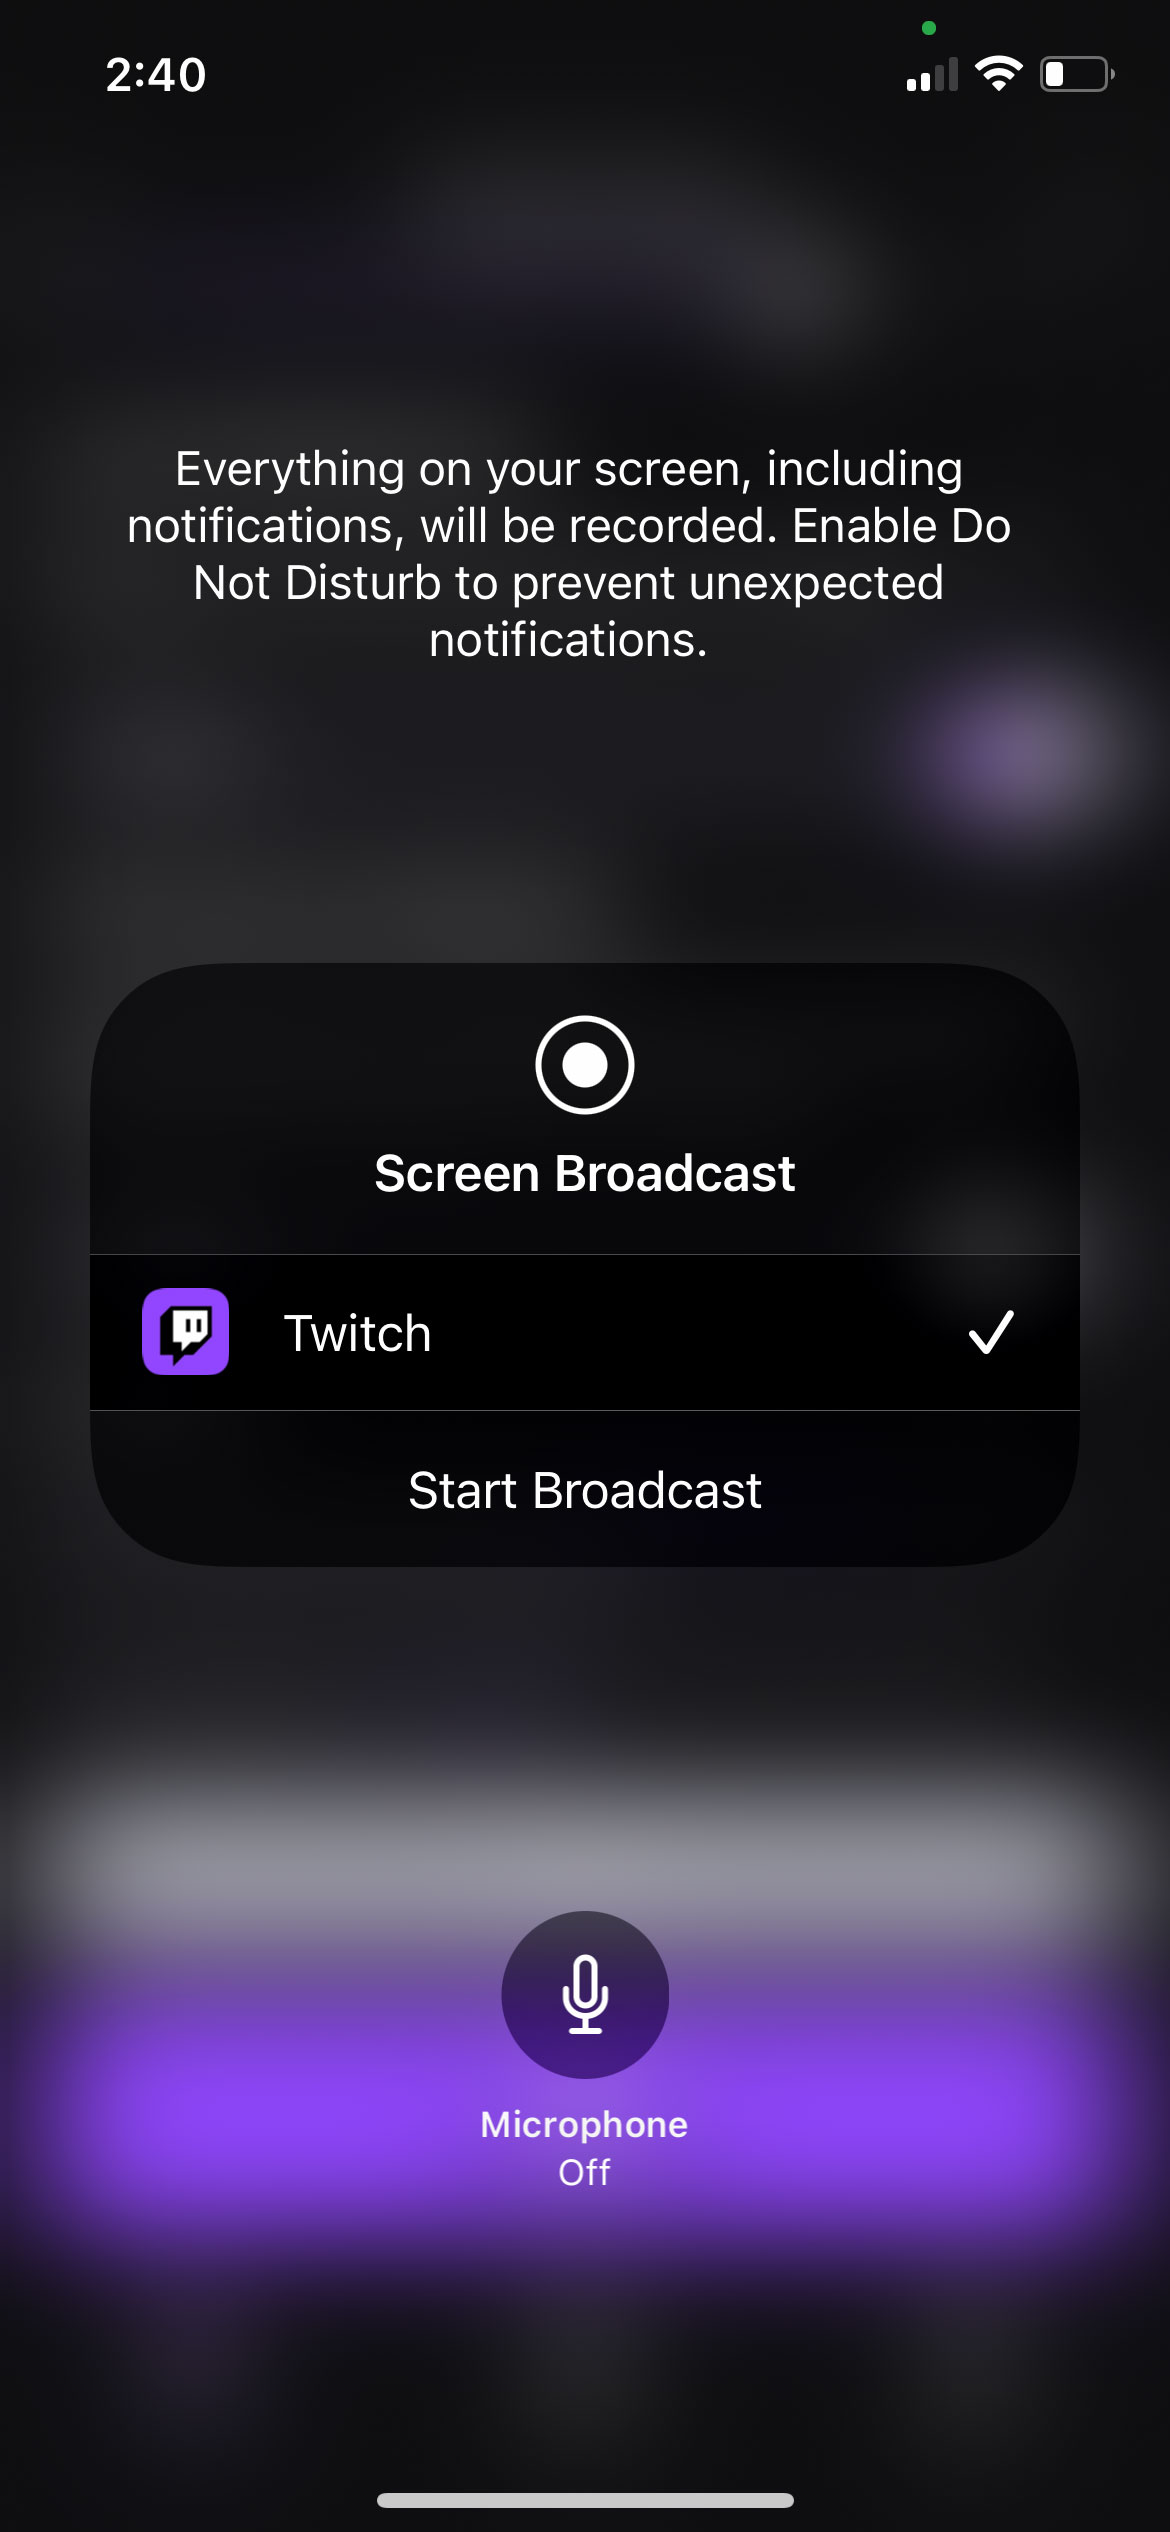
- Finally, you click the big purple ‘live’ button and you’ll be presented with a disclaimer.
-
- Click on “Start Broadcast” and your device’s screen will be broadcasted live.
It’s worth noting that while streaming games, only whatever is happening on your device will be shared with the viewer, and your camera will not be enabled.
Streaming IRL, however, allows you to share live footage from your camera. It works similarly to streaming games.
You click on the “Stream IRL” option and you’ll be presented with a stream set up screen. This is where you select your stream’s title (Welcome to my first IRL stream?? in the screenshot below) and the category it falls under. Categories include ‘Talk Shows and Podcasts,’ ‘Just Chatting,’ ‘ASMR,’ Pools, Hot Tubs, and Beaches,’ ‘Special Events,’ ‘Fitness & Health’ and many more.
See screenshots below for reference:
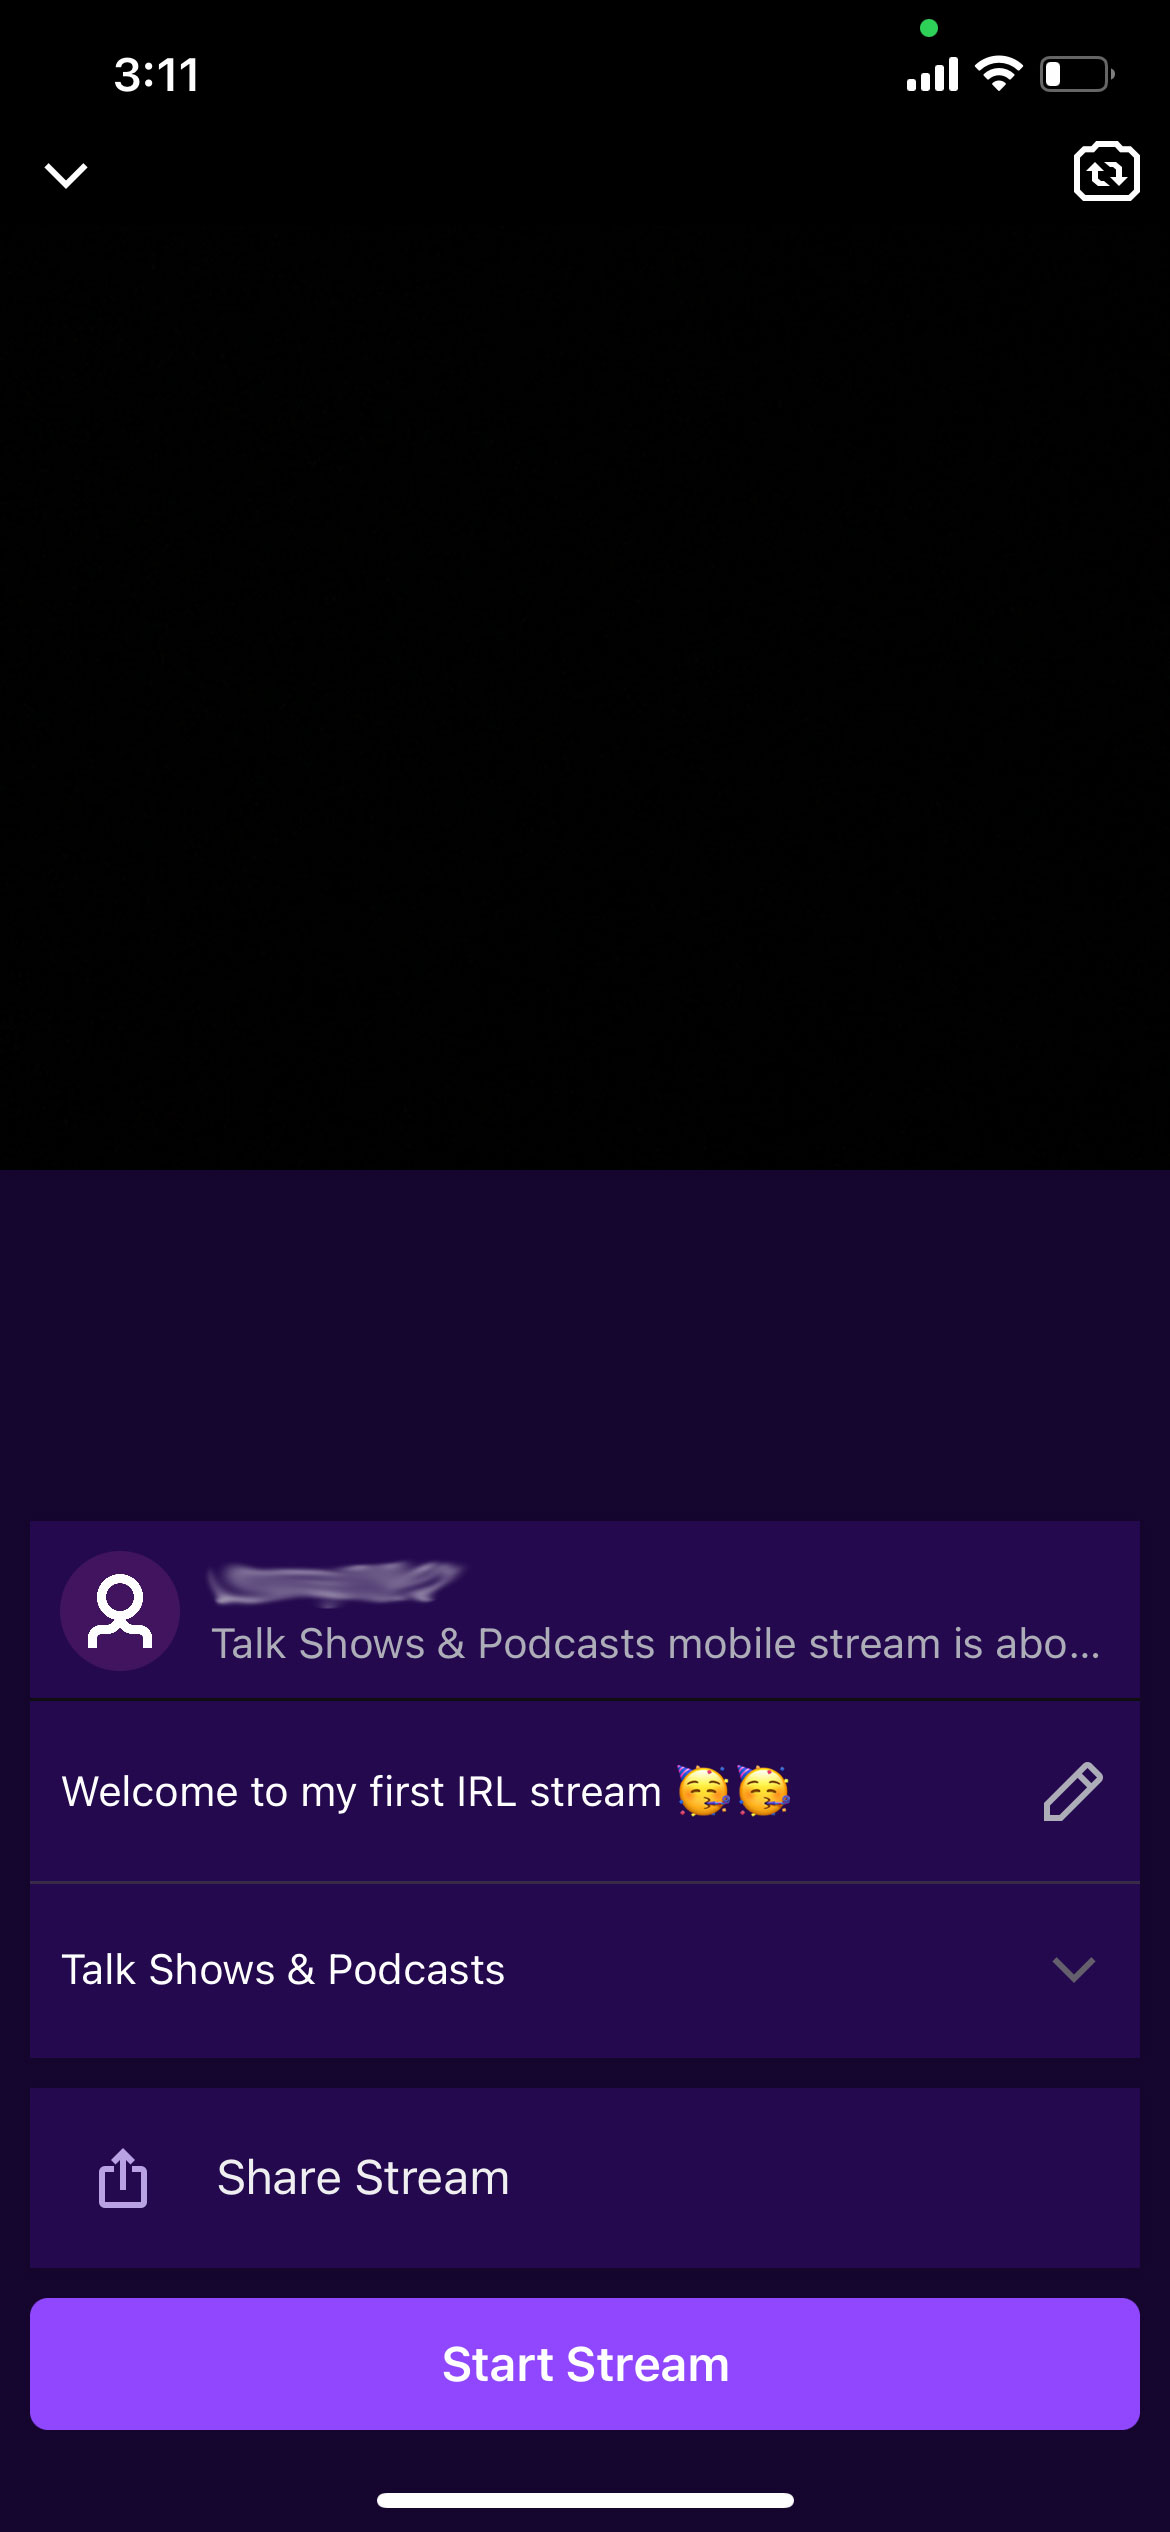
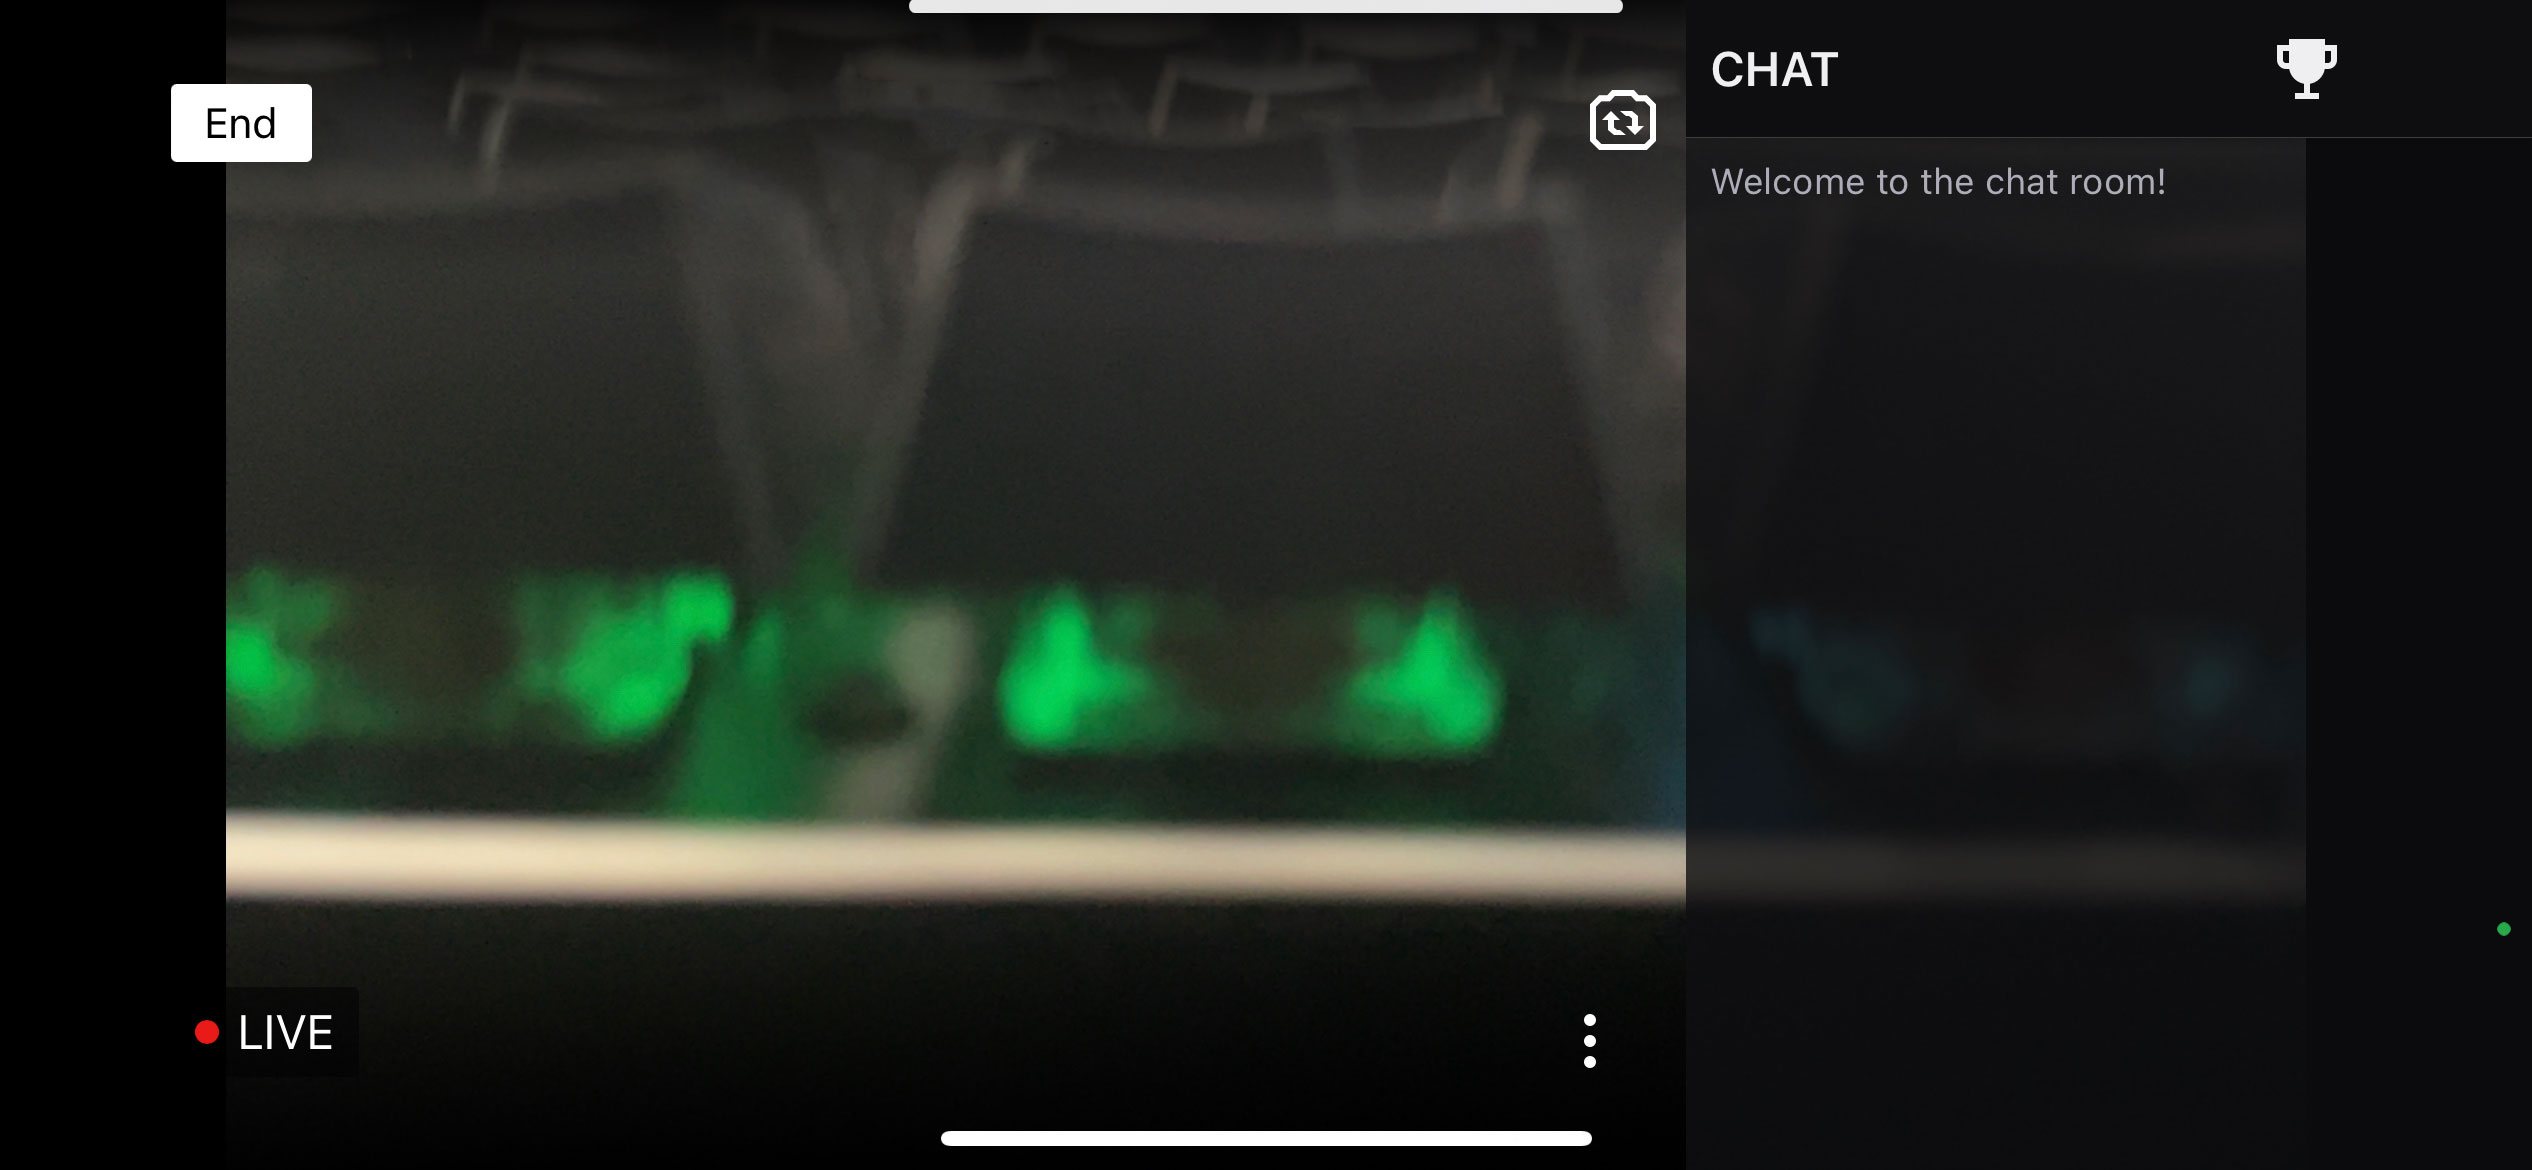
Once you’ve set up all information about your stream, click on the ‘Start Stream’ button and rotate your device to landscape mode (sadly, you can not stream in portrait mode) and the cameras start rolling, albeit with a three-second countdown.
Once live, you’ll see your stream the way your viewers are watching, and your chat will be placed on the right side. You can then switch between the front and back cameras, though you can not type in your own chat. When you’re finished, press the “End” button on the top left to conclude the stream.
Lastly, make sure you have a reliable internet connection to avoid any hiccups, and you’ll be ready to start your live streaming journey. Don’t be disheartened if you don’t pull in astronomical numbers in your first few streams, even the biggest streamers today used to struggle with viewership. Just stick to your niche and stream consistently and you’ll open up a lane that rewards you psychologically and financially.
MobileSyrup may earn a commission from purchases made via our links, which helps fund the journalism we provide free on our website. These links do not influence our editorial content. Support us here.
